Thursday, October 31, 2013

Simplicity 1796, Crossover Dress with Elastic Waist

S1796 Thumbnail

Why does Simplicity choose such heinous fabrics for their envelope pictures?  Case in point, Simplicity 1796.  They made two dresses for the envelope, and they are both out of some sort of horrible undrapeable poly blend broadcloth.  You can practically smell the artificial fiber fumes coming off the photo.  I paid no attention to this pattern whatsoever until I saw it reviewed, and suddenly noticed the nice details:  the shoulder yokes, the pleated bodice, the cinched waist.  I appreciate that solids are the best choice for an envelope, but how about some high quality fabrics?  Yuck.  On the plus side, this pattern comes in a huge range of sizes:  10-28W.  I graded down to an 8 at the shoulders and bust.

I used the silk/wool I got at Paron last November for the absolute steal of $6/yd using a Groupon and shopping in the 50% off section.  In the end, I'm glad I got a bargain because the pink ran in pre-treatment.  :(  The fabric is still useable, but it is slightly less awesome with pink patches in the white areas.  Fancy fabric is generally meant to be dry cleaned, but I'm just not going to do it and I'd rather sacrifice some fabric at the pre-treat stage than lose a garment after sewing it.

Lining

It's a lightweight fabric so I lined it to give it body and opacity, using an Ikea Knoppa sheet for the bodice and a rayon satin for the skirt (but somehow got confused when sewing the whole thing together and put the satin face toward the fashion fabric and the matte face toward the body).


Reinforce Neckline with Interfacing

To keep the neckline from stretching out during sewing, I fused strips of interfacing in place along the stitch line of both the fashion fabric and lining.  Since the yoke supports a lot of fabric, particularly as the bodice is pleated into it, I interfaced the entire yoke.


Trim Edge of Lining for Turn of Cloth


To get good turn of cloth, I trimmed 1/4" from the neckline edge of the lining before sewing it in place.


French Seam Pocket


I also reinforced the pocket opening edges with interfacing.  I sewed the fashion fabric using French seams as it is somewhat delicate, and followed my tutorial for sewing the pockets in (even though I'm the one who made the tutorial, I still have to look at it every time!).  The fabric presses so beautifully, I think these are the most attractive French seam pockets I've made.


Measure Casing Width with Elastic

To line the dress, I constructed and lined the bodice and then constructed the skirt and its lining.  Then i matched up the bodice center front and stitched the fashion fabric skirt to the right side of the fabric and the lining skirt to the wrong side.  When you flip everything right side down, the skirt's seam allowance is enclosed between the fashion fabric and the lining.

I pressed this down and then stitched the waist casing through both the fashion fabric and lining of the skirt.  This turned out to be somewhat of a mistake as the casing was SO INCREDIBLY THICK that pulling the elastic through it was absolute torture on the hands.  I think it took me 3 days to do because I could only handle doing it for a small mount of time.   Anyway, to get the width of the casing (with which I should have been much more generous!), I lined up the elastic with my waistline seam and then stitched a little below it. This would work on a casing that does not have so many thick layers, I promise.

Shoulder Line as Drafted

As drafted, this dress has a serious drop shoulder.  It's a great width for the sleeveless version, but would have looked terrible had I set in the sleeves there.  I trimmed it back to my normal shoulder width.


Topstitched Yoke

I think it was at Pennsylvania Fabric Outlet that I bought a large Guterman spool that I knew would match some wool I had at home.  Somehow I didn't notice until I got it home that it was topstitching thread, not sewing thread.  So now I have this giant spool of magenta topstitching thread.  I decided to use some of it on this project.  I topstitched the yoke, neckline, waist casing, and did two rows of stitching on the hem.


Sleeve Detail


I liked the tab detail on the sleeves, though I didn't use the instructions.  I just made some tabs, placed them in an aesthetically pleasing place on the sleeves, and stitched them in place using a decorative button.  I got a whole tube of these at a vintage store a couple years ago--I was glad to finally use a couple.

Pockets

Back

I was a bit skeptical of the elastic waist on this, thinking it might look cheap and lowbrow, but I think it works with the style.  It certainly made fit easy!  The belt in the thumbnail photo was misguided (or at least I should have tightened it a notch), but outdoor photos are so much nicer!  That is at the National Gallery of Art in DC, which has glass pyramids like those of the Louvre, though not quite as majestic.  It's much better without the belt.

The only thing I don't like about the pattern is the pleats in the bodice at the shoulder yoke.  They look terrible on the pattern envelope, and even in my drapier fabric--it is about voile weight--still don't look awesome.  I'd like to make this again converting the pleats to gathers (folding out some of the width), maybe for summer to take advantage of that wide shoulder.  It's a pattern that requires a careful fabric choice.  I'll have to be on the lookout for a lightweight cotton or cotton/rayon.  Rayon challis would be ideal but I just hate how non-durable rayon challis generally is.  I had a RTW rayon skirt that was a workhorse in my wardrobe for a good 7 years until I got sick of it--and it still looked great.  But I've never found that quality rayon in yard goods.  My lightweight woven rayons generally shred at the seams after a couple of years.

All photos are here and the pattern review is here.

Friday, October 25, 2013

How to Make Basket Liner Grocery Bags for Your Wald Bike Baskets

Wald Bags Thumbnail

Given my focus on the bikeability of my skirts and dresses, it probably won't surprise you that I sew for my bike as well.  I am a commuter-, shopper-, and pleasure-biker, so weight is not an issue for me.  I'm not fast anyway, what's a couple extra pounds?  So for cargo, I looooooove my Wald baskets.*  They collapse when not in use and are easy to fold out when I'm doing a big grocery shop.

*Please note that I have no financial or other connection with any of the products or sources listed in this post.  I really do like the baskets that much as a plain ol' satisfied customer.

Baskets are more stable than panniers and a bajillion times easier to use.  I found detaching and reattaching panniers a real pain, they are enormous to carry into the grocery store (or heaven forbid a restaurant or bar where you don't want to leave your stuff sitting outside), and I had a pannier pop off my bike in Logan Circle once.  With the baskets, there's no detaching and reattaching, and carrying a custom tote bag into the grocery store is much more civilized.  Also, believe it or not, I think my grocery bags hold more than a pannier because they are tall.  A tall pannier hangs down too low, but the bags' added height is above rack level.

Pro tip:  on the advice of my bike shop, I skipped the included hardware and attached my baskets to my rack with hose clamps, which are available at Home Depot or any hardware store.  They are a real pain to put on (you have the squeeze the tongue thingy into place with one hand and turn the screwdriver with the other until the tongue thingy is caught and you can tighten it), but that basket is not coming off.  After about a year I had one hose clamp fail--the metal broke.  Each basket is attached with 3 hose clamps so it did not fall off.  When I noticed some rattling, I replaced the hose clamp without incident.  So I do recommend an occasional inspection to make sure your hose clamps have not failed.

Of course, a naked basket is no good.  I just had to make custom-fit liners for my baskets!

You will need:
Sturdy Fabric
Fusible fleece or other stiffener for the bottom
A drawstring (I used rattail braid; you need a little less than 1 1/2 yards)
A cord stop (Joann sells these in the notions aisle; mine are from Quest Outfitters)
Velcro (mine is 1 inch wide)

The liners are made from four pattern pieces (if rectangles rise to the level of pattern pieces): a front/back, sides, bottom, and straps.  The measurements given below include a 1/2" seam allowance.

For each basket liner, cut 2 of each of the following pieces:

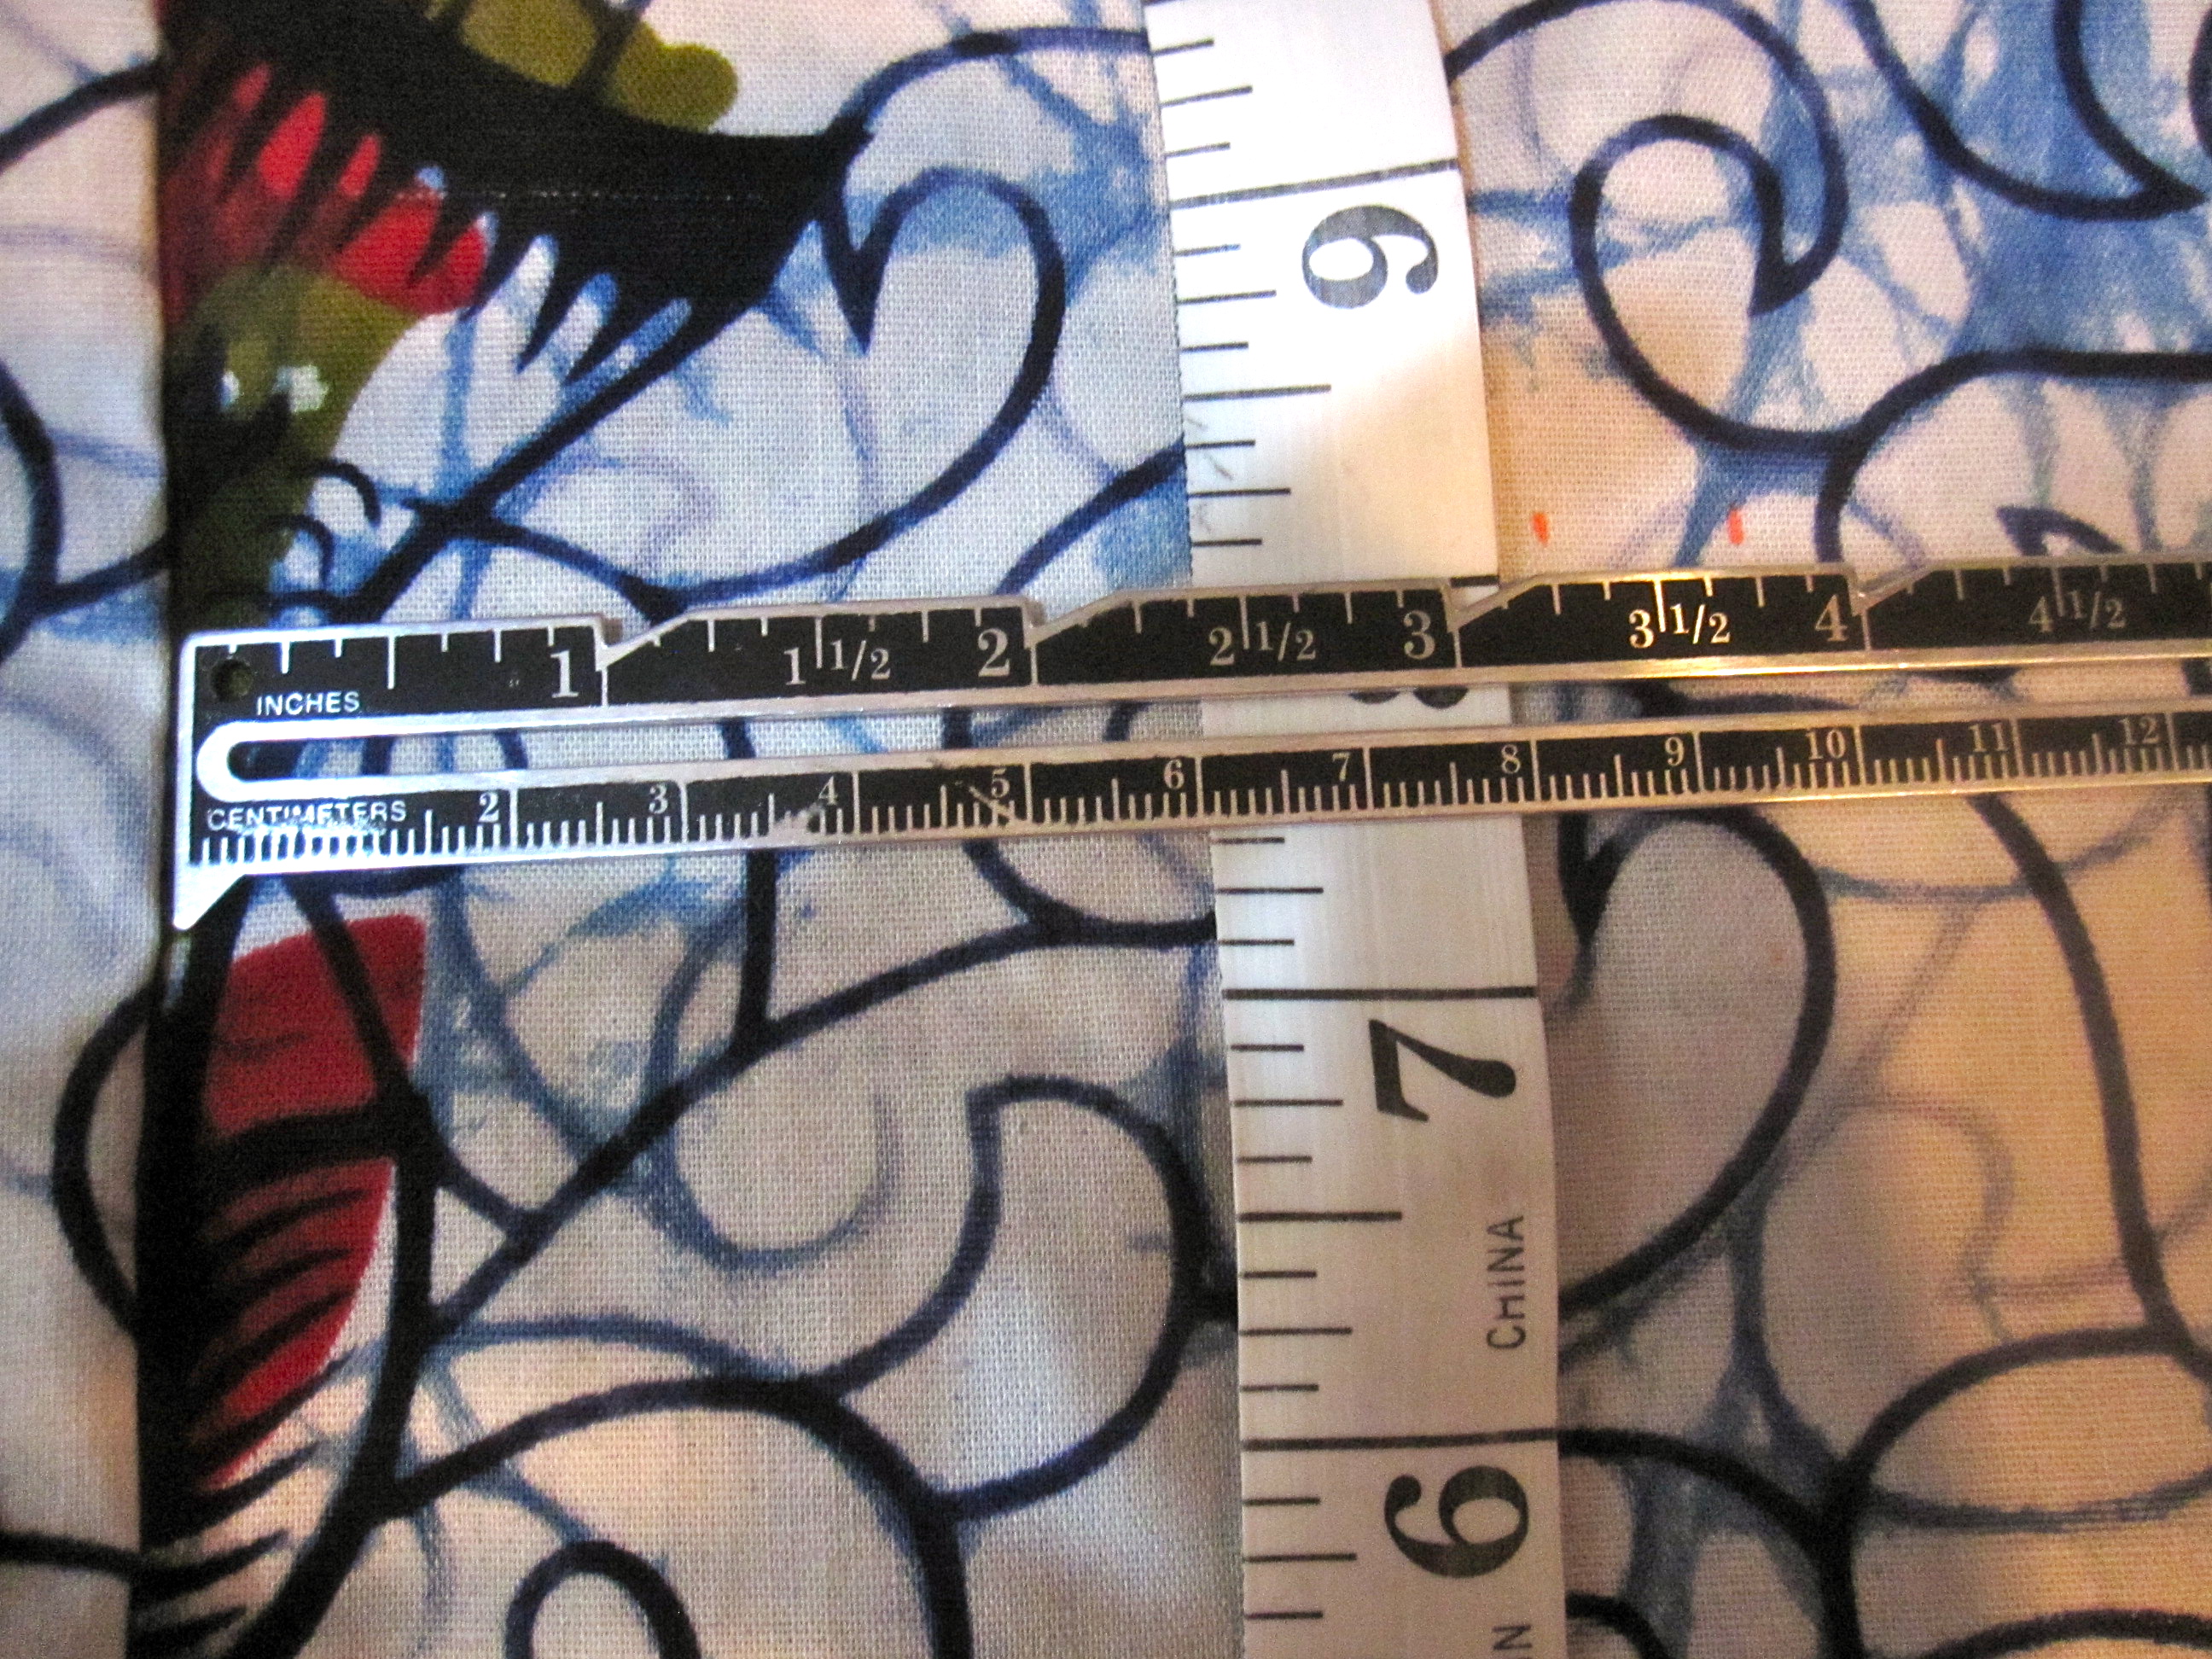
Front/Back:  17.5" tall x 13.5" wide
Side:  17.5" tall x 8.5" wide
Bottom:  13.5" x 8.5"
Handle:  4.5"wide x 26"* long

*The length of the handles is based on the perfect comfort carrying height for me.  I'm 5'1", so in the highly likely event you're taller than me you might want slightly longer handles; I would recommend adding 1/2" for every inch you are over 5'1", on the theory that half your height is in your torso (where handle length matters) and half is in your legs (where it doesn't).

Fabric Layout for Wald Baskets


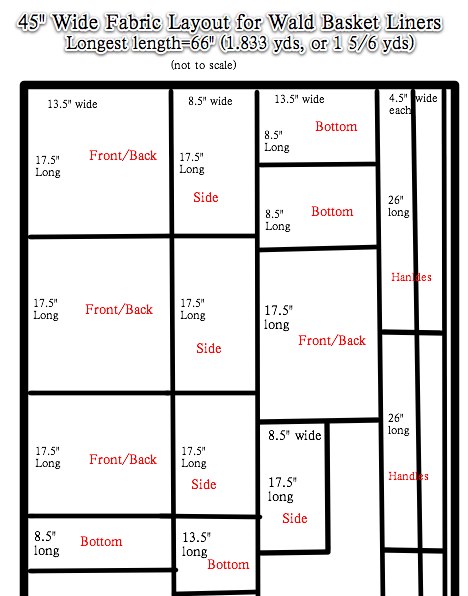
I made two liners--one for each basket (I think most people only have one basket, but since my bike is my car I have two)--from a 45" wide wax print a friend brought me back from Liberia, so I took the trouble to figure out the most fabric-efficient pattern layout, shown below.   Most quilting fabric is 45" wide, so if you want to use one of those cute prints this may come in handy.

Most cottons can be ripped on both grain and crossgrain.  Make a snip with the scissors and rip away.  I ripped all my pieces rather than cutting them.  So much faster, easier, and more precise.

A word of warning, though, that when the bags are full they are easy to catch and rip on the baskets.  You want a fabric with some body and sturdiness so don't use a lightweight quilting cotton, or if you do you'll need to double it up.


The first thing to do is sturdy up the bottom.  This isn't totally necessary, but I find it extremely helpful when loading groceries because it shows you the exact footprint of your basket.  This is particularly important when the checker is loading your bags because they instinctively cram them as full as possible and then the bags are too wide to fit in the baskets and you have to mush your groceries around to get them into the right shape.

Fusible Fleece, cut out minus seam allowances
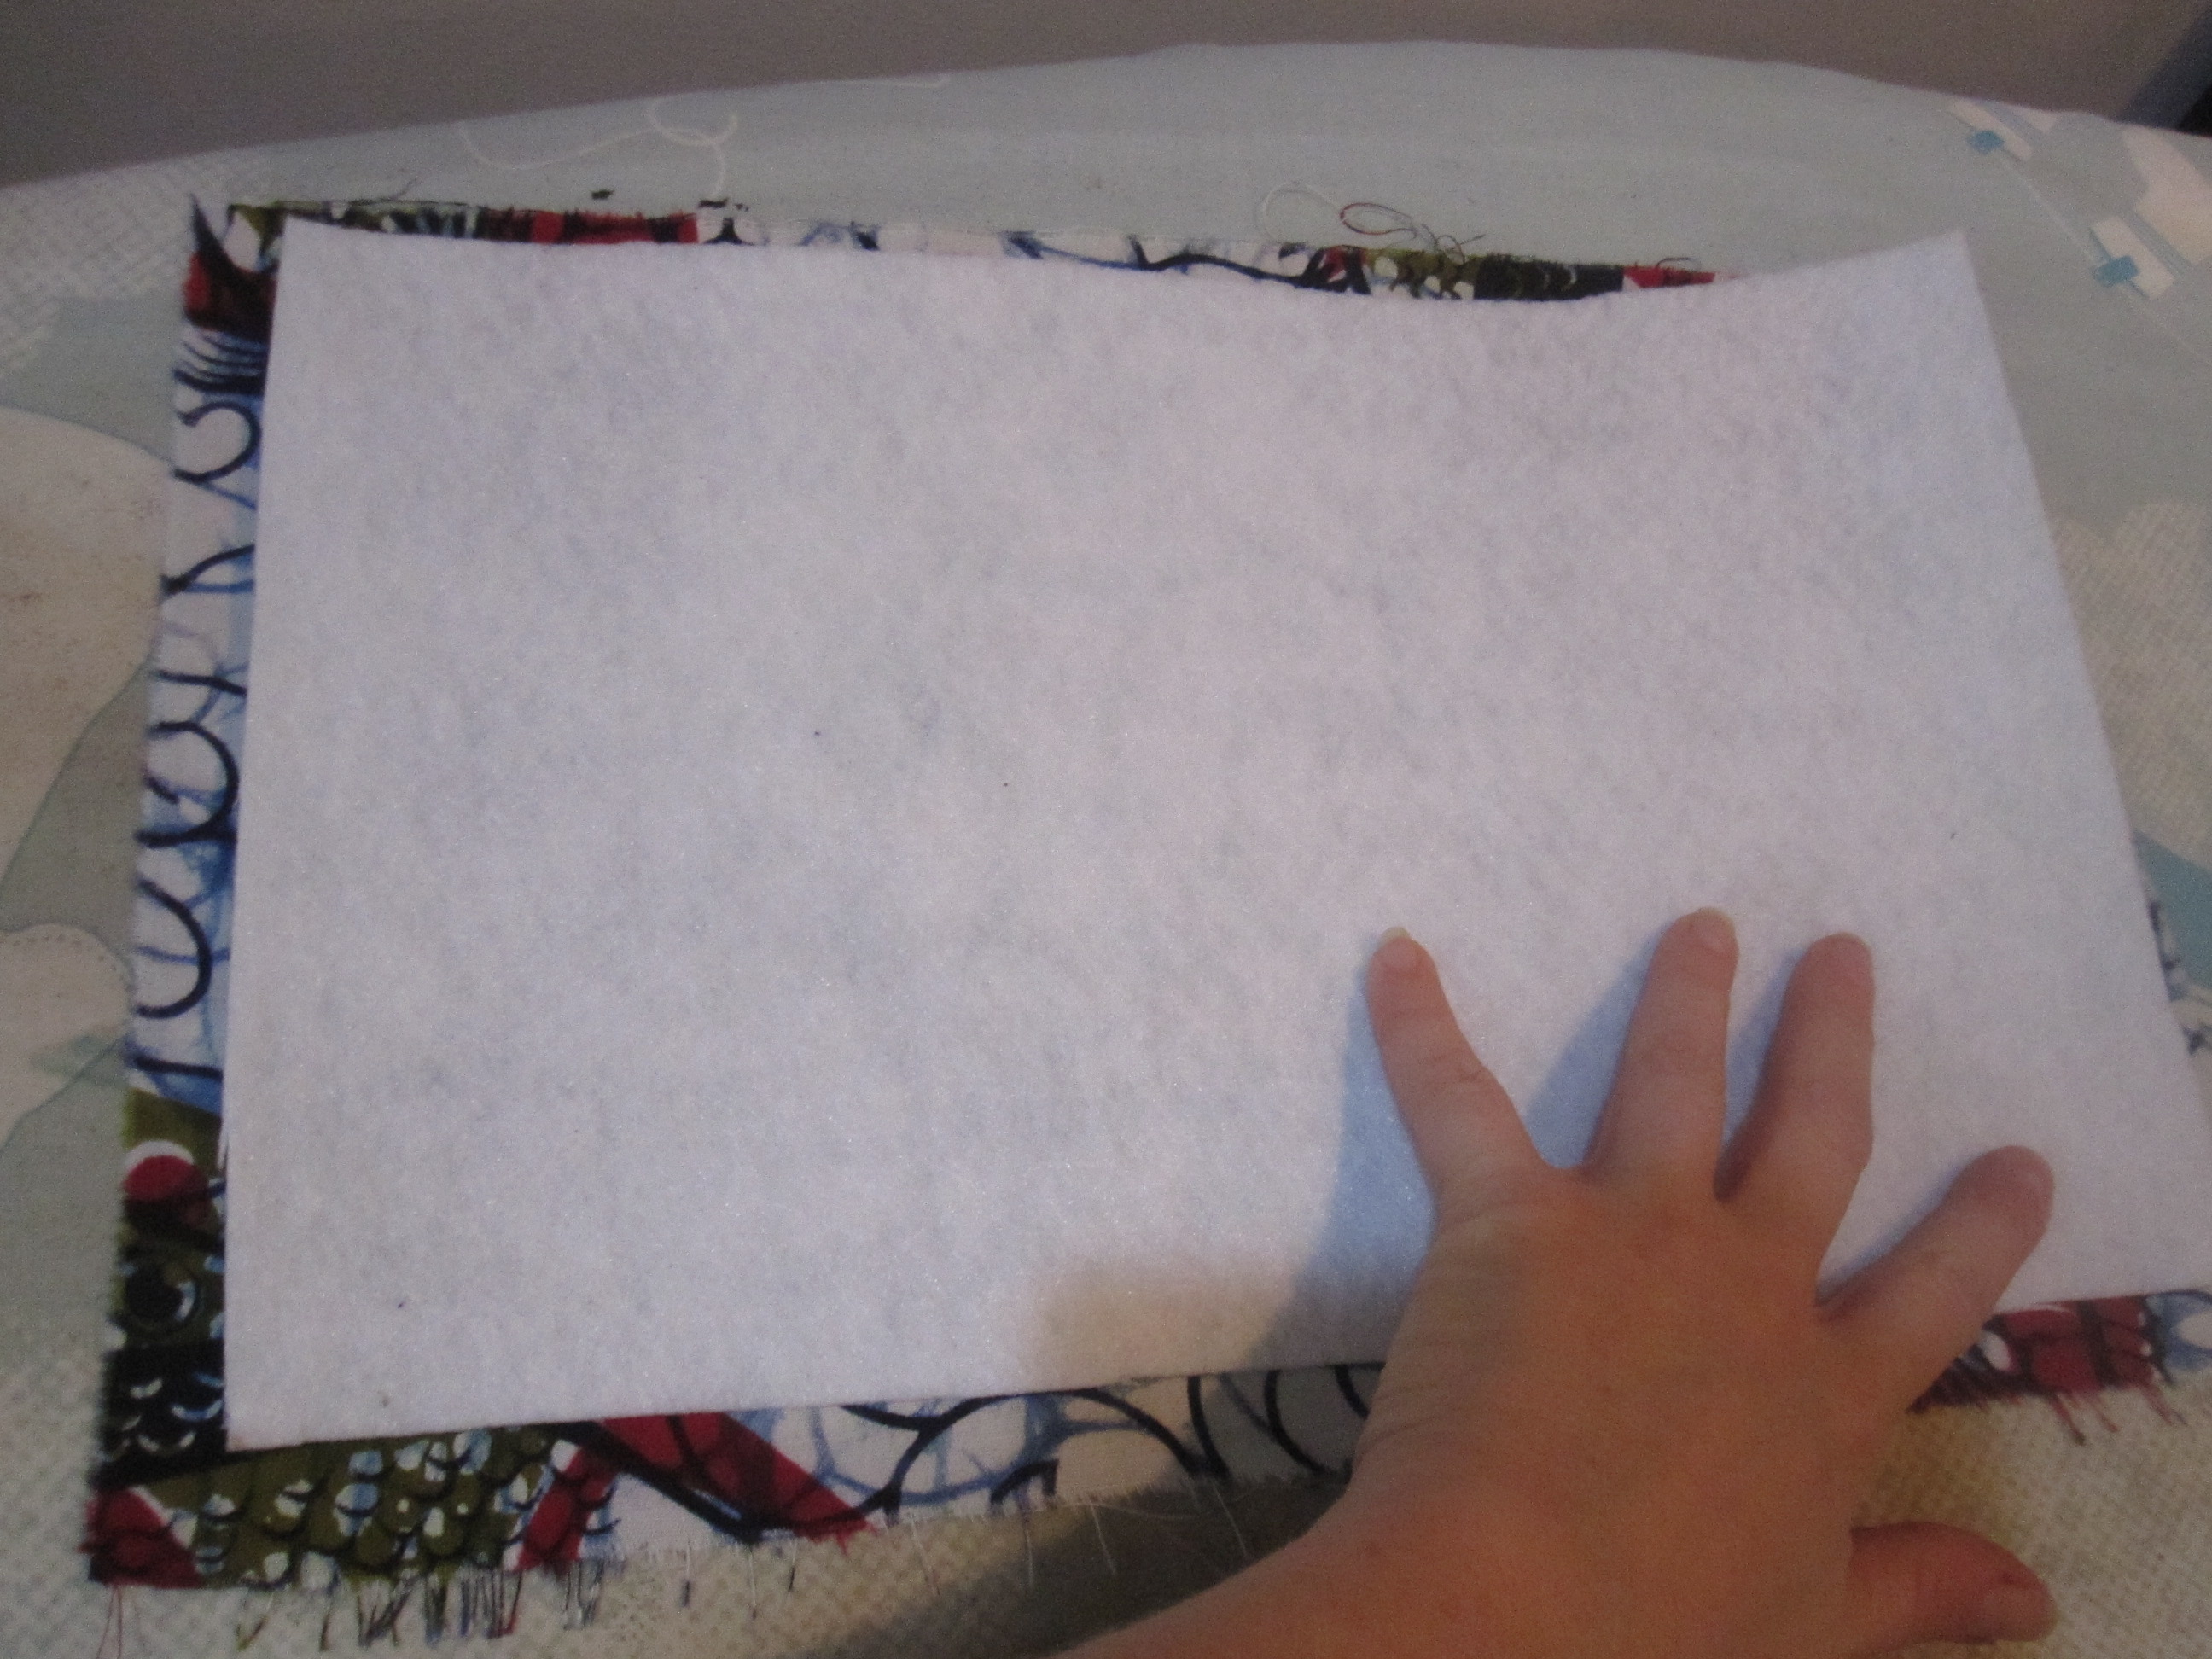
Cut your fusible fleece 12" x 7" (taking the 1/2" seam allowance off all four sides of the bottom piece measurements plus a little more so it's easier to sew).  You can draw right on your fusible fleece with a pencil, so just mark your rectangle and then cut along the lines.

Lay one bottom piece, wrong side up, on a flat surface.  Center the fusible fleece on top of it.  Lay the other bottom piece on top of the fusible fleece, right side up.  You've now sandwiched your fleece and the right side of your fabric is showing on either side.  Pin through the sandwich a few inches in from each corner and in the center.  Now take it to the machine and anchor it with a big X from corner to corner through all three layers (bottom, fleece, bottom).  Take out the pins.

Front/Back/Sides Box
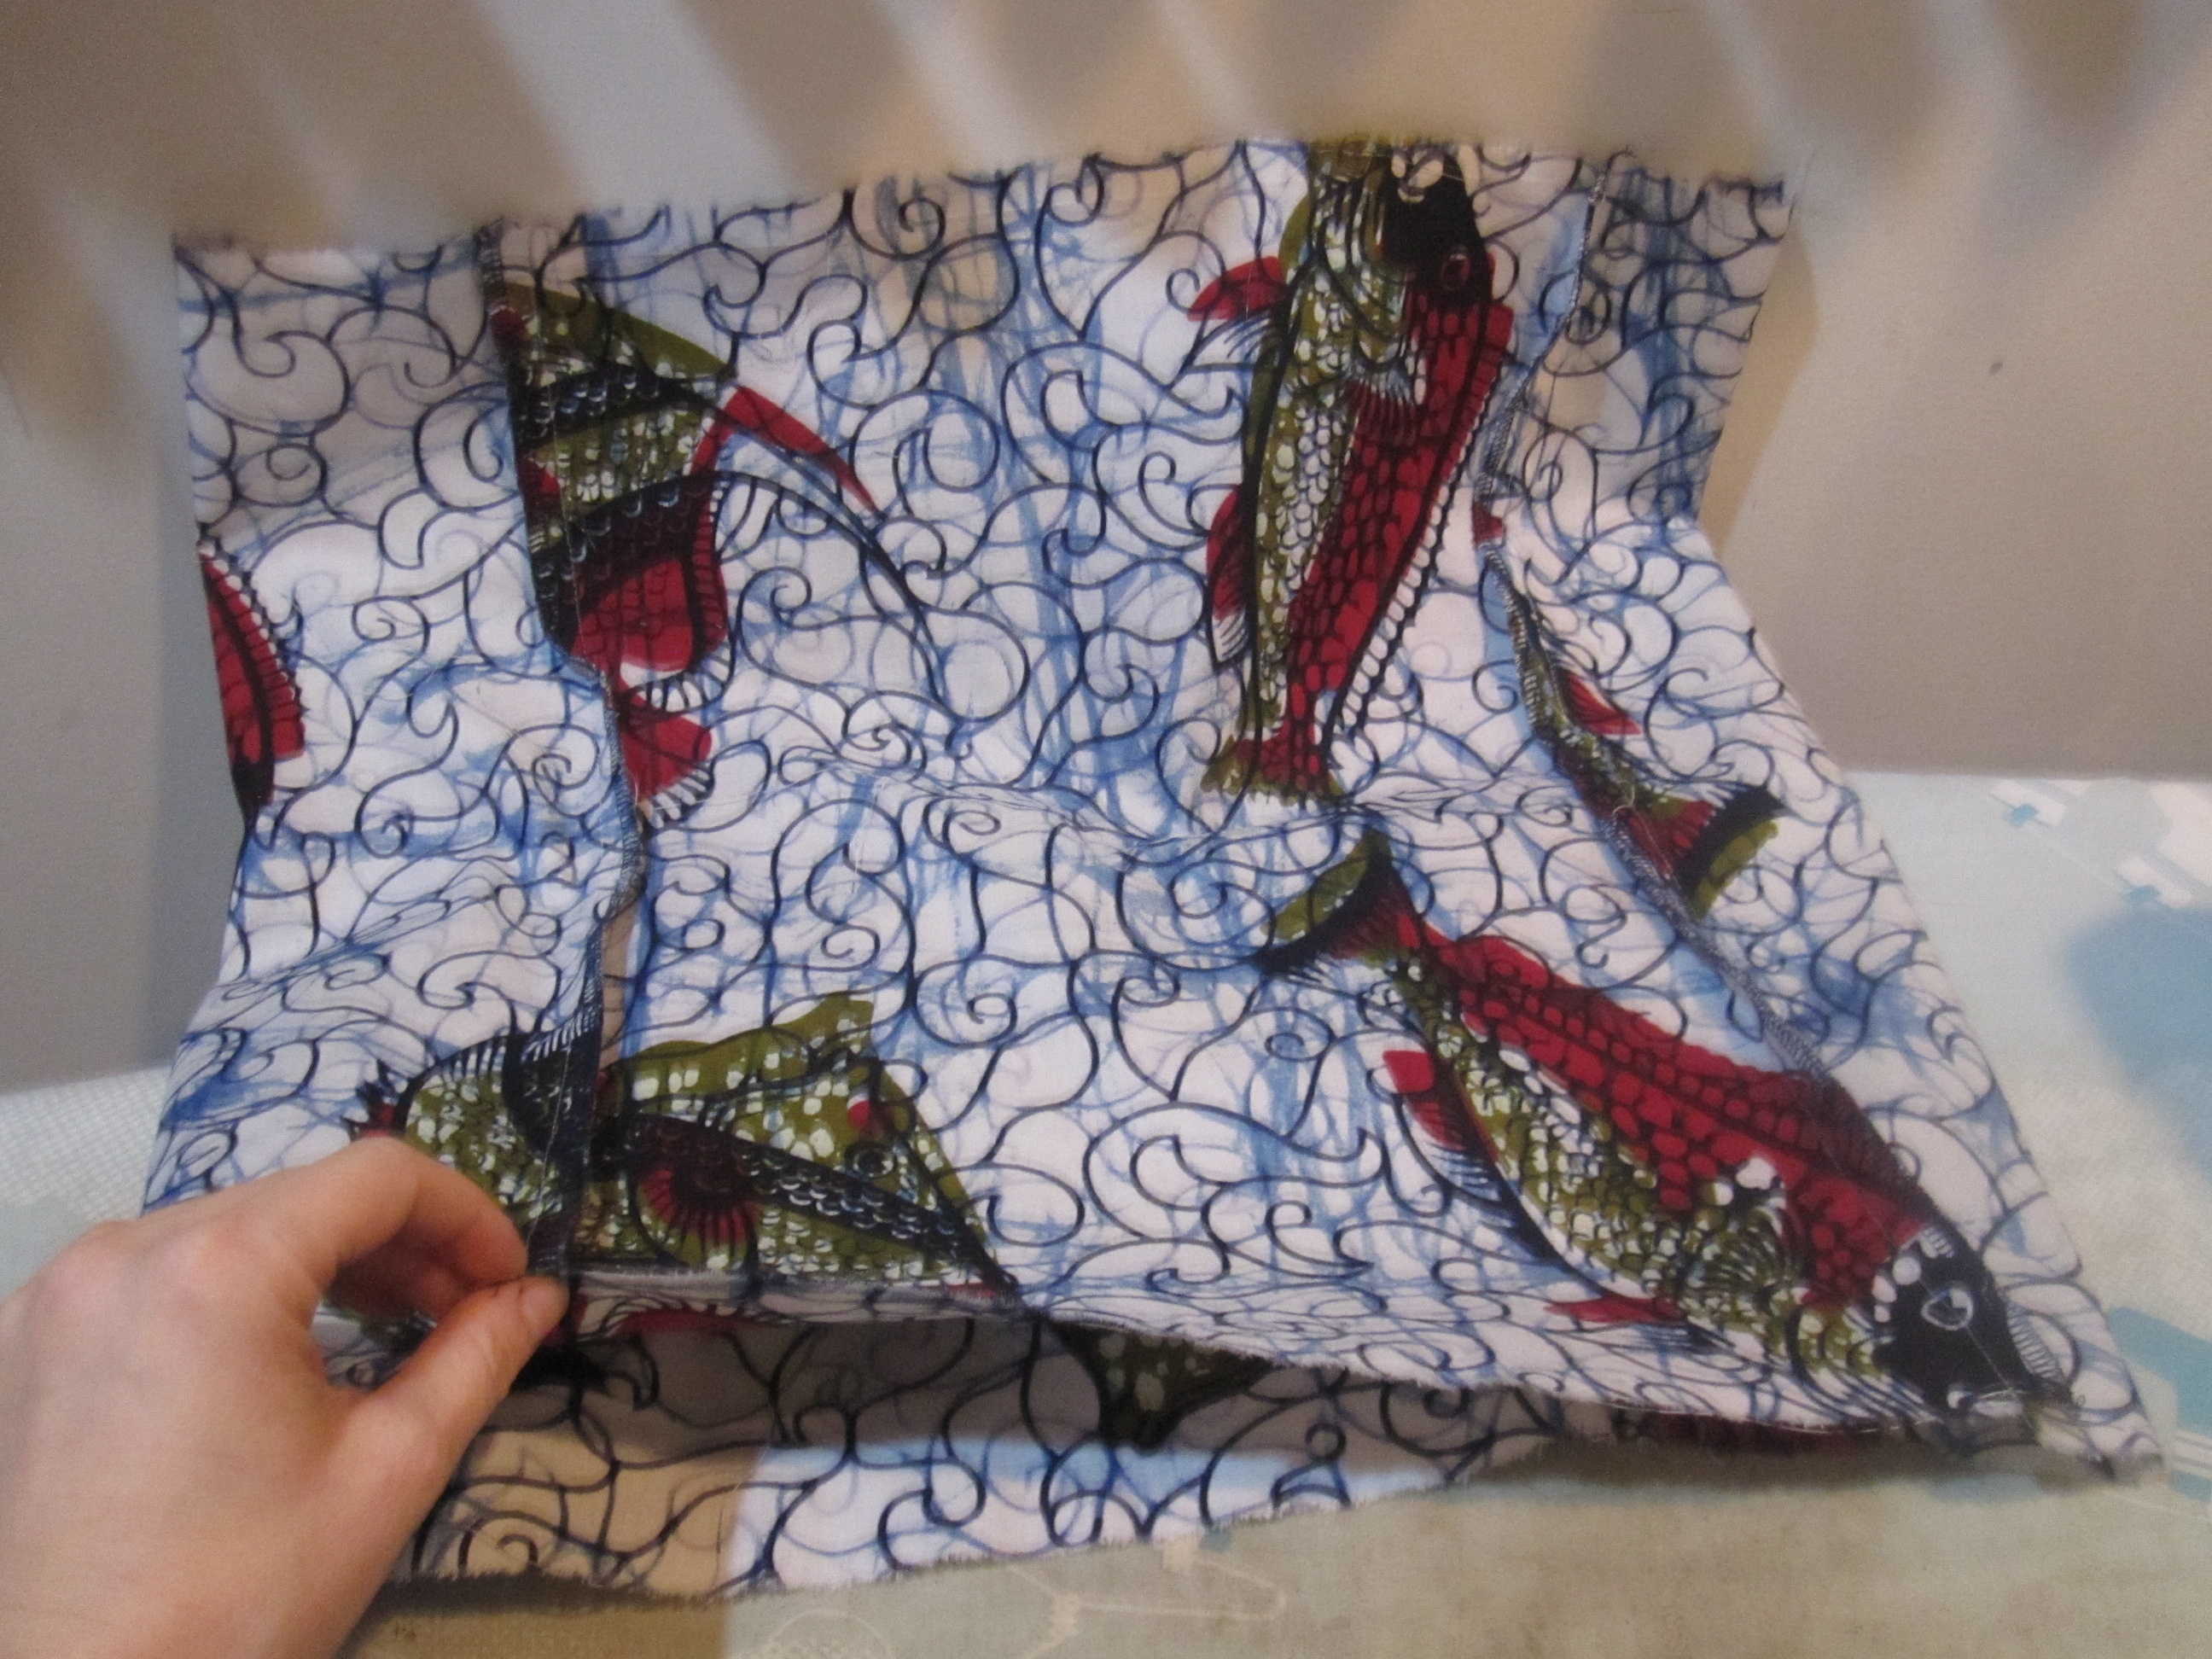
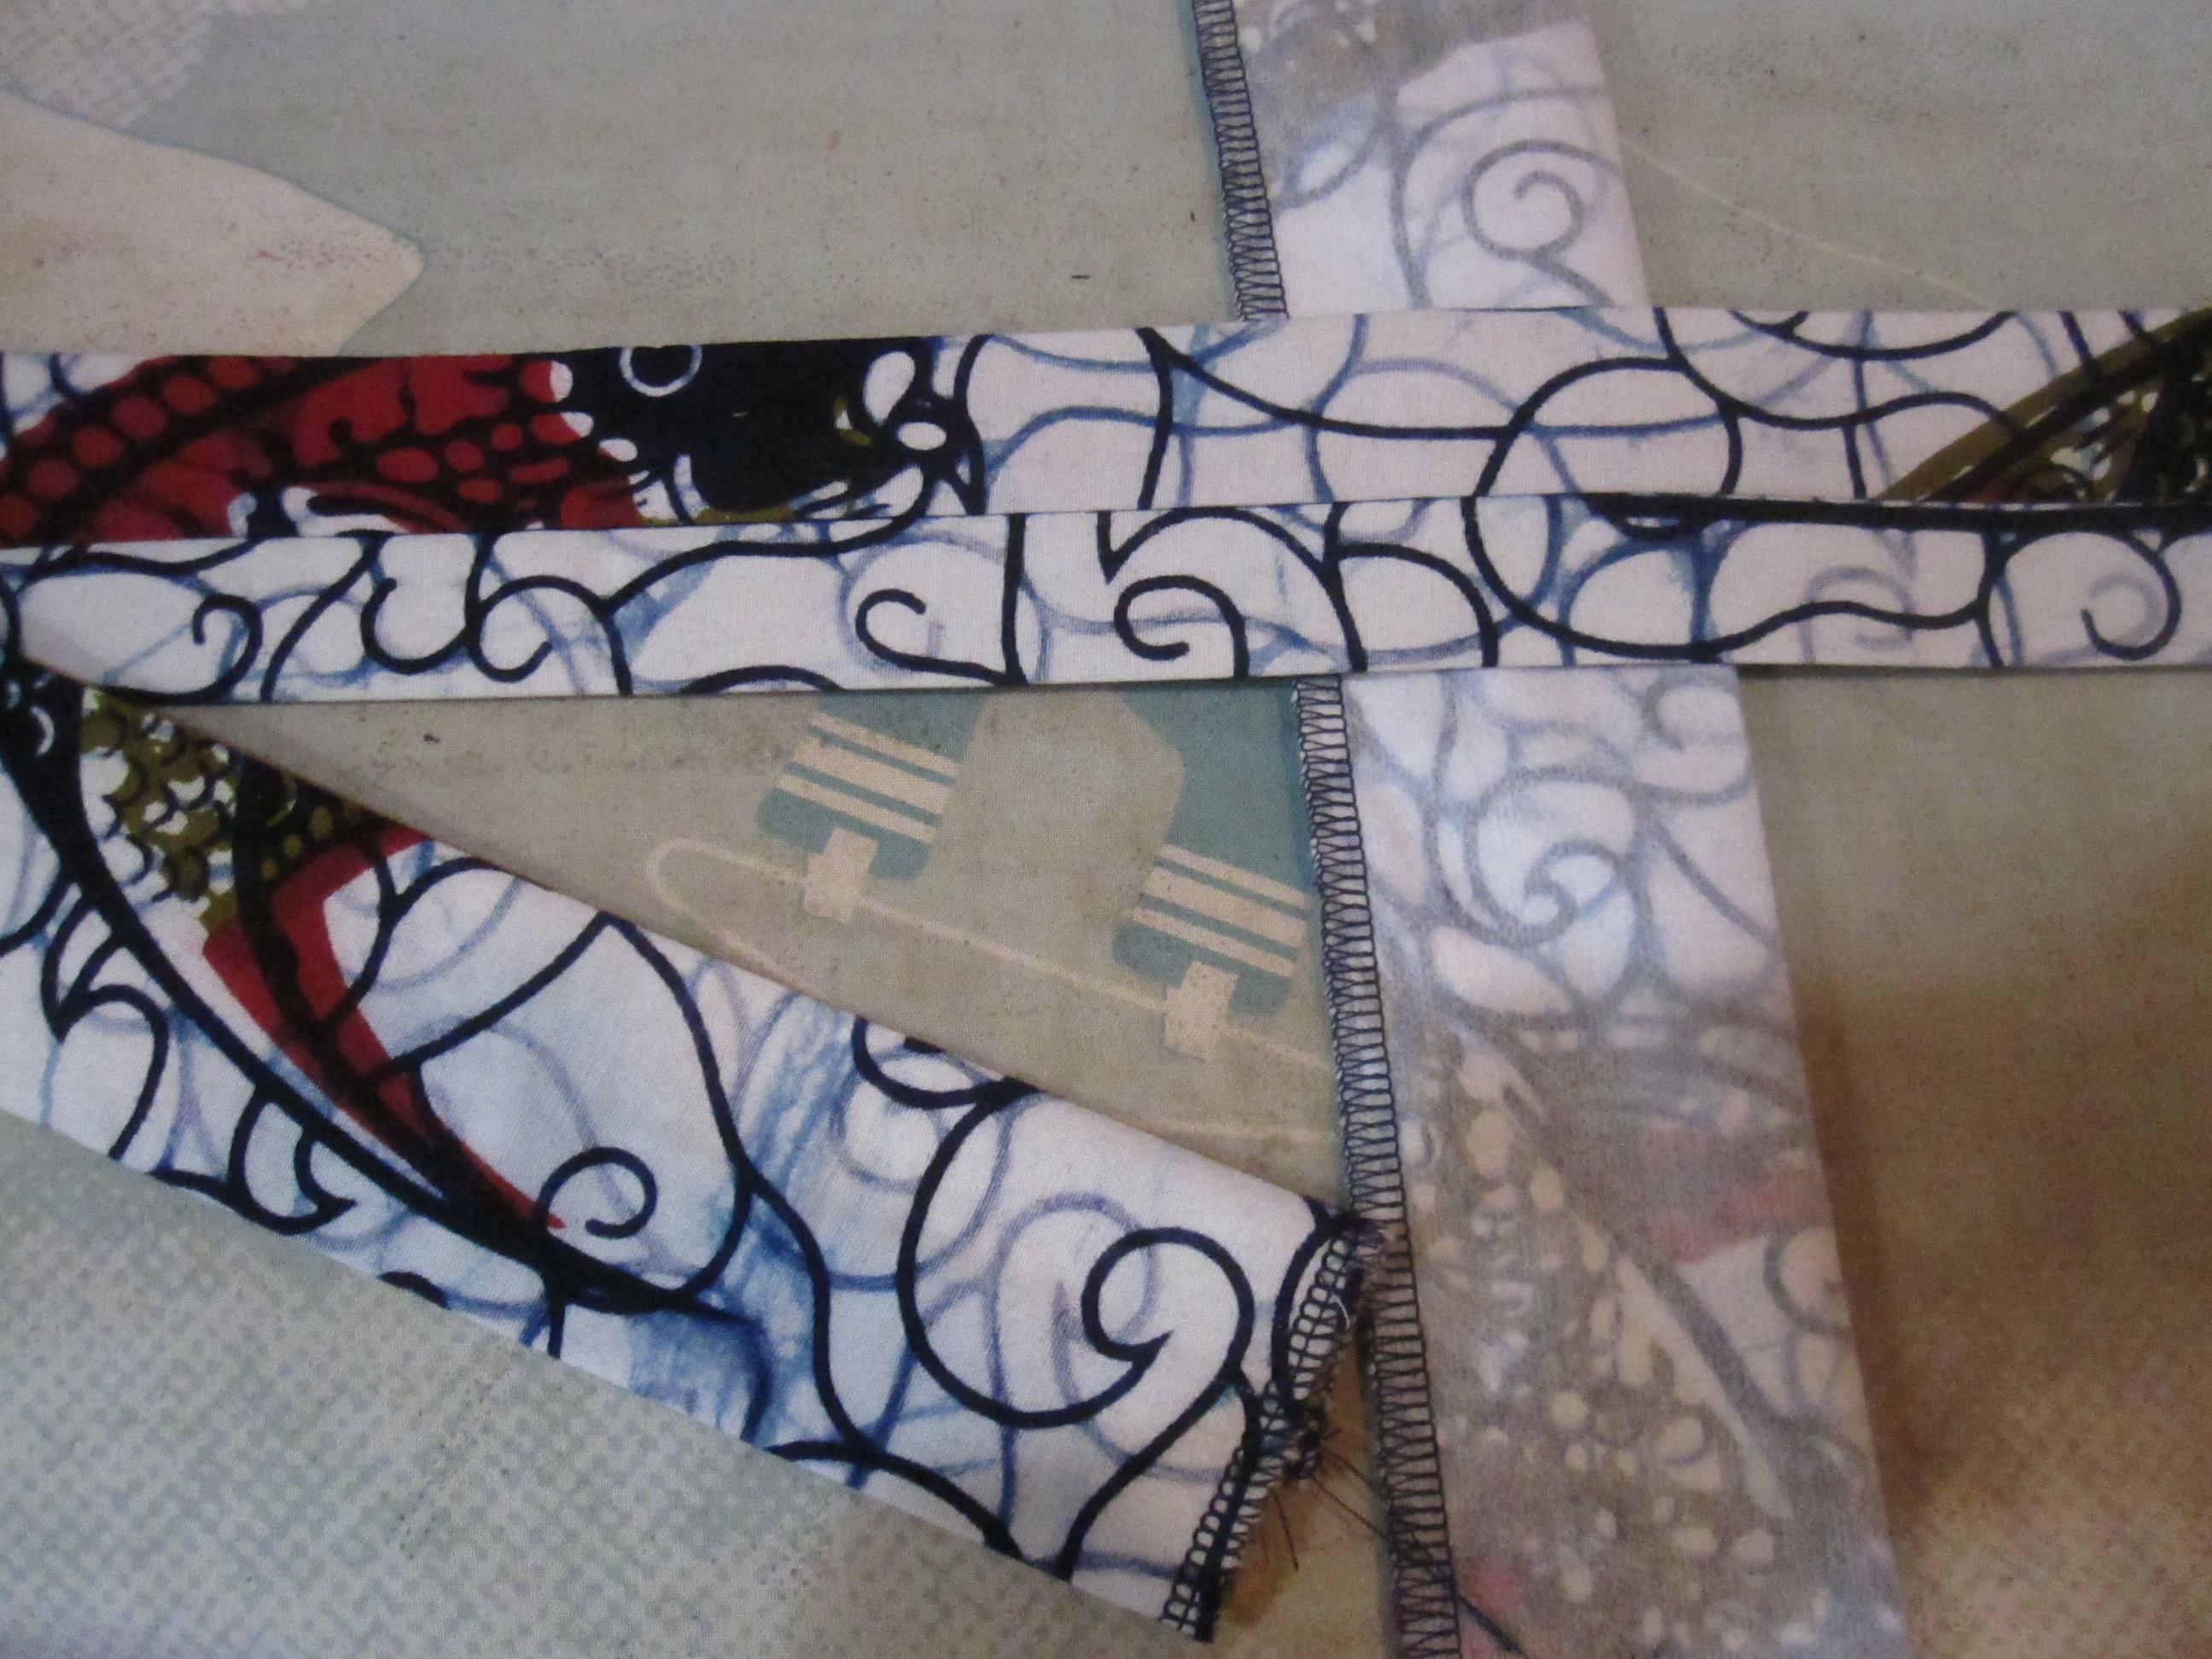
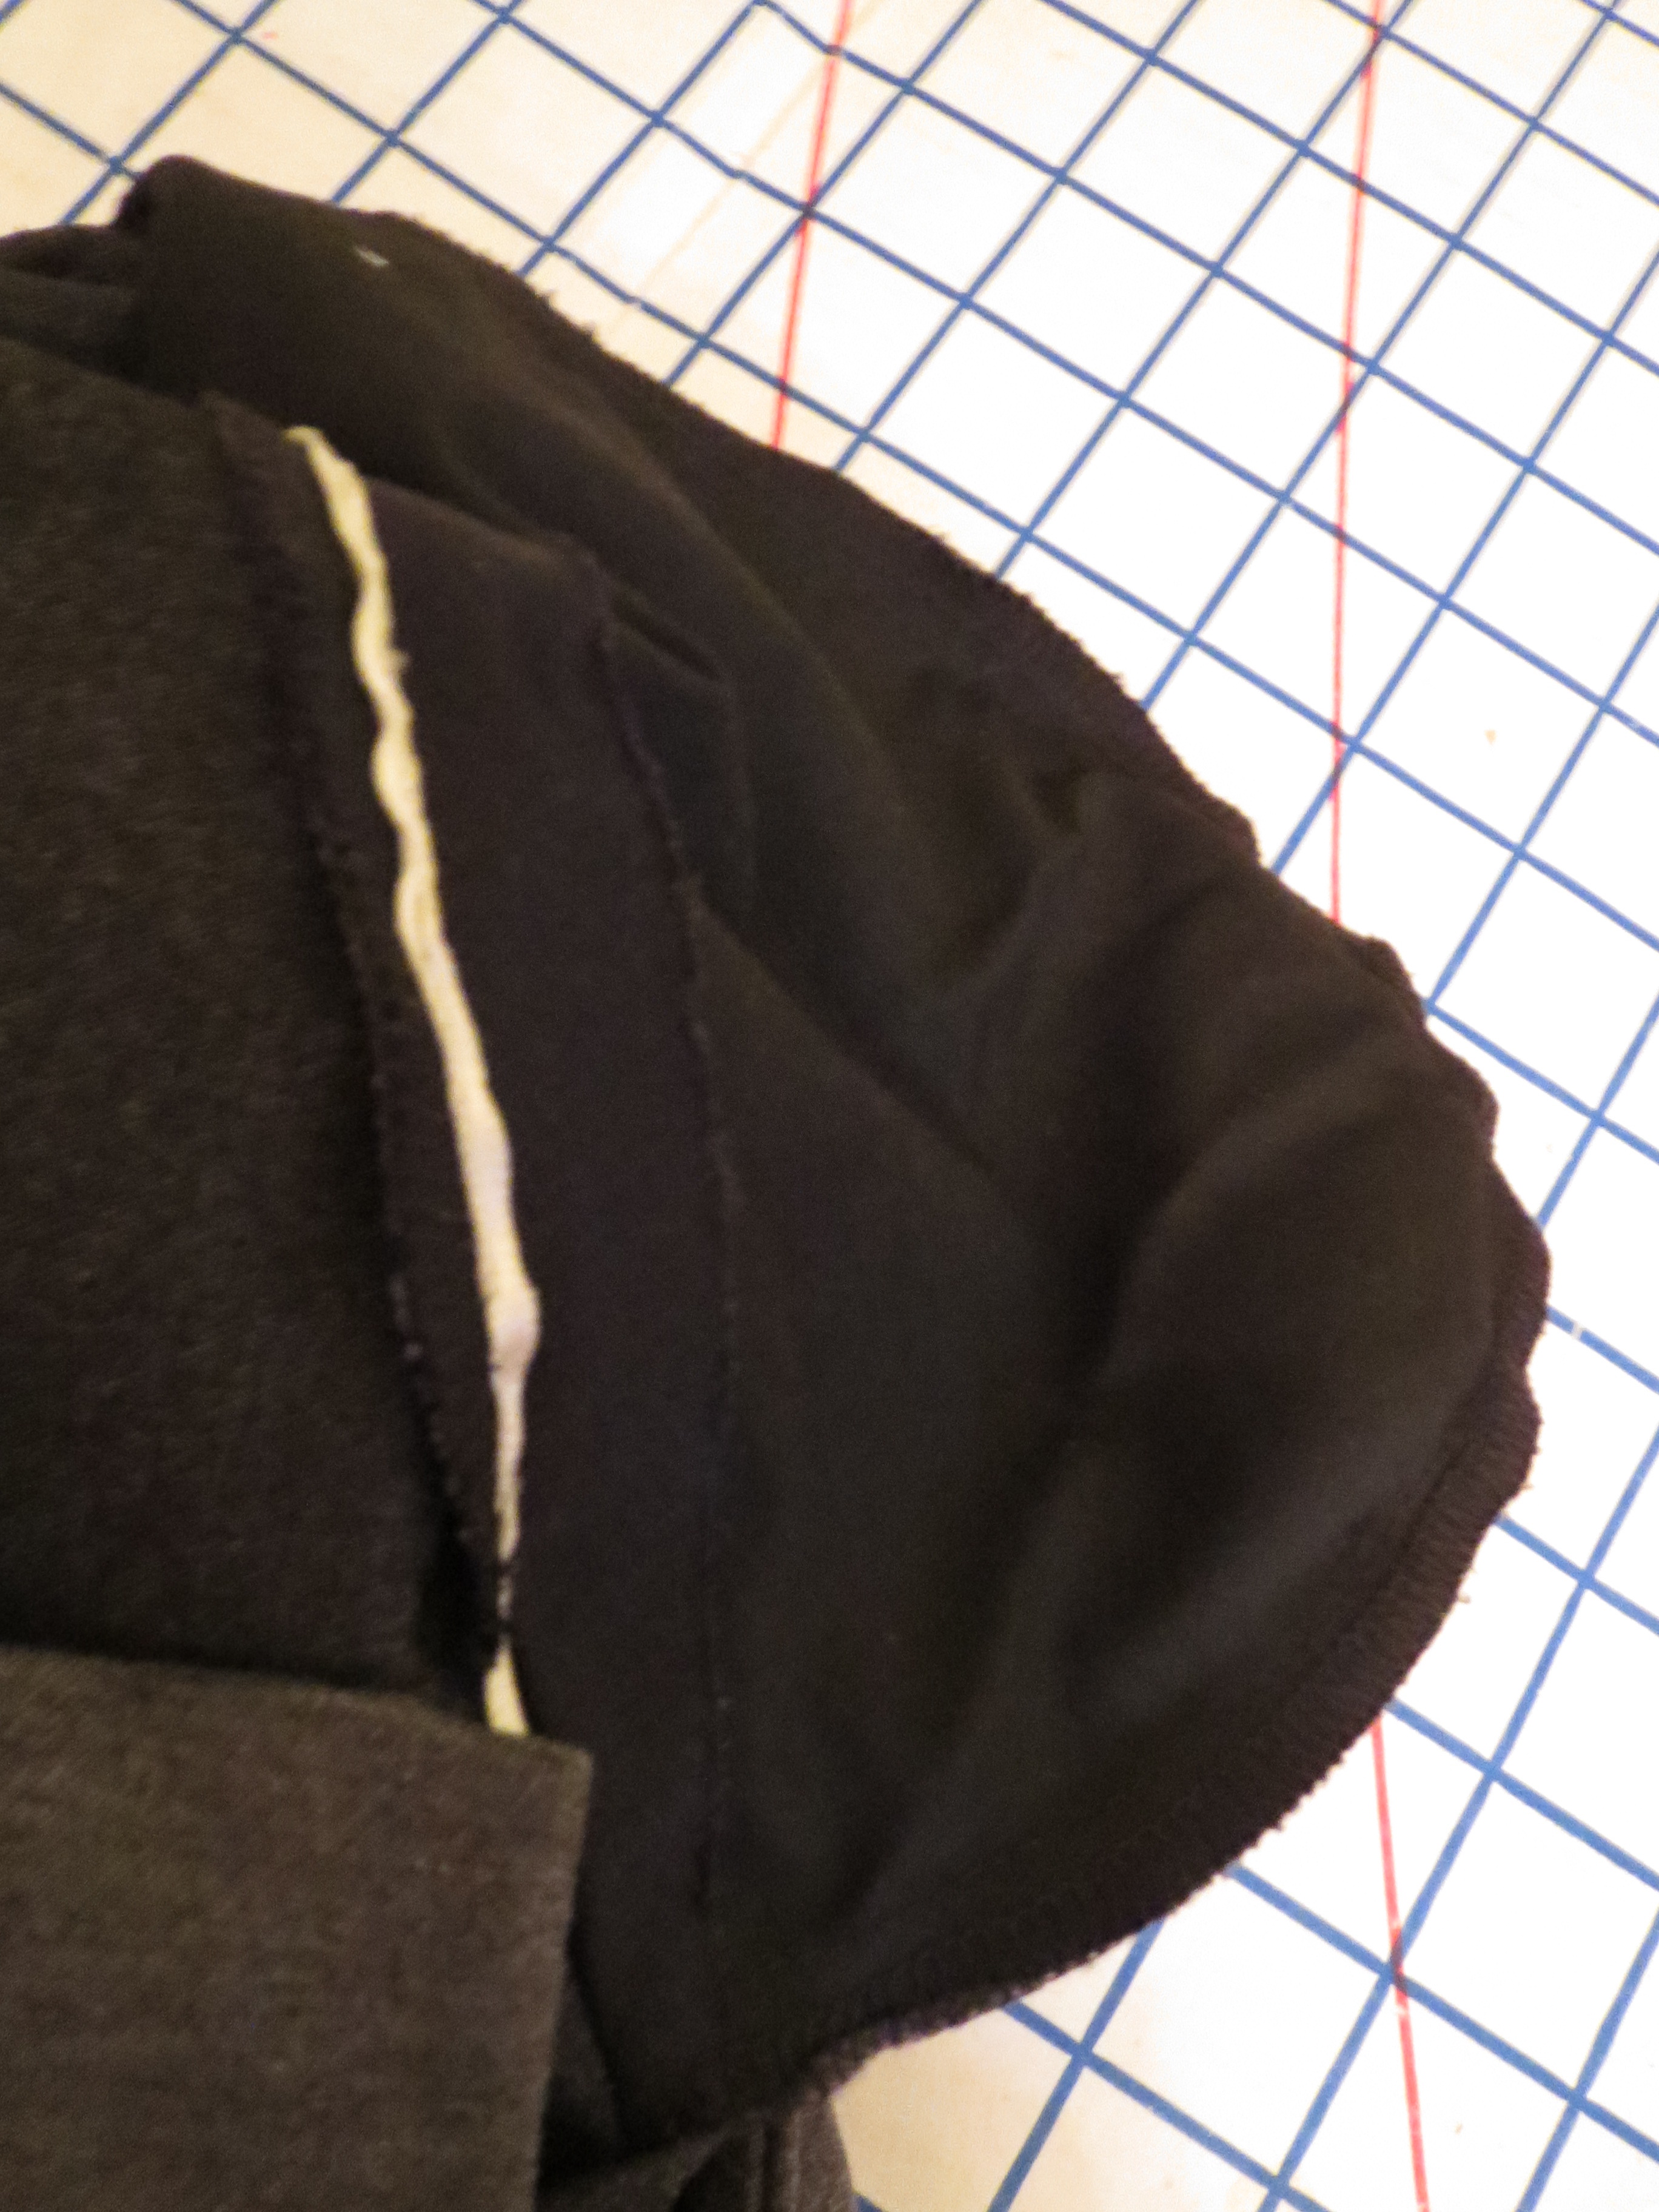
The next step is the sew the front/back and sides together.  Take one front/back piece and lay it right side up on a flat surface.  Place one side piece right sides together along the long (17.5") side, matching this to the front/back's long side.  Pin.  Now pin the other side piece in place the same way, right sides together.  Pin the other front/back to one of the sides, and complete your tube by pinning the remaining front/back side to the remaining free side.  Sew all these seams.  I finished mine with my serger, but you can use a zigzag stitch if you don't have a serger.  Press the seam allowances toward the sides.  You now have sort of a box with no top or bottom, as seen at left.

Now comes the only even remotely tricky part, I promise.  You're going to pin the bottom in place.  Match the corners of the bottom with the seams of your front/back/sides box, right sides together.  The seam allowances of your "box" will be on the outside.  The bottom has two right sides so it doesn't matter which one you put inside and which outside.

Pin Bottom to Front/Back/Sides

Pin the long edges together with the box on top and the bottom on bottom and pin diagonally into the corners.  Make sure you have caught both layers of the bottom!  The back/front/sides box won't match the square corners of the bottom exactly and will pull in toward the center a little.  Just make sure you have the long edges lined up other than in the corners and it will work out.

Turn Corner

Start sewing in the middle of one of the edges, rather than at a corner to make it easier.  When you get to the corner don't sew all the way to the end--stop at your 1/2" seam allowance.  Make sure the needle is down into the fabric, then lift the foot and rotate your bag 90 degrees.  Scooch your fabric (particularly the seam allowances of the front/back/sides), which will want to fold up, behind the needle.  Put the foot back down and sew the next side.

When sewing the corner make sure you are catching the front/back/sides fabric box fabric with enough seam allowance to do a zigzag to finish the edges (remember, the front/back/sides box will cut in a little diagonally across the corners).

The bottom is stiff from the fusible fleece, so for one of the sides you'll have to cram it into the free arm.  Your corners may not be beautiful, but they will probably look ok on the outside.  Finish the seam allowances and turn your bag right side out.

Measure Casing

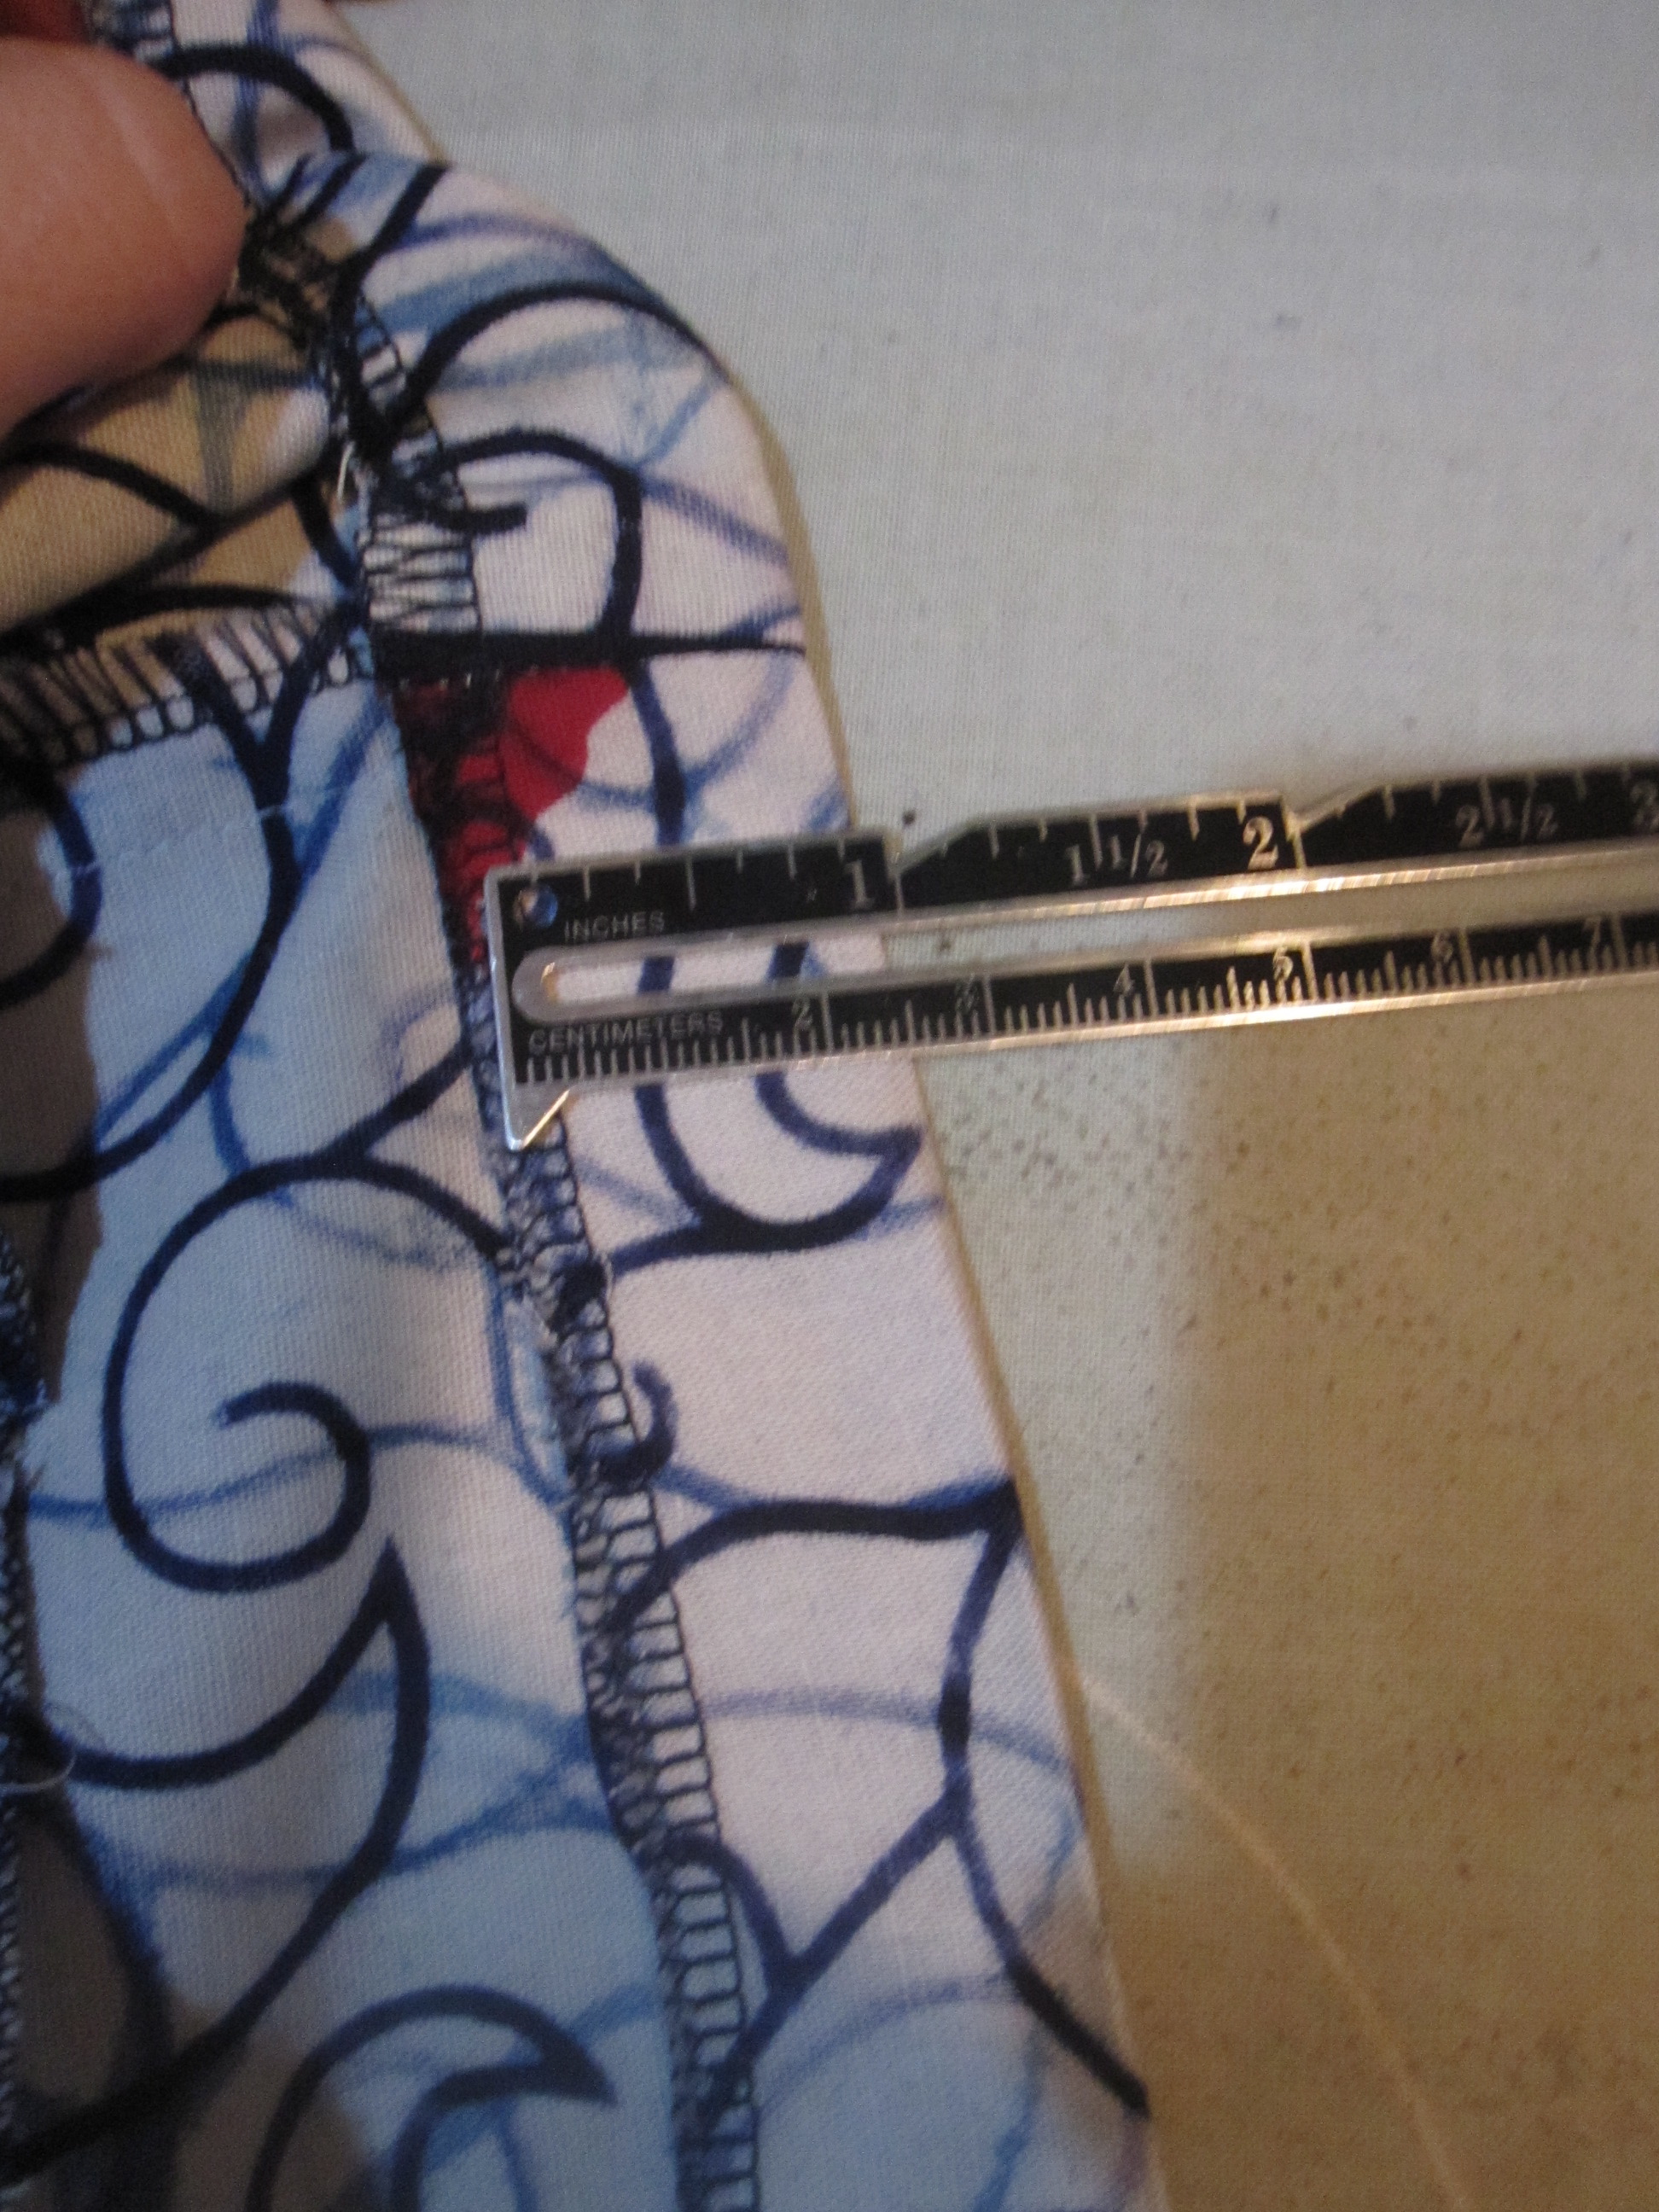
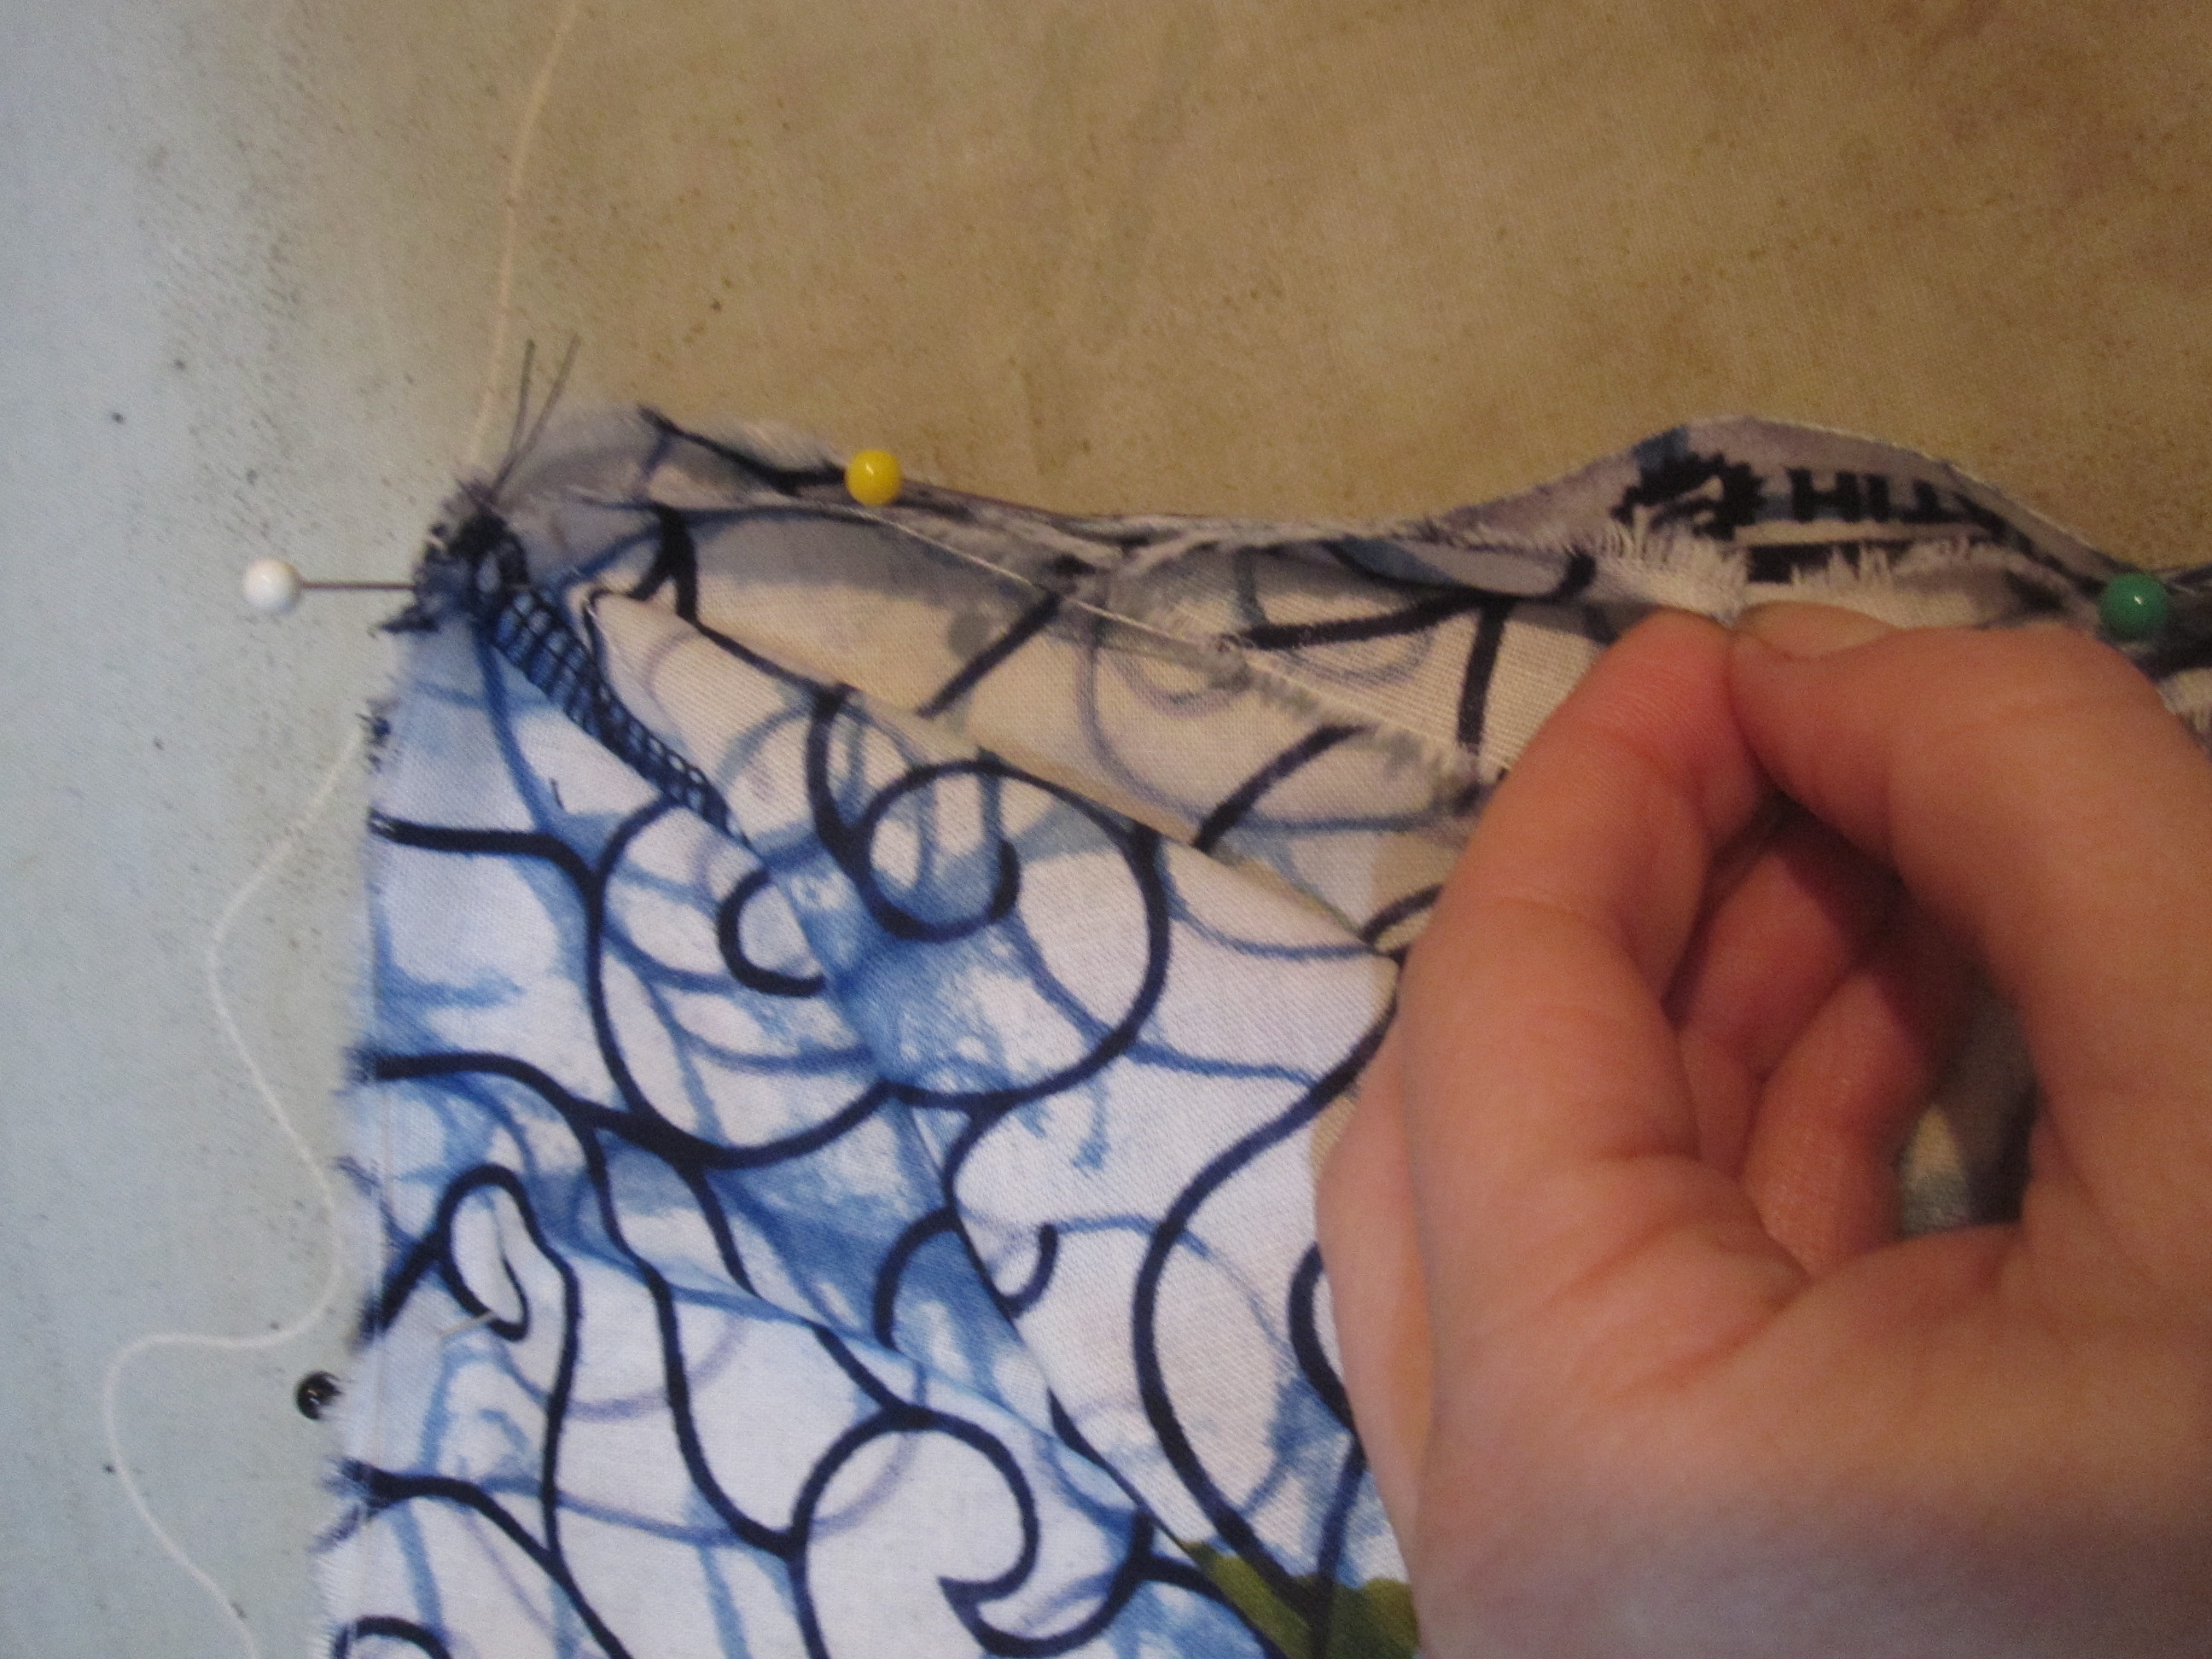
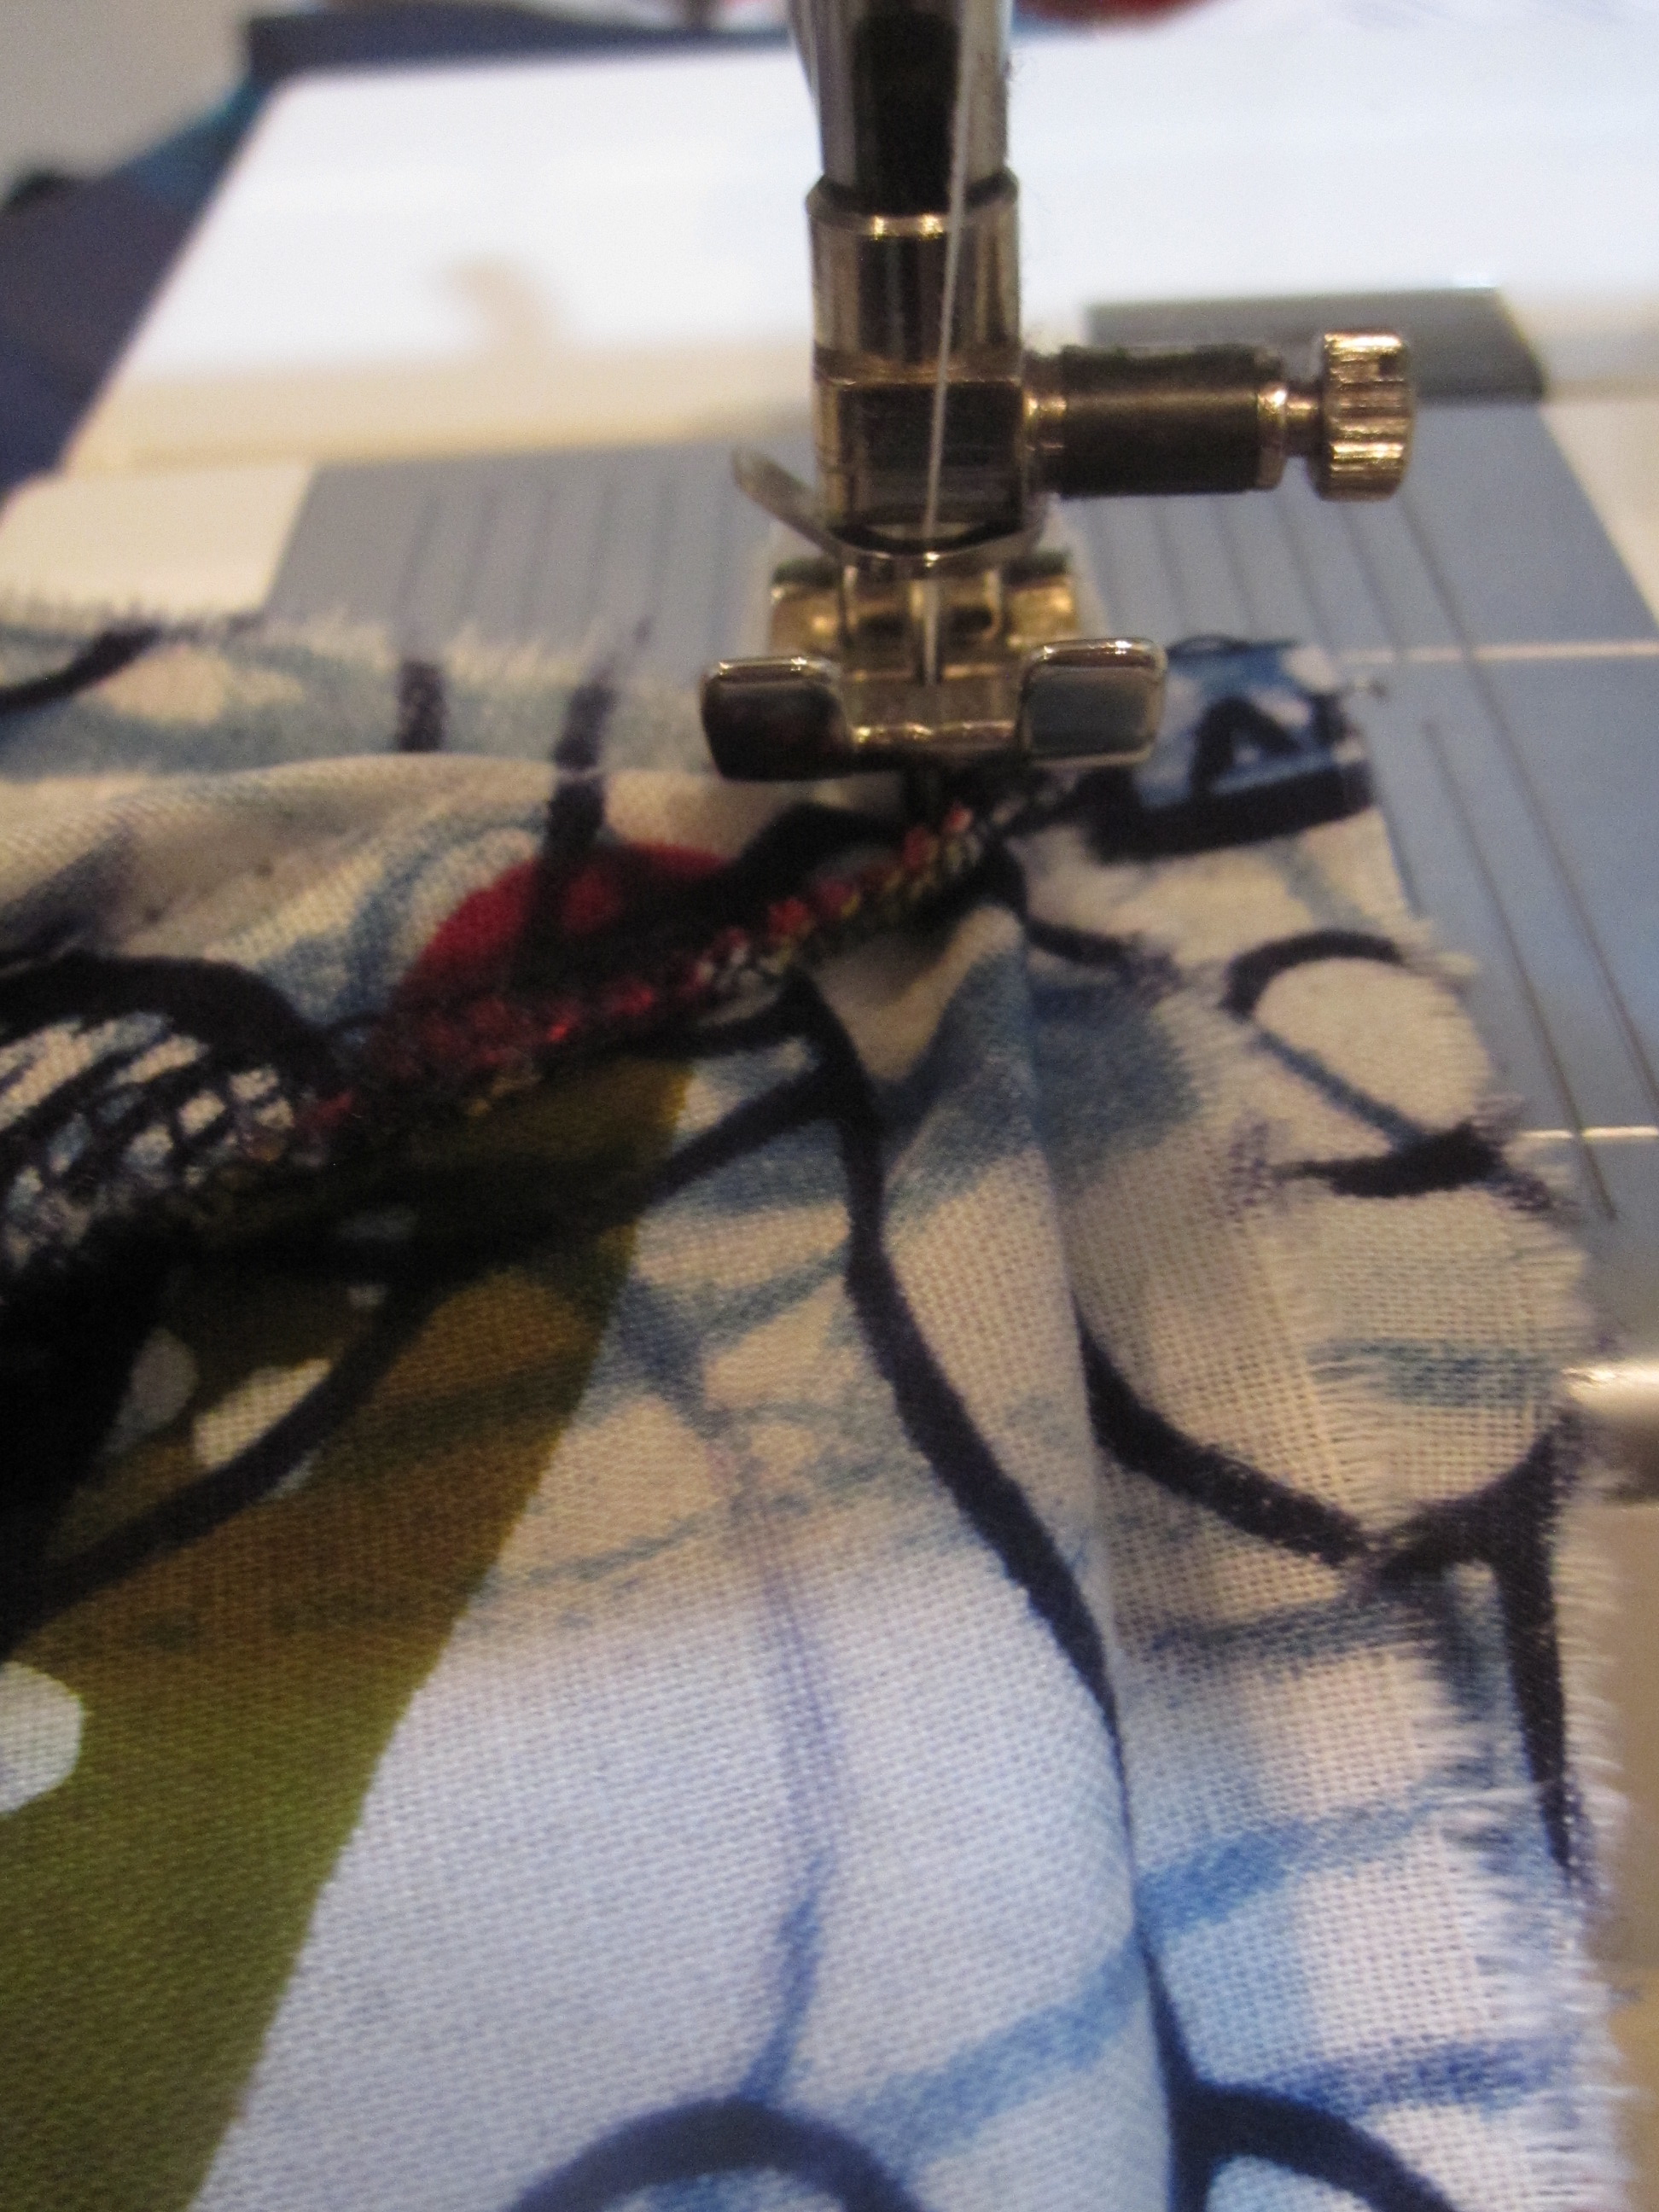
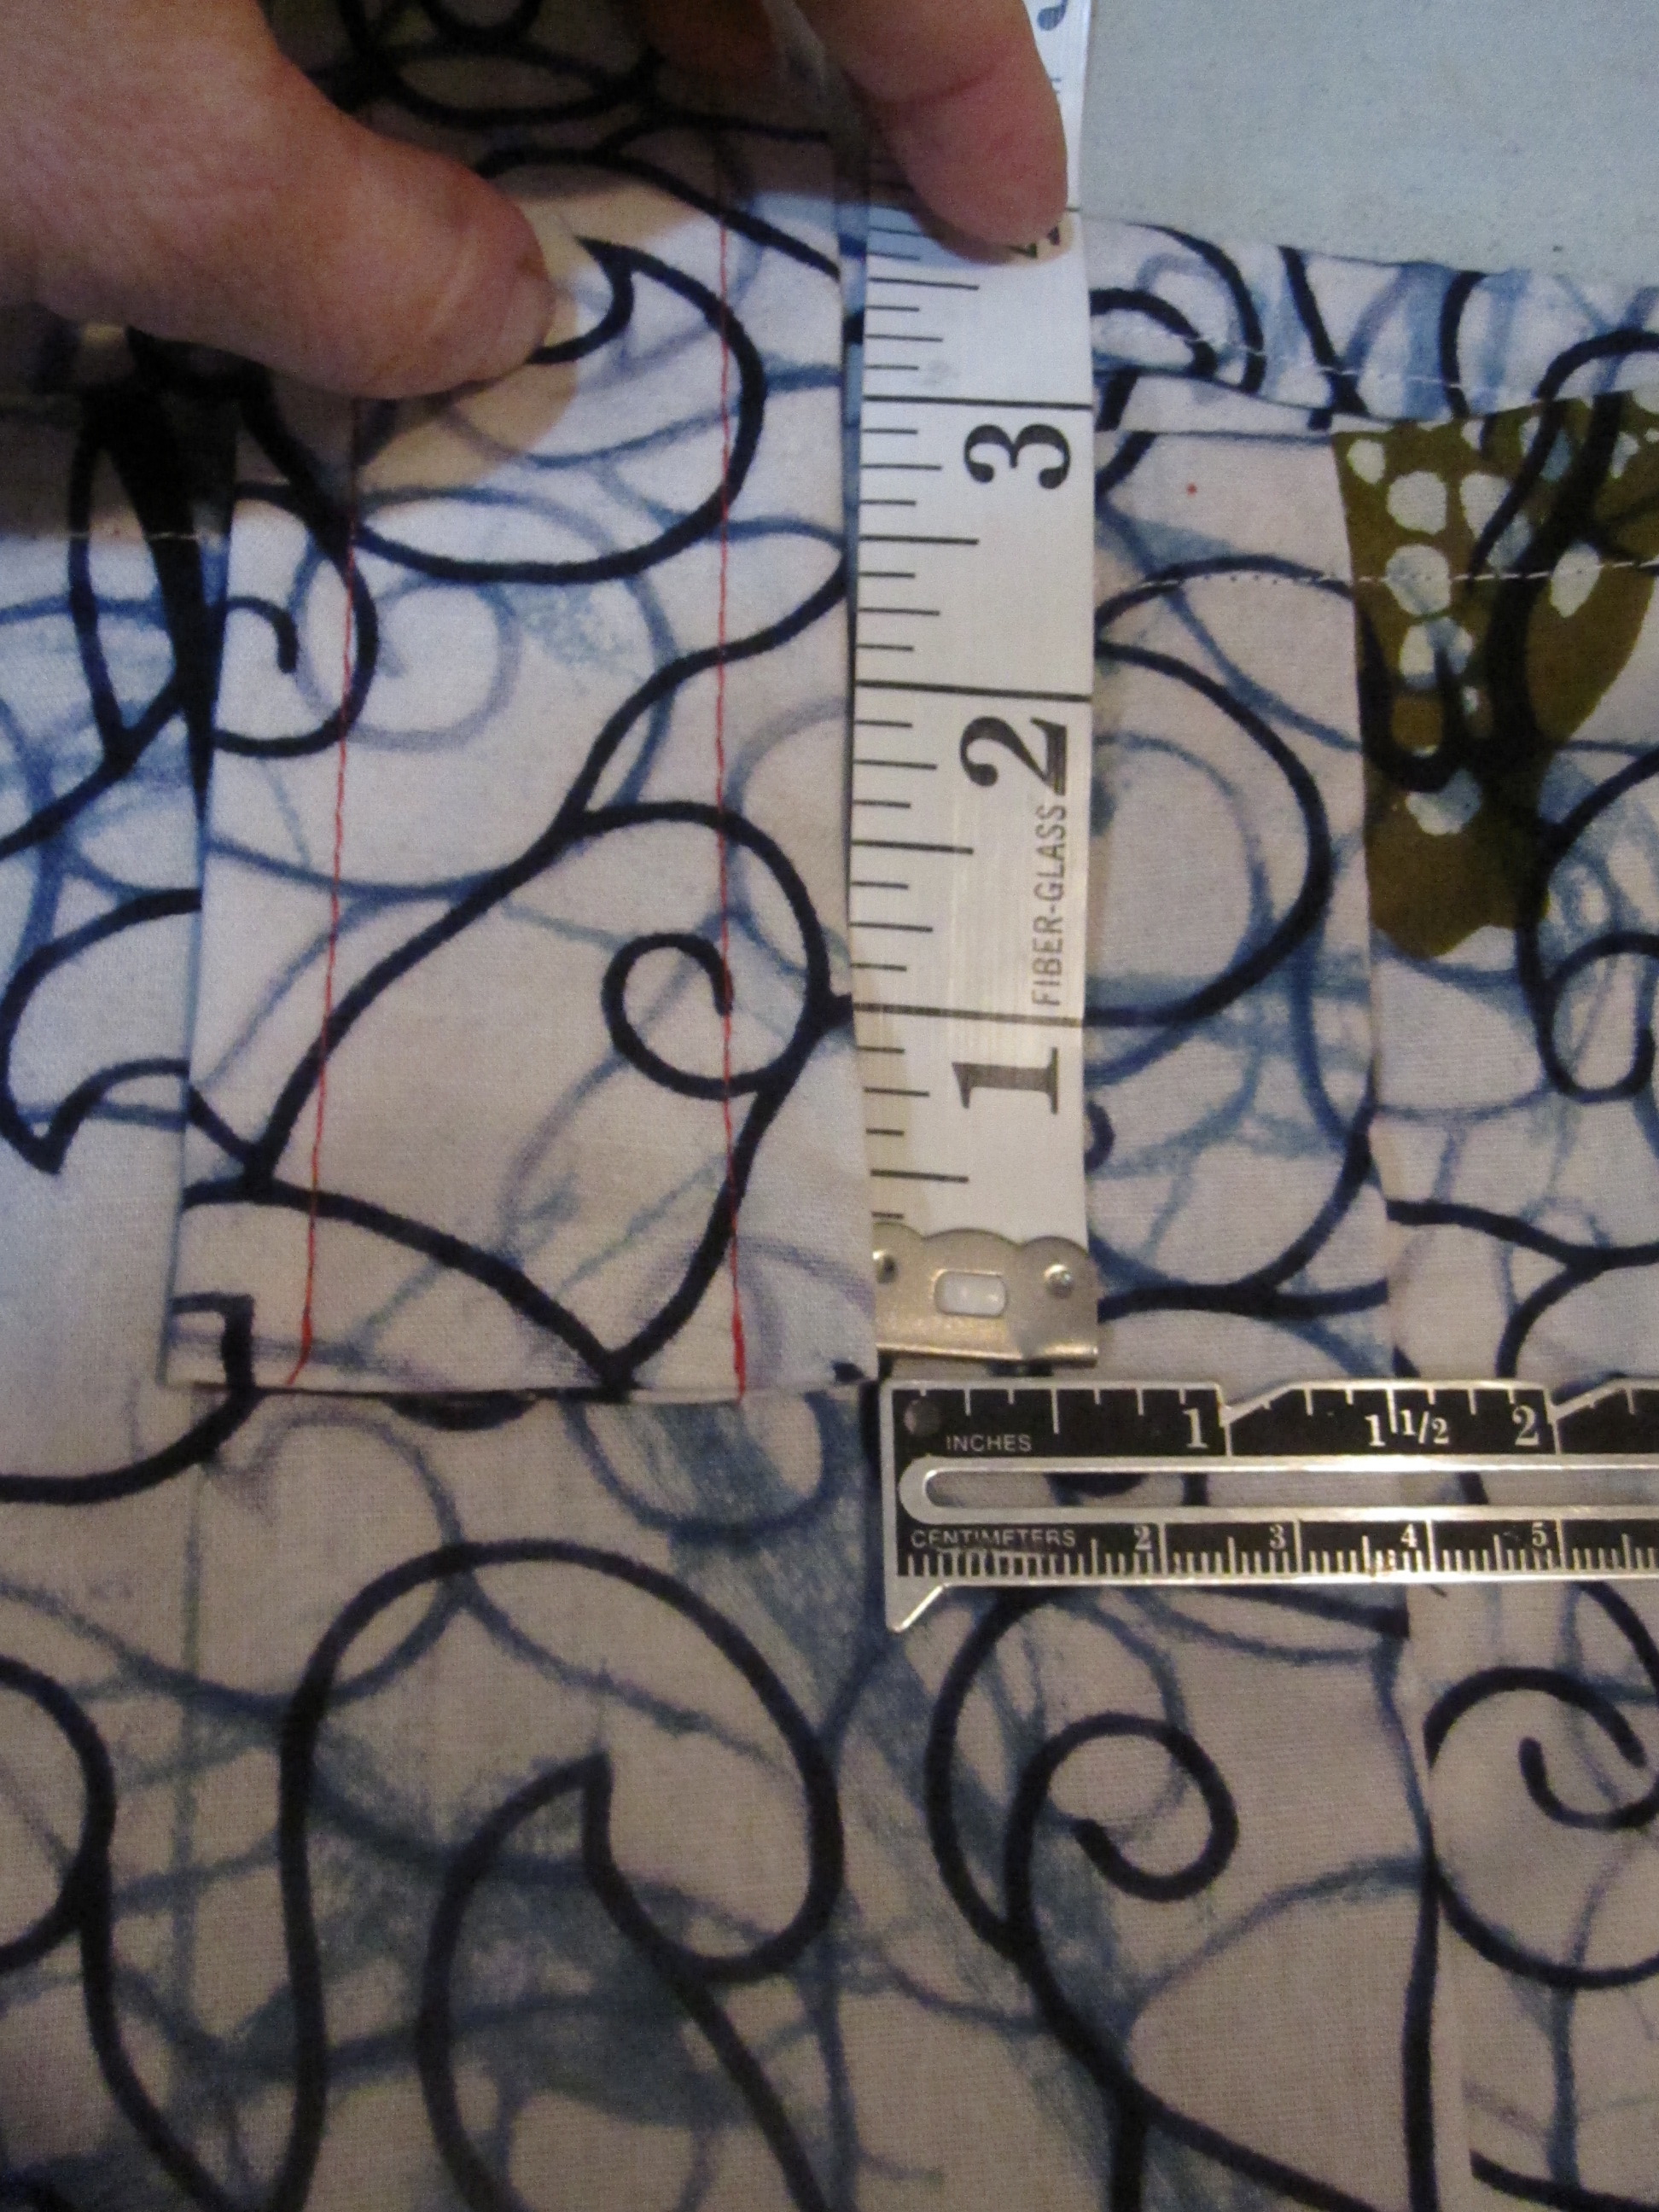
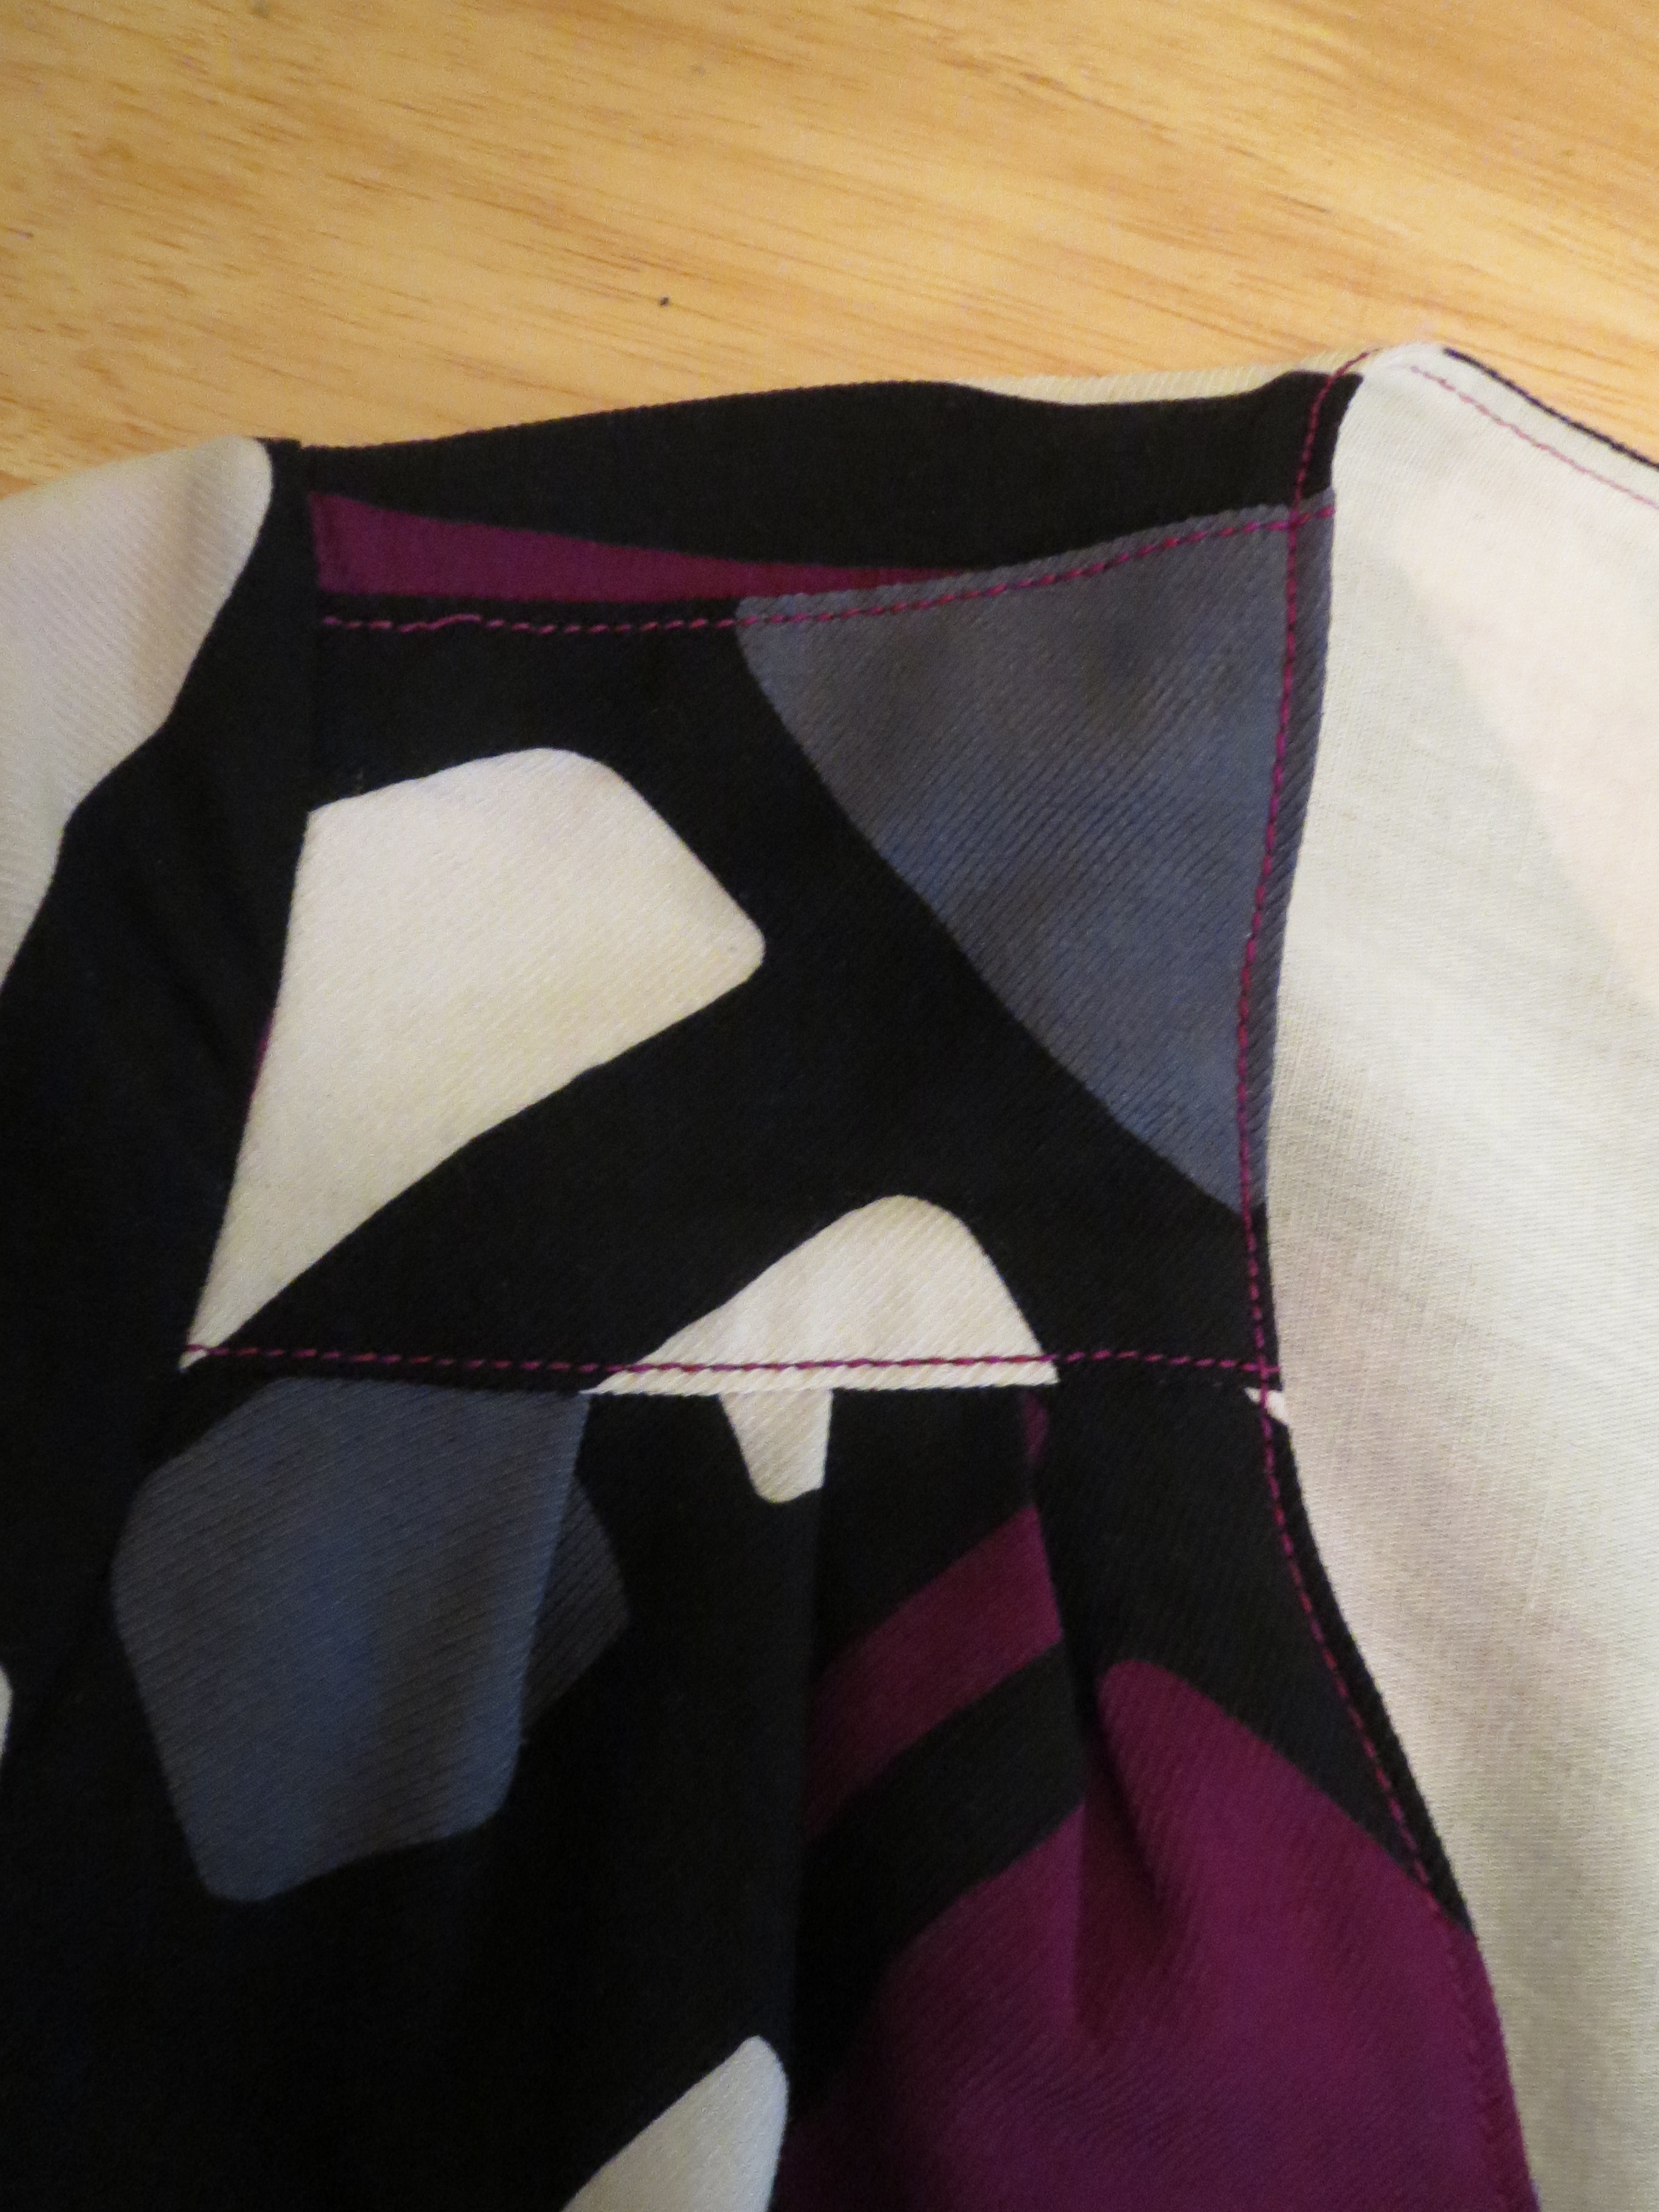
Now we'll sew the casing for the drawstring.  Finish the top edge of your bag.  Again, I used the serger but you can use a zigzag.  Measure 1" from the upper edge and fold this down and press.  To make it look nicer, I next folded under about 1/4" from the top edge, so that when I sew down the drawstring casing I will have a folded edge rather than raw edge showing.

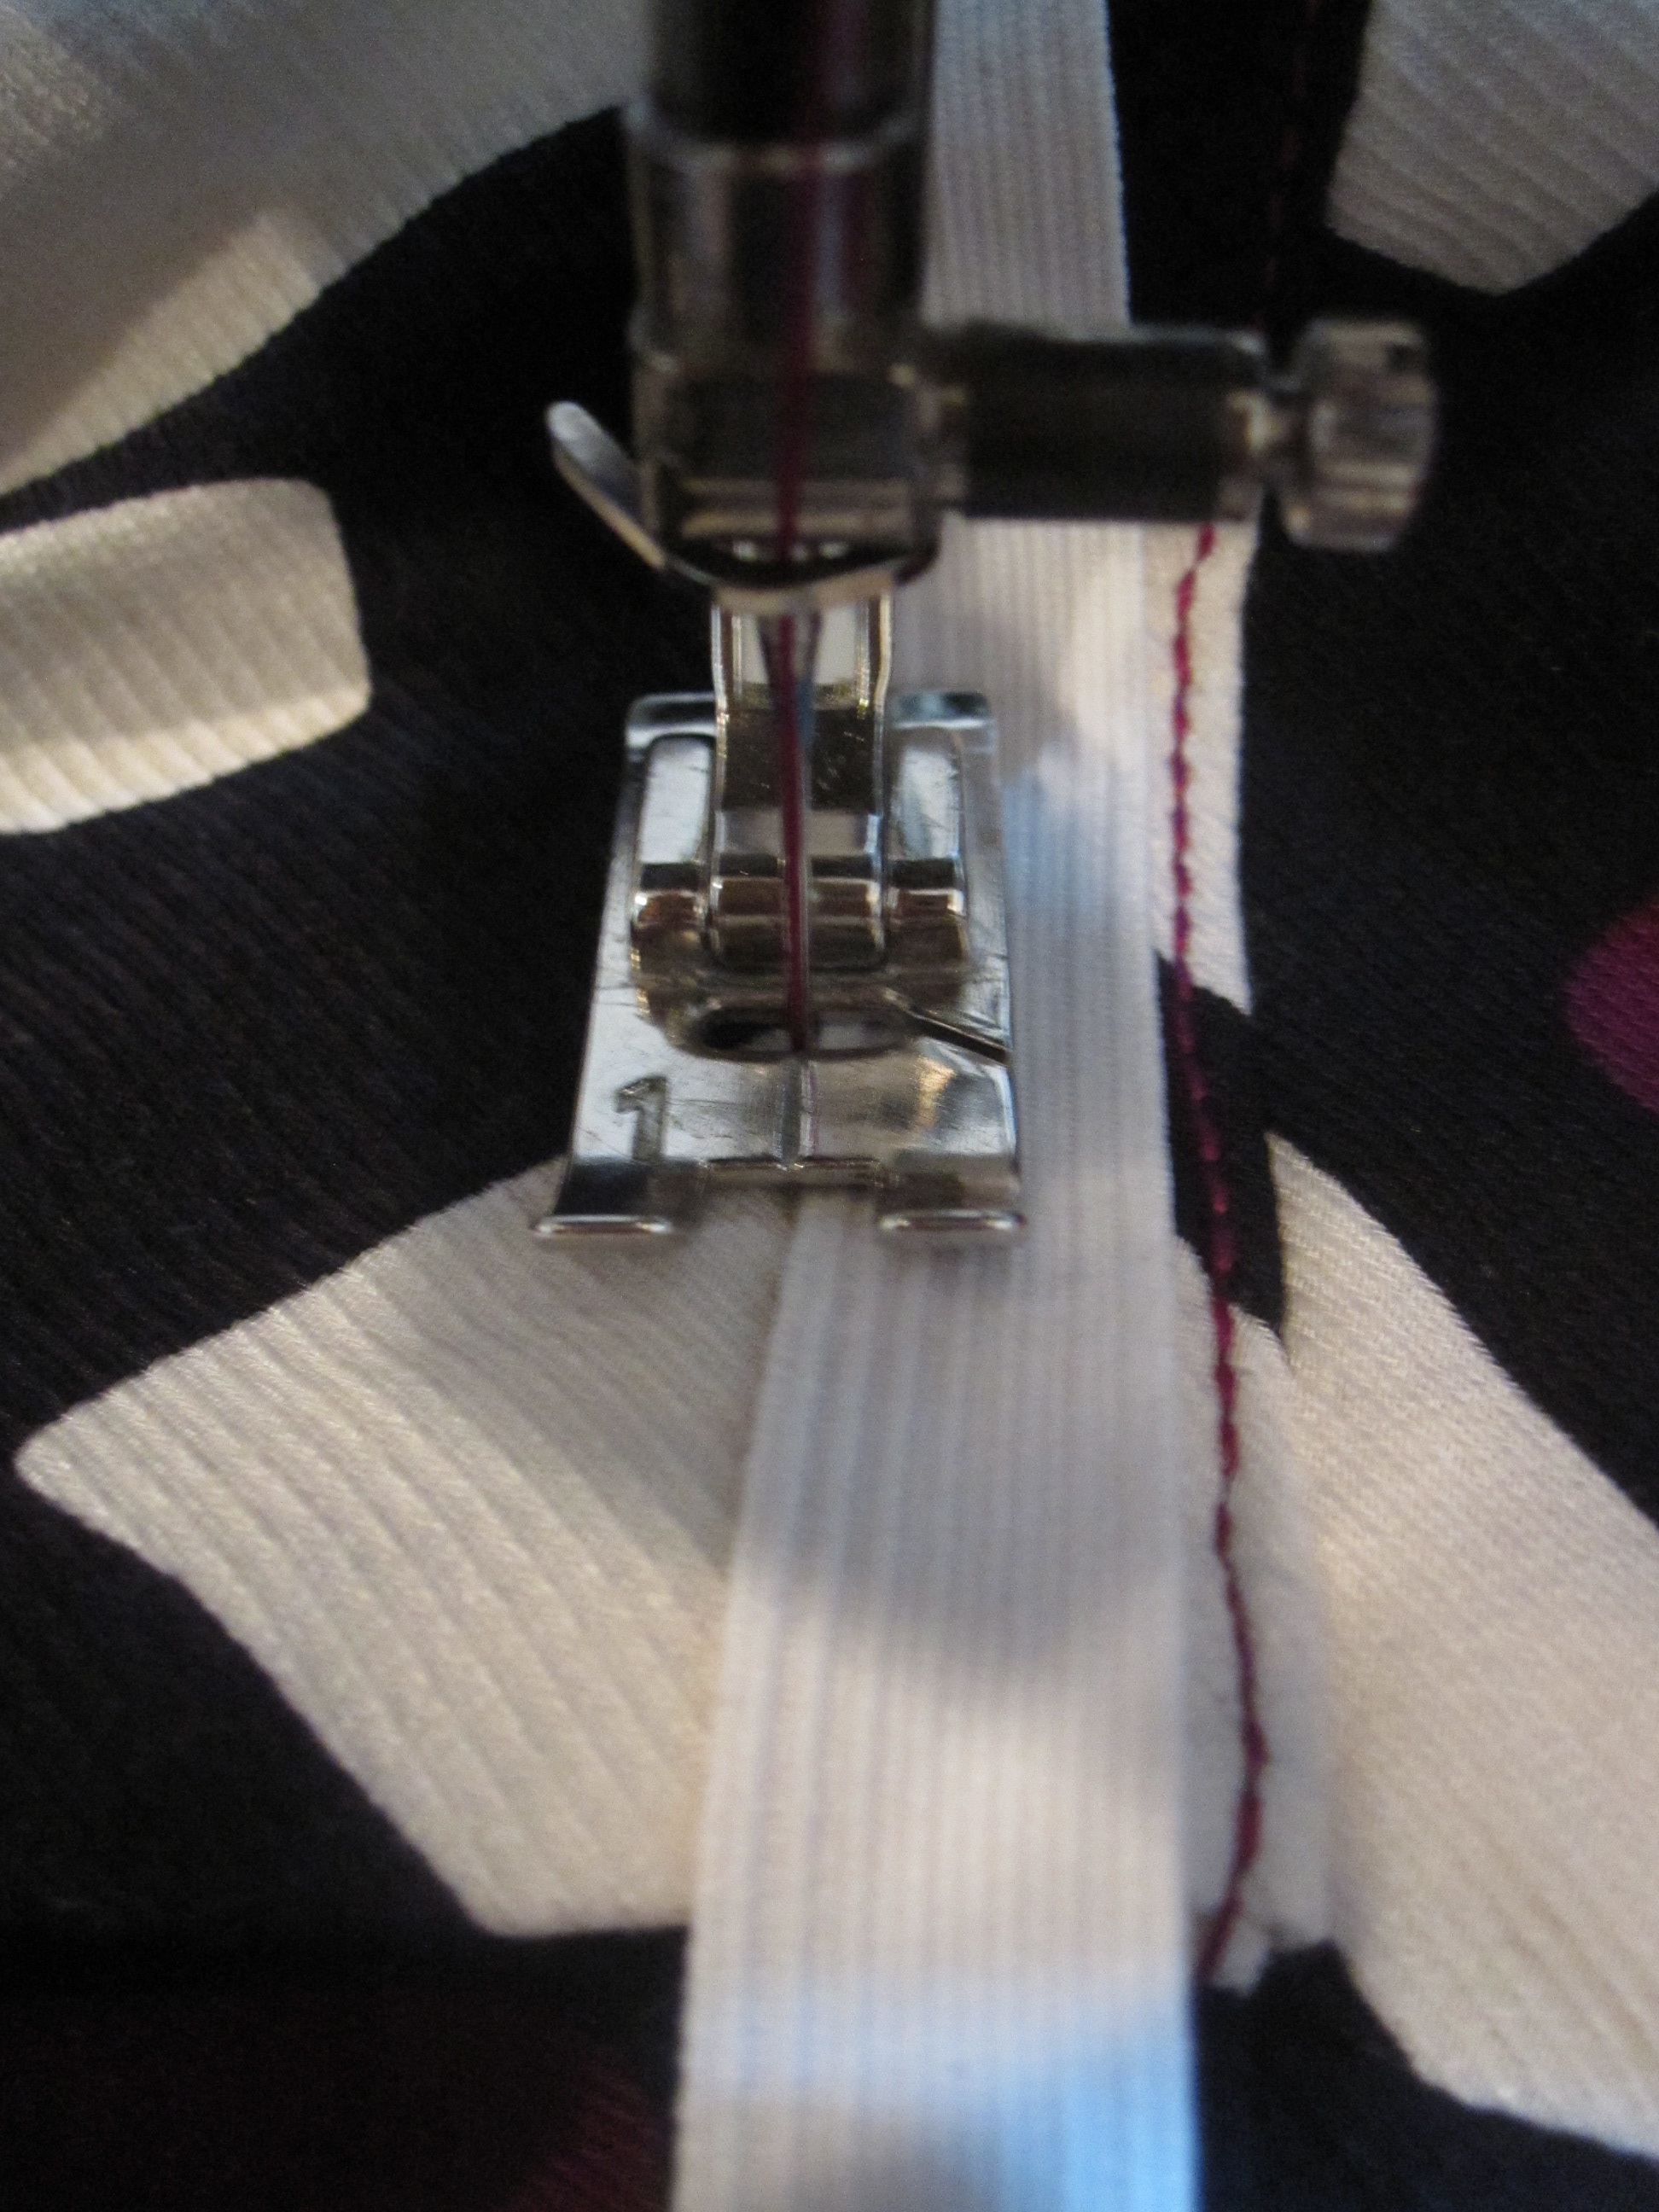
Before we sew down the casing we need to make buttonholes for the drawstring.


Mark Buttonhole Placement


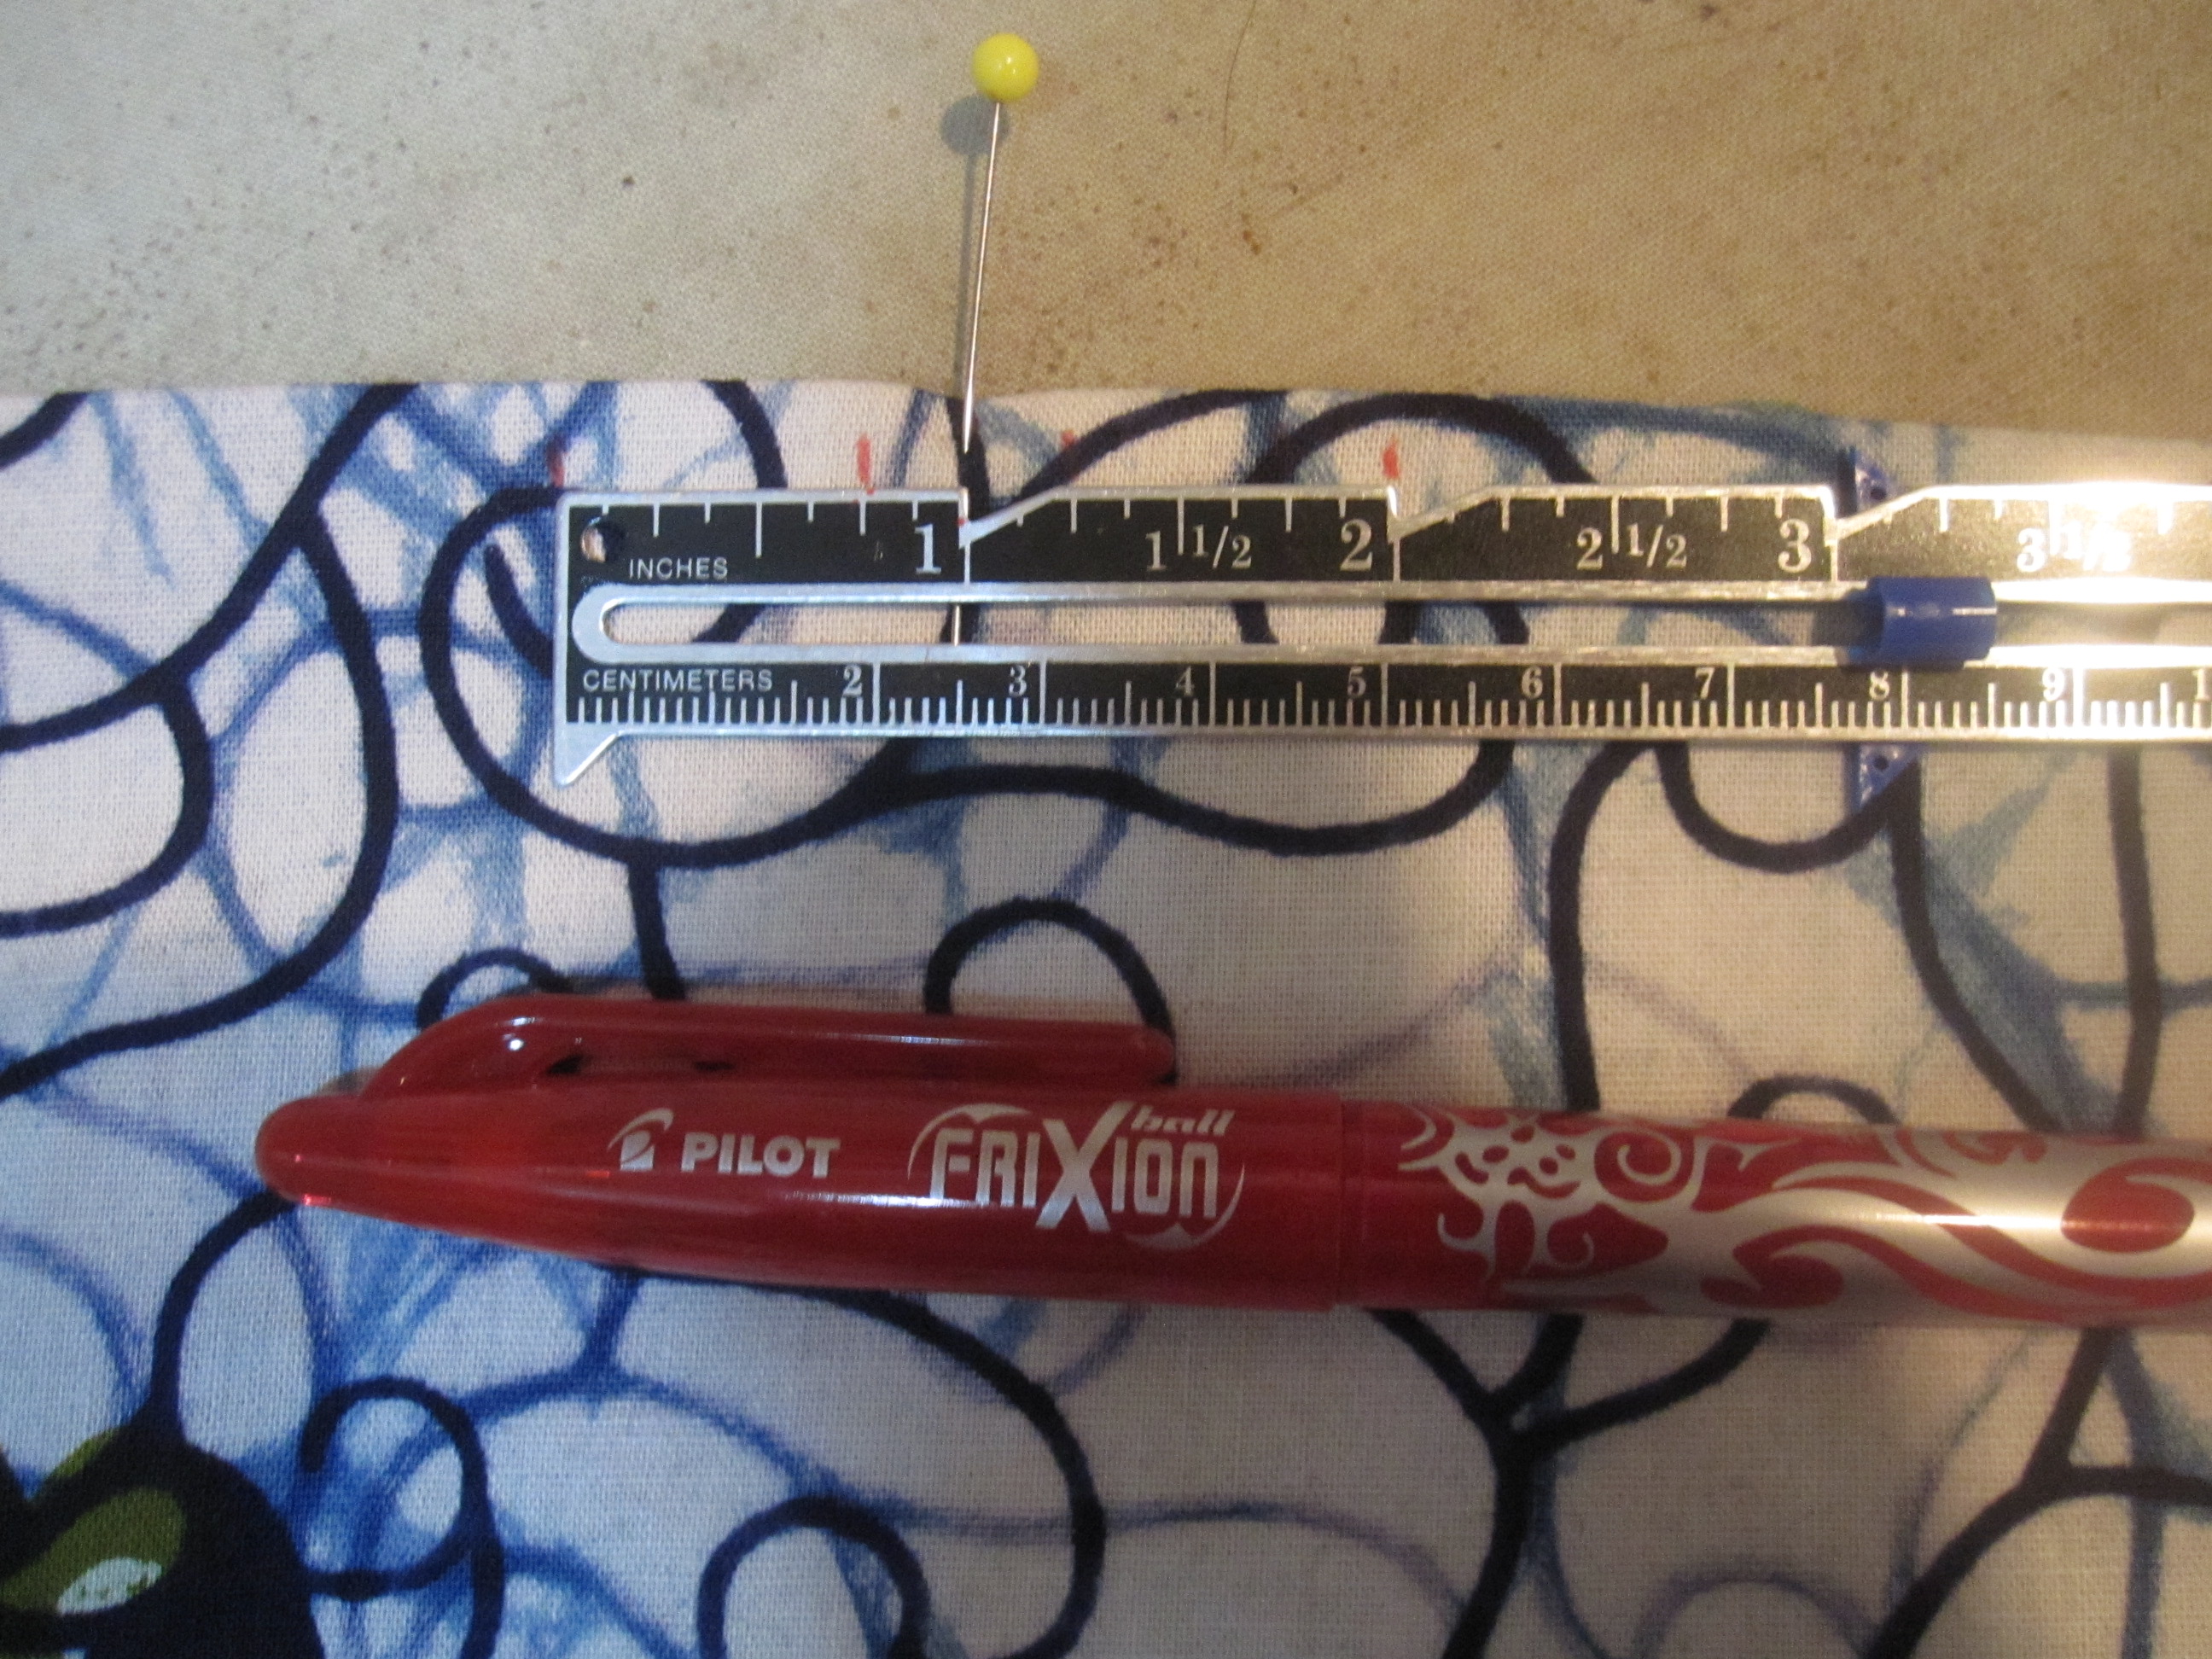
Keeping your fabric folded down 1" the way you pressed it, find the center of one of your front/back pieces.  Here it is marked by the pin.  Measure and mark 1/4" on both sides of the center, and then again 3/4" from your first marking.   You want these markings to be 3/8" from the upper folded edge.  Unfold the raw edge back up.

Buttonholes for Drawstring

Cut small rectangles of interfacing and place them on the wrong side (I cut one fairly long strip and pinned it in place, far enough from my buttonhole markings not to interfere with my sewing.  Because I used a Frixion pen, fusing the interfacing in place would have erased my markings).  Make the buttonholes only on one layer of fabric, the layer below the fold, between your markings and cut them open.

Stitch Casing

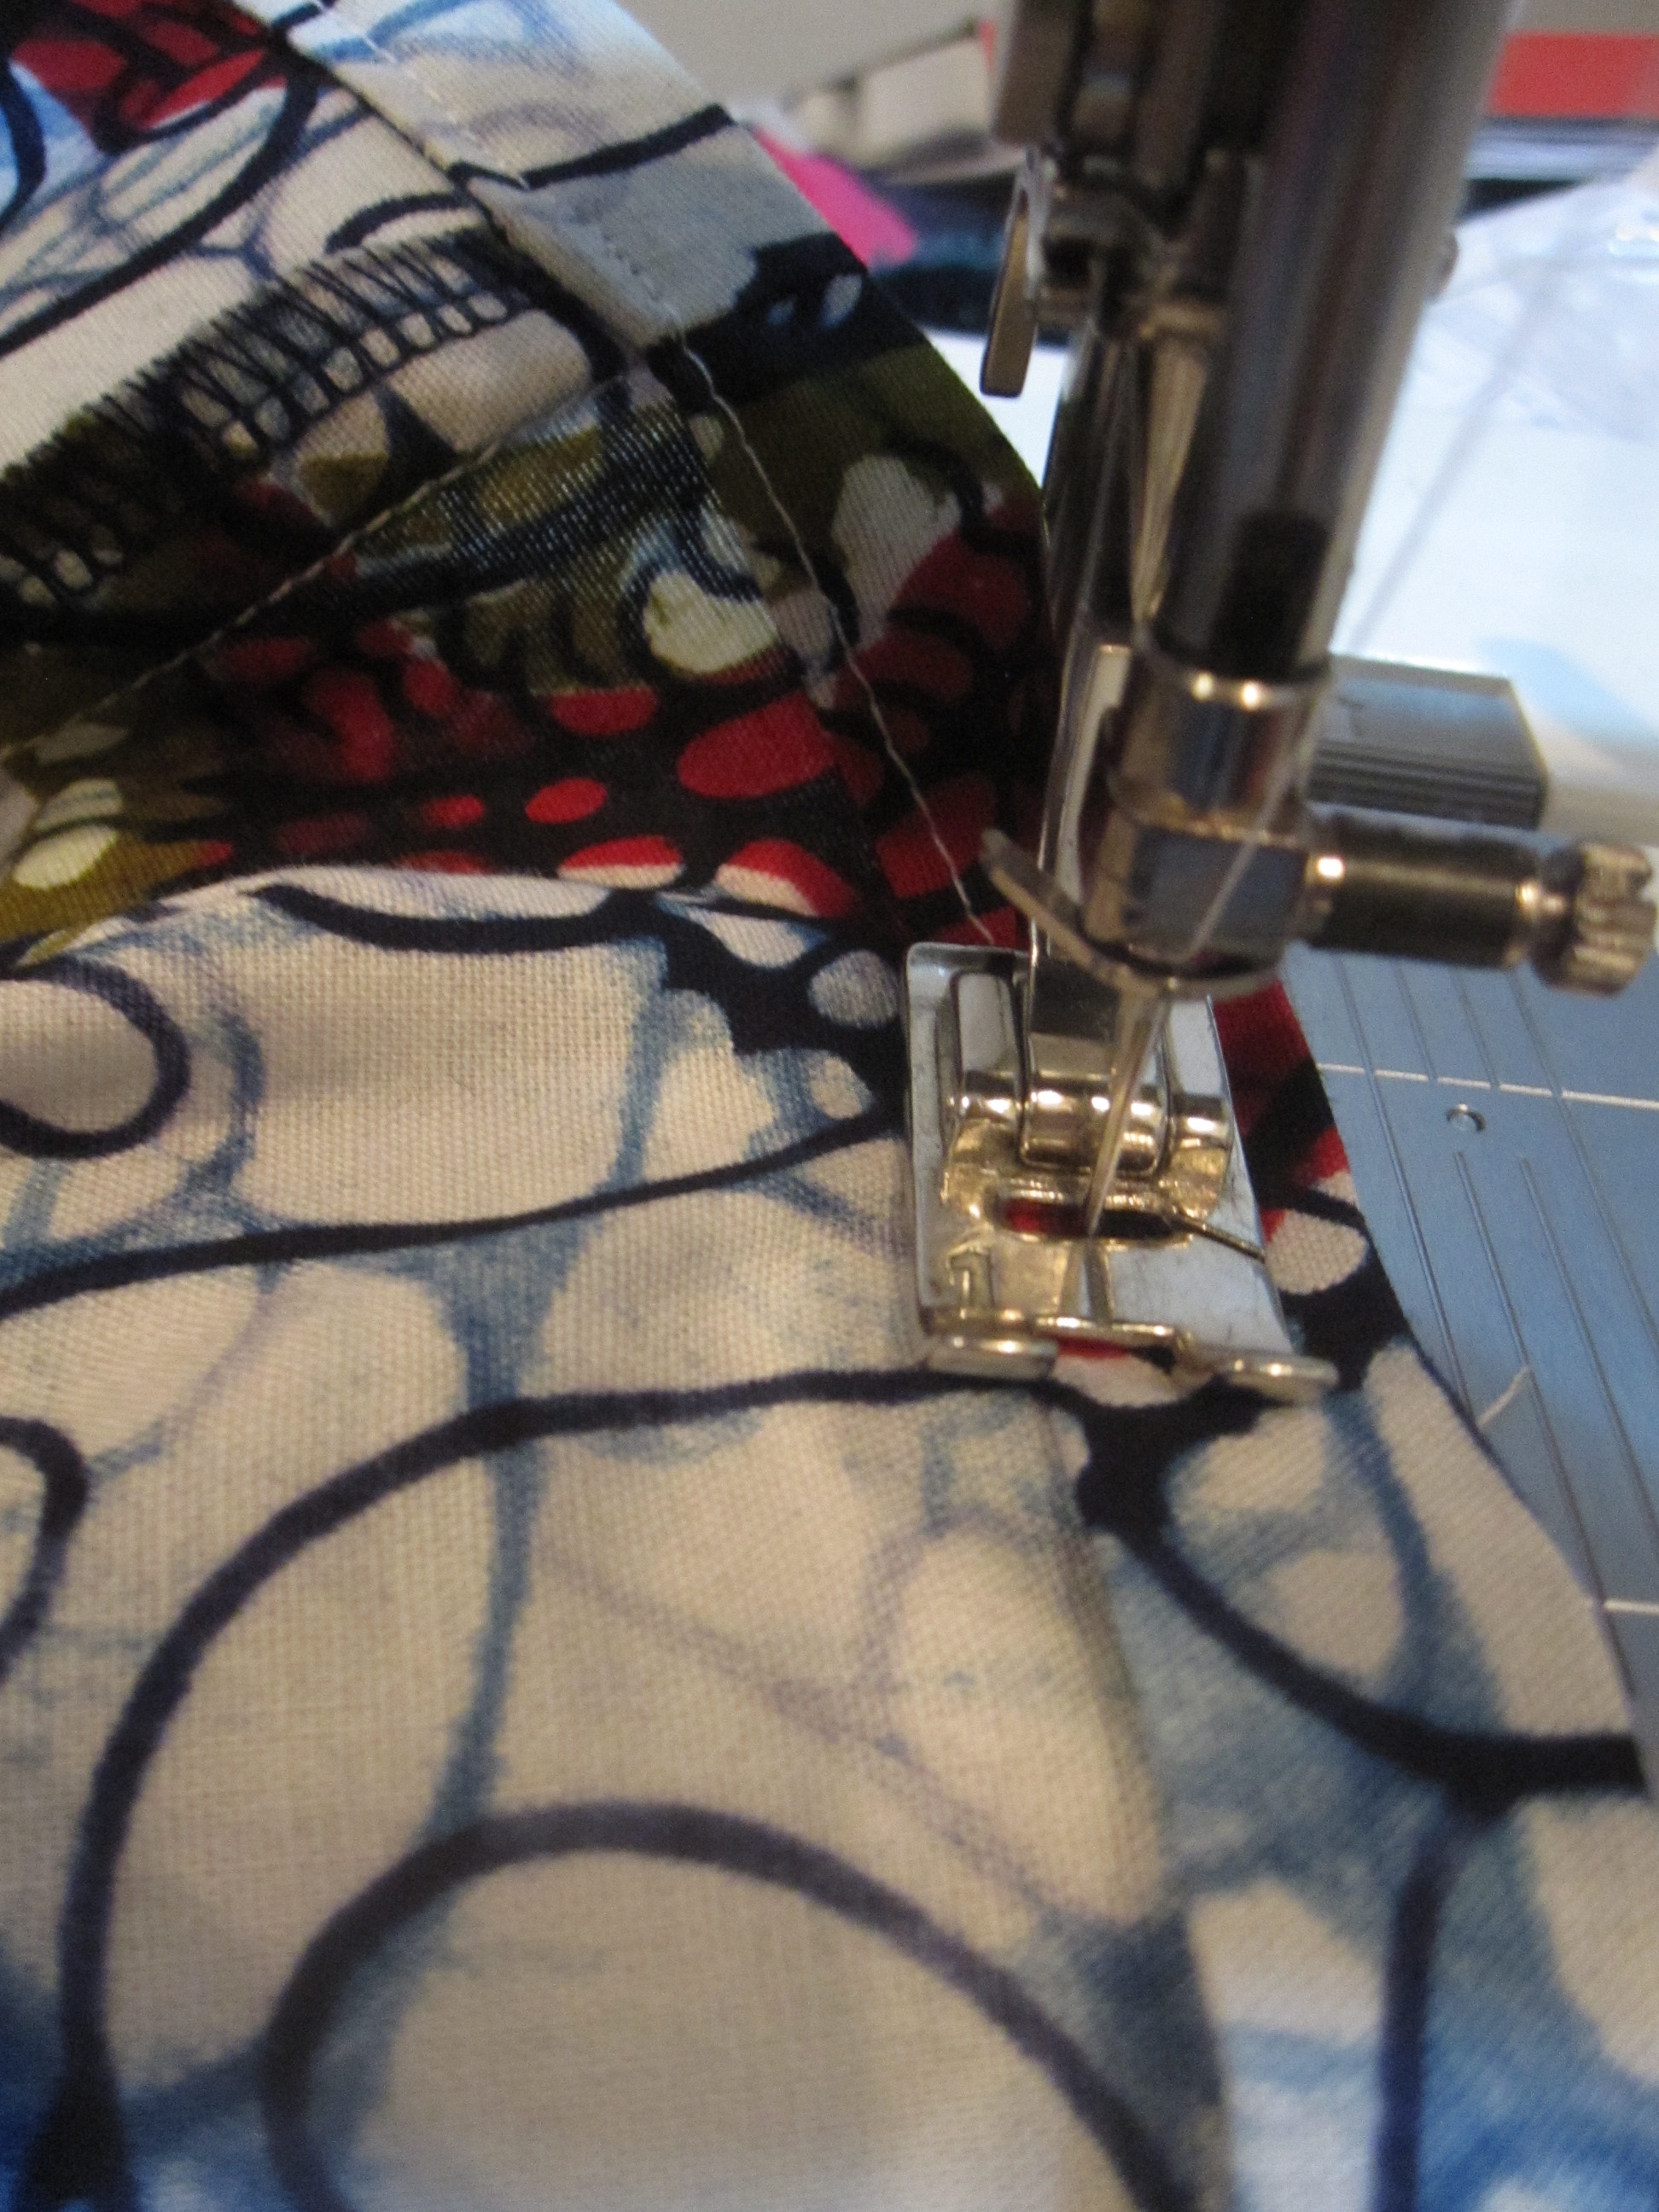
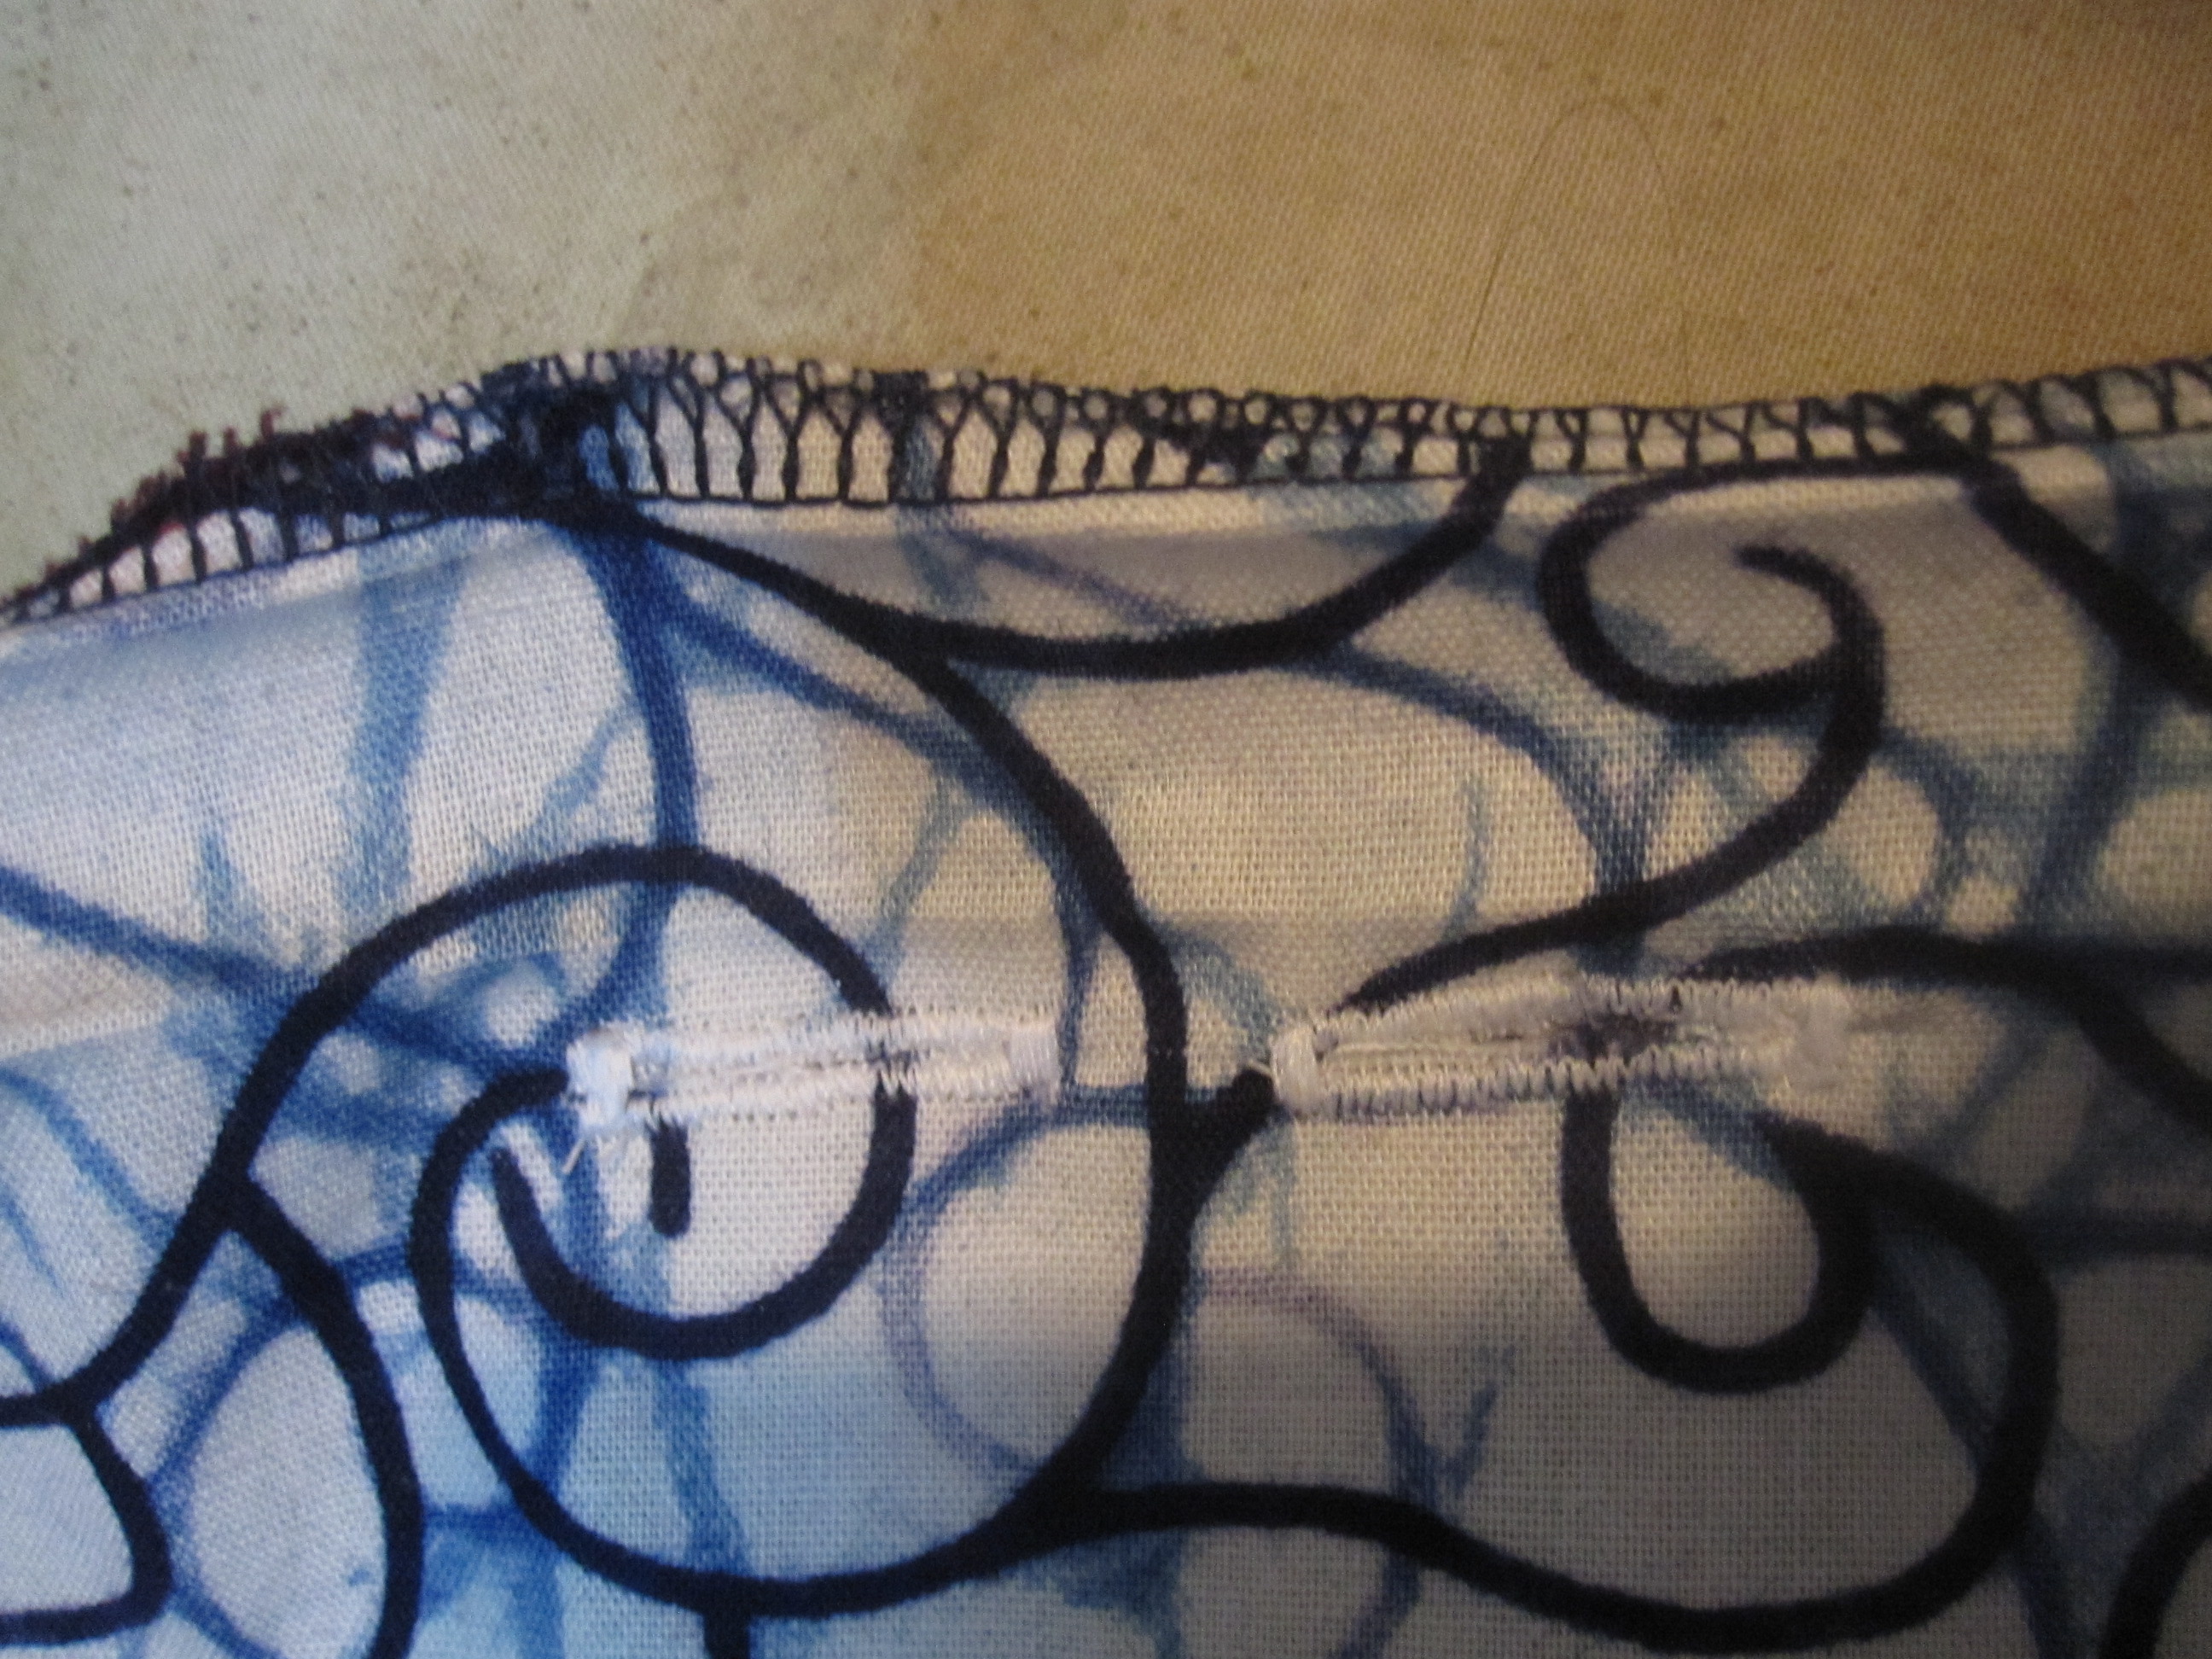
Now we're ready to stitch down that casing.  Fold down your 1 inch again, and sew close to the raw edge or fold all the way around the top of your bag.  Make sure that your buttonholes are above your casing stitch line.


Use Nailpolish to Prevent Drawstring Fraying


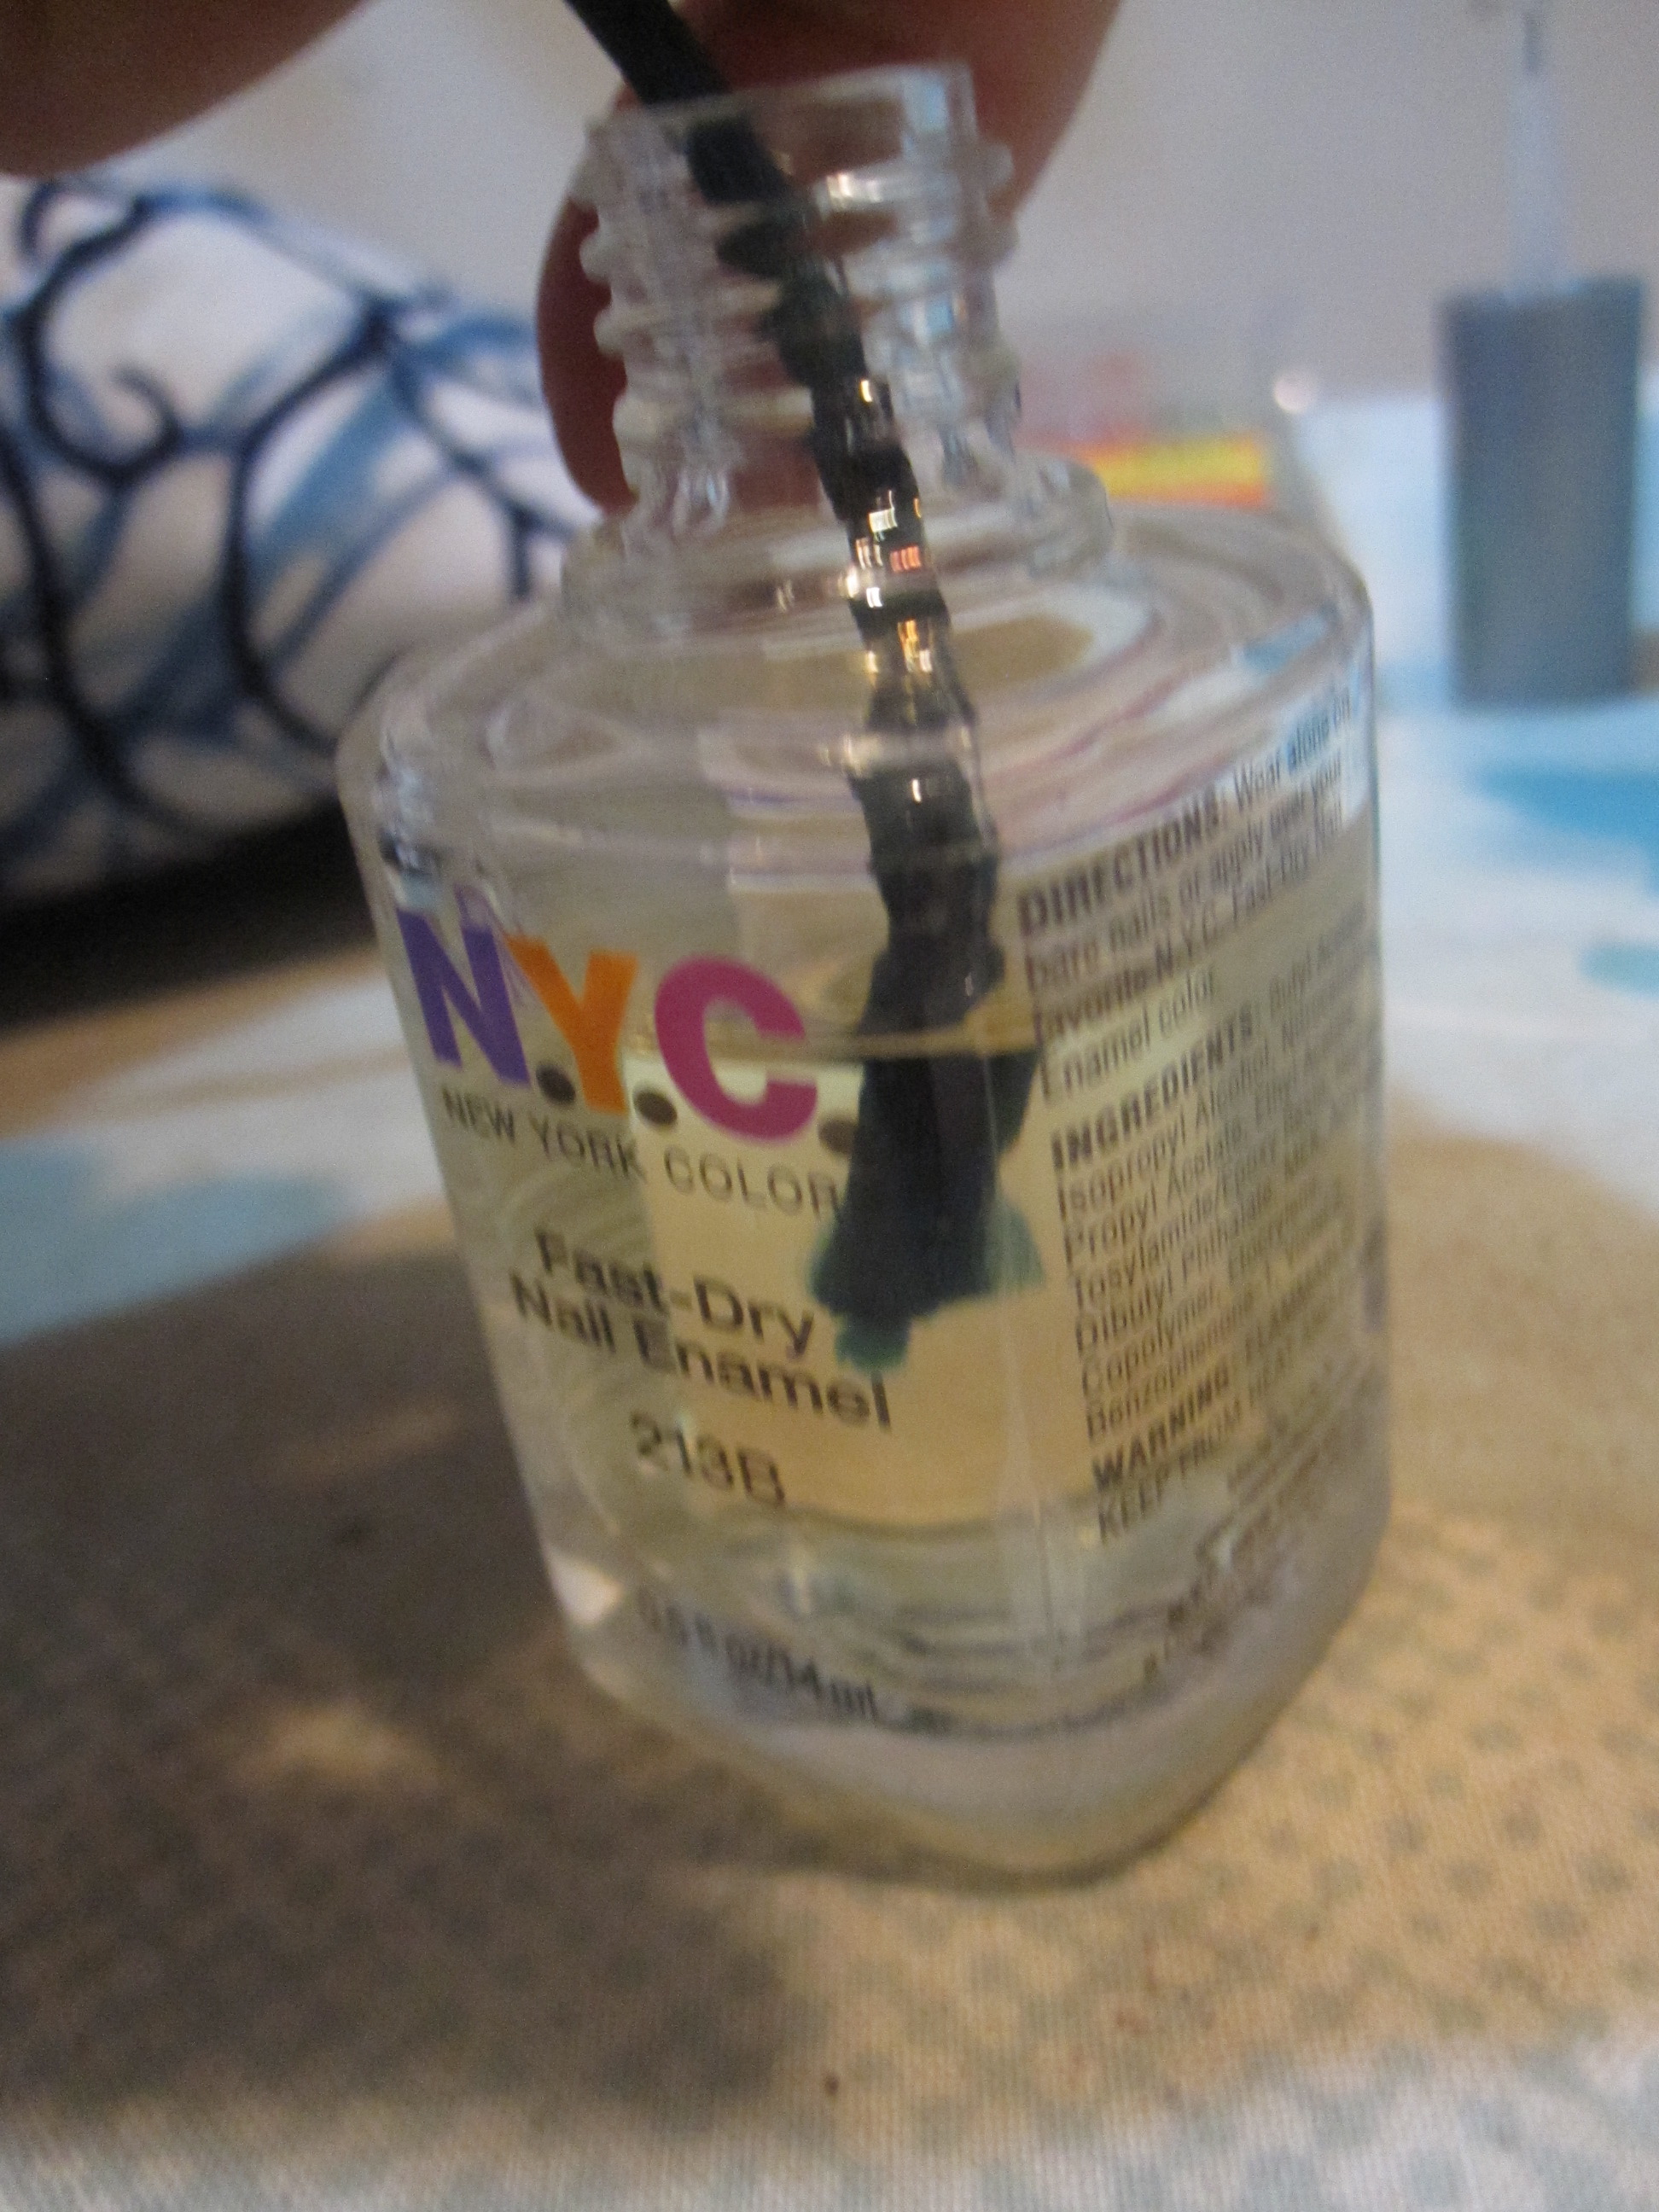
Cut your drawstring to about 50 inches.  You want it to be as long as your opening plus another 14 inches or so.  I used rattail braid (available from Joann).  To keep it from fraying, I dip the cut end in nail polish and let it dry.


Thread Cord through Casing


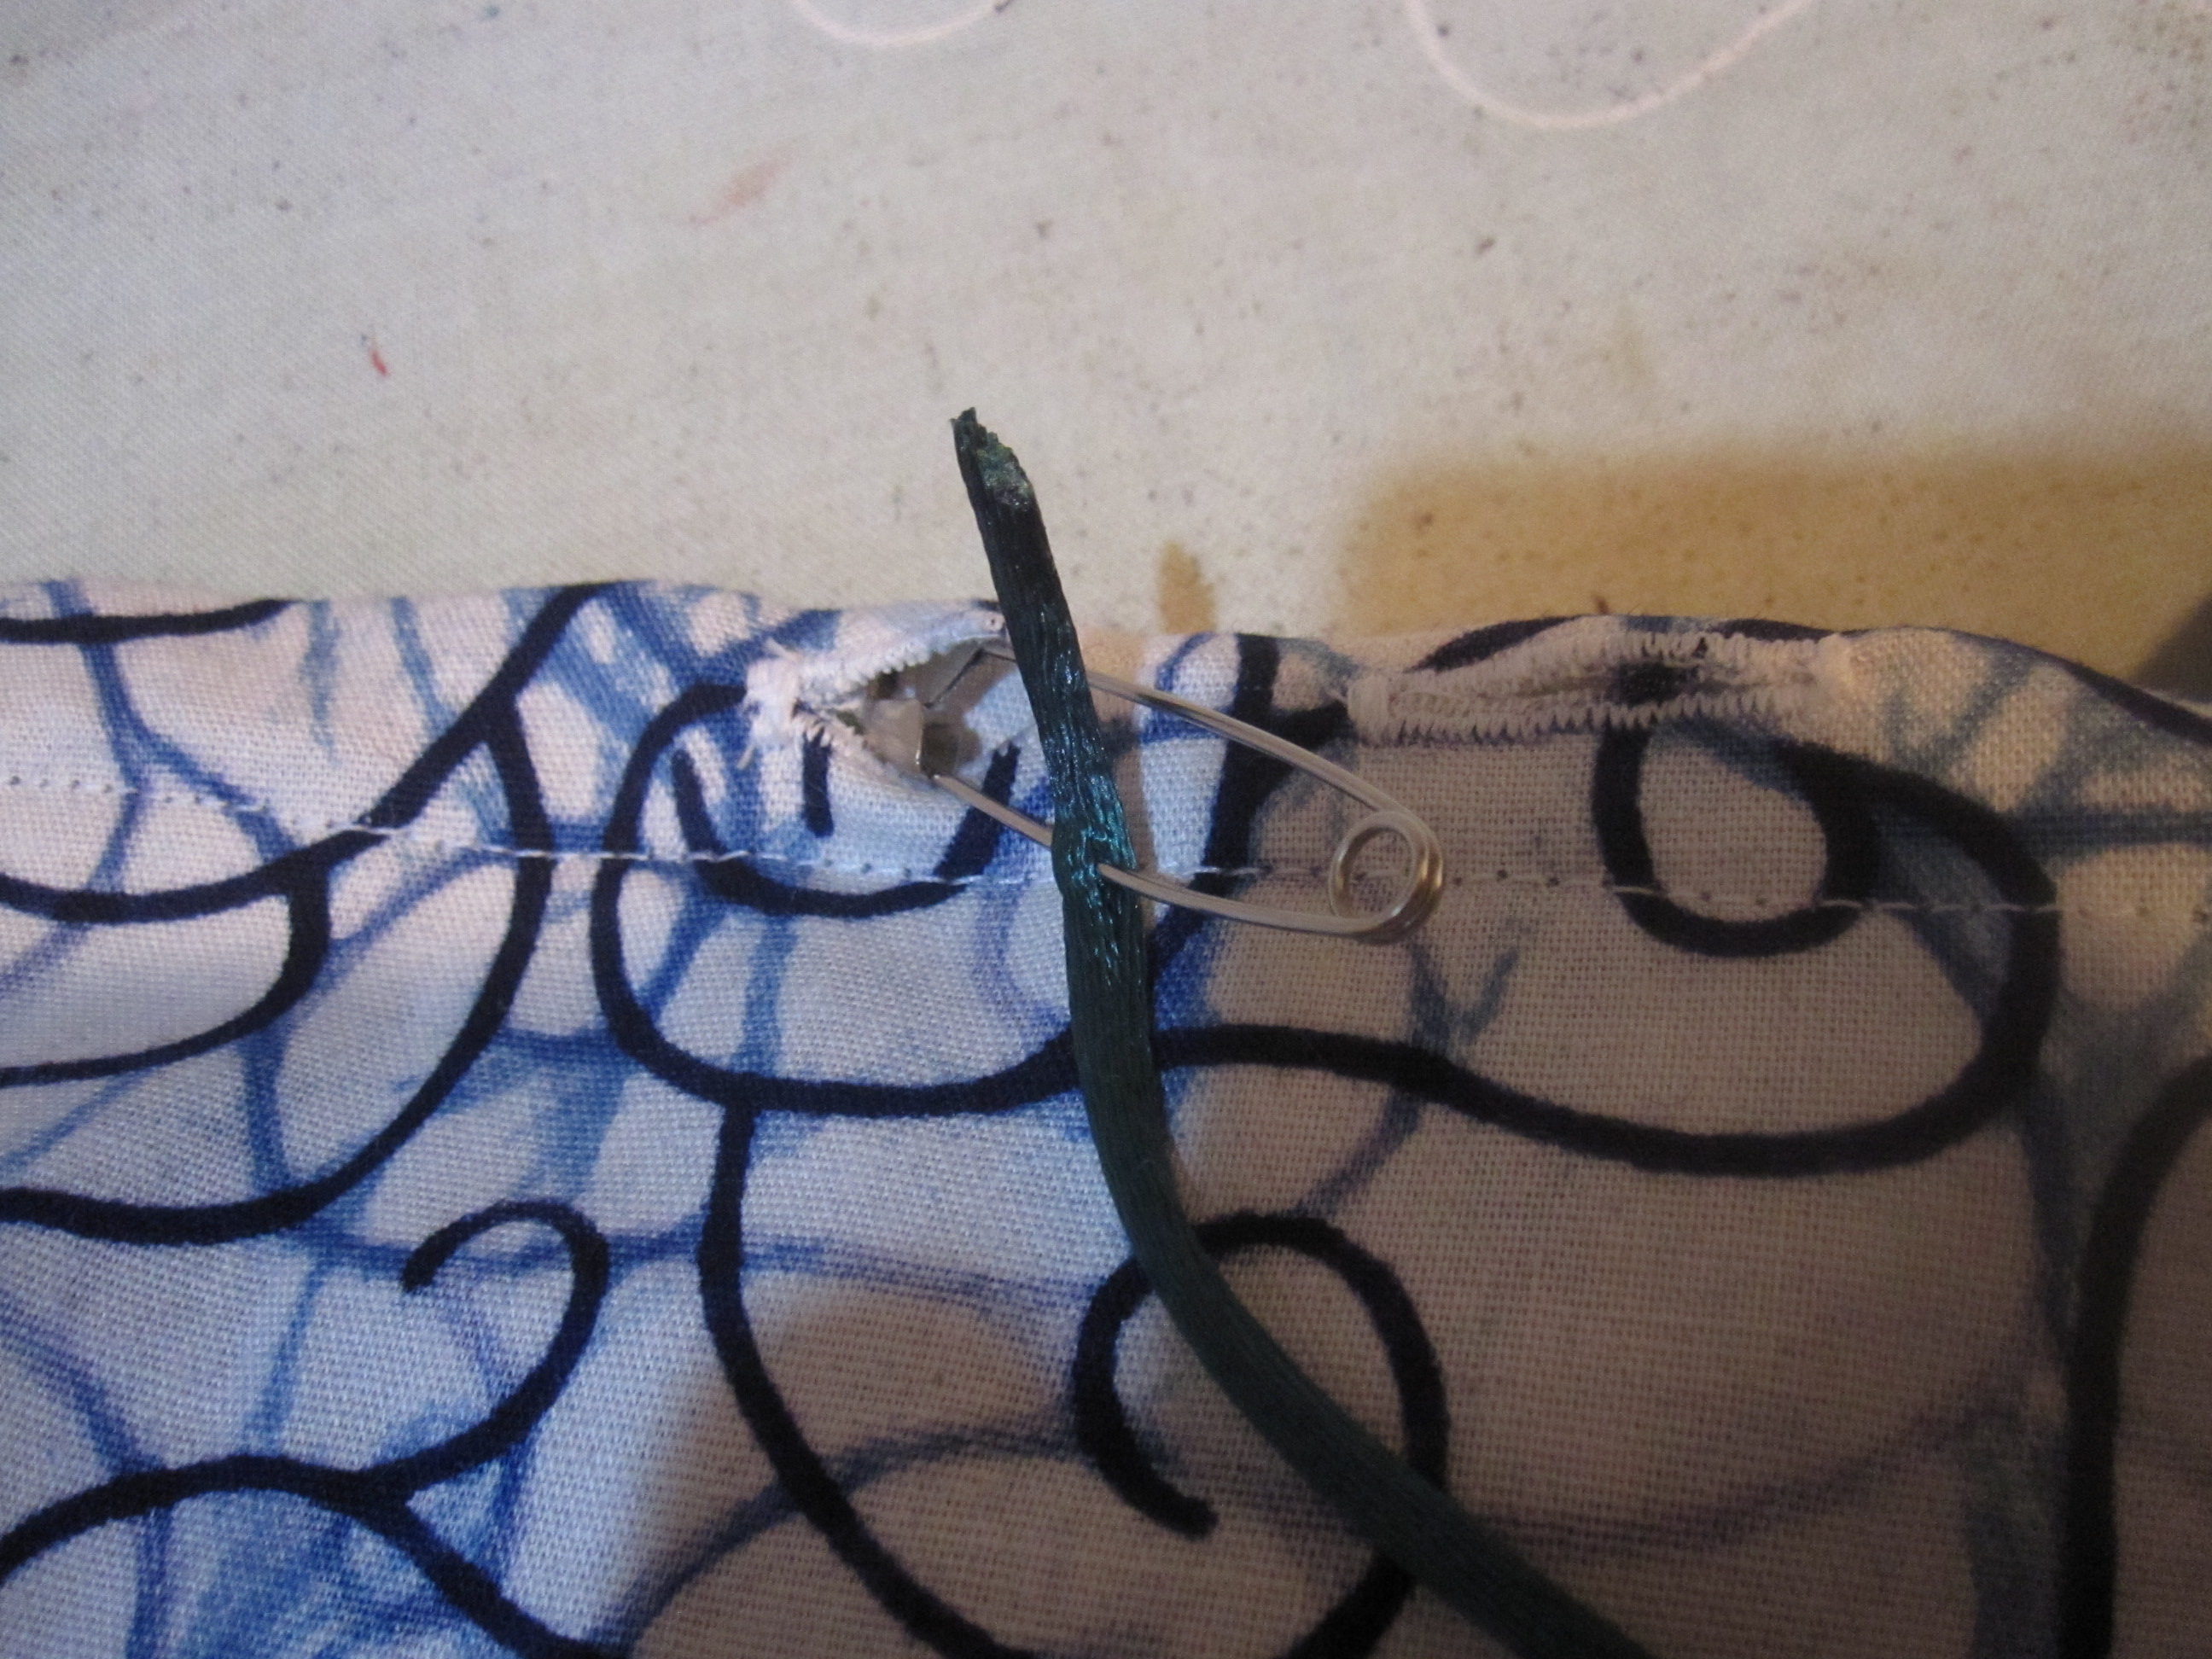
Once it's dry stick in a safety pin near one of the ends and thread it through your casing, in one buttonhole and out the other.


Knot Drawstring Below Cord Stop


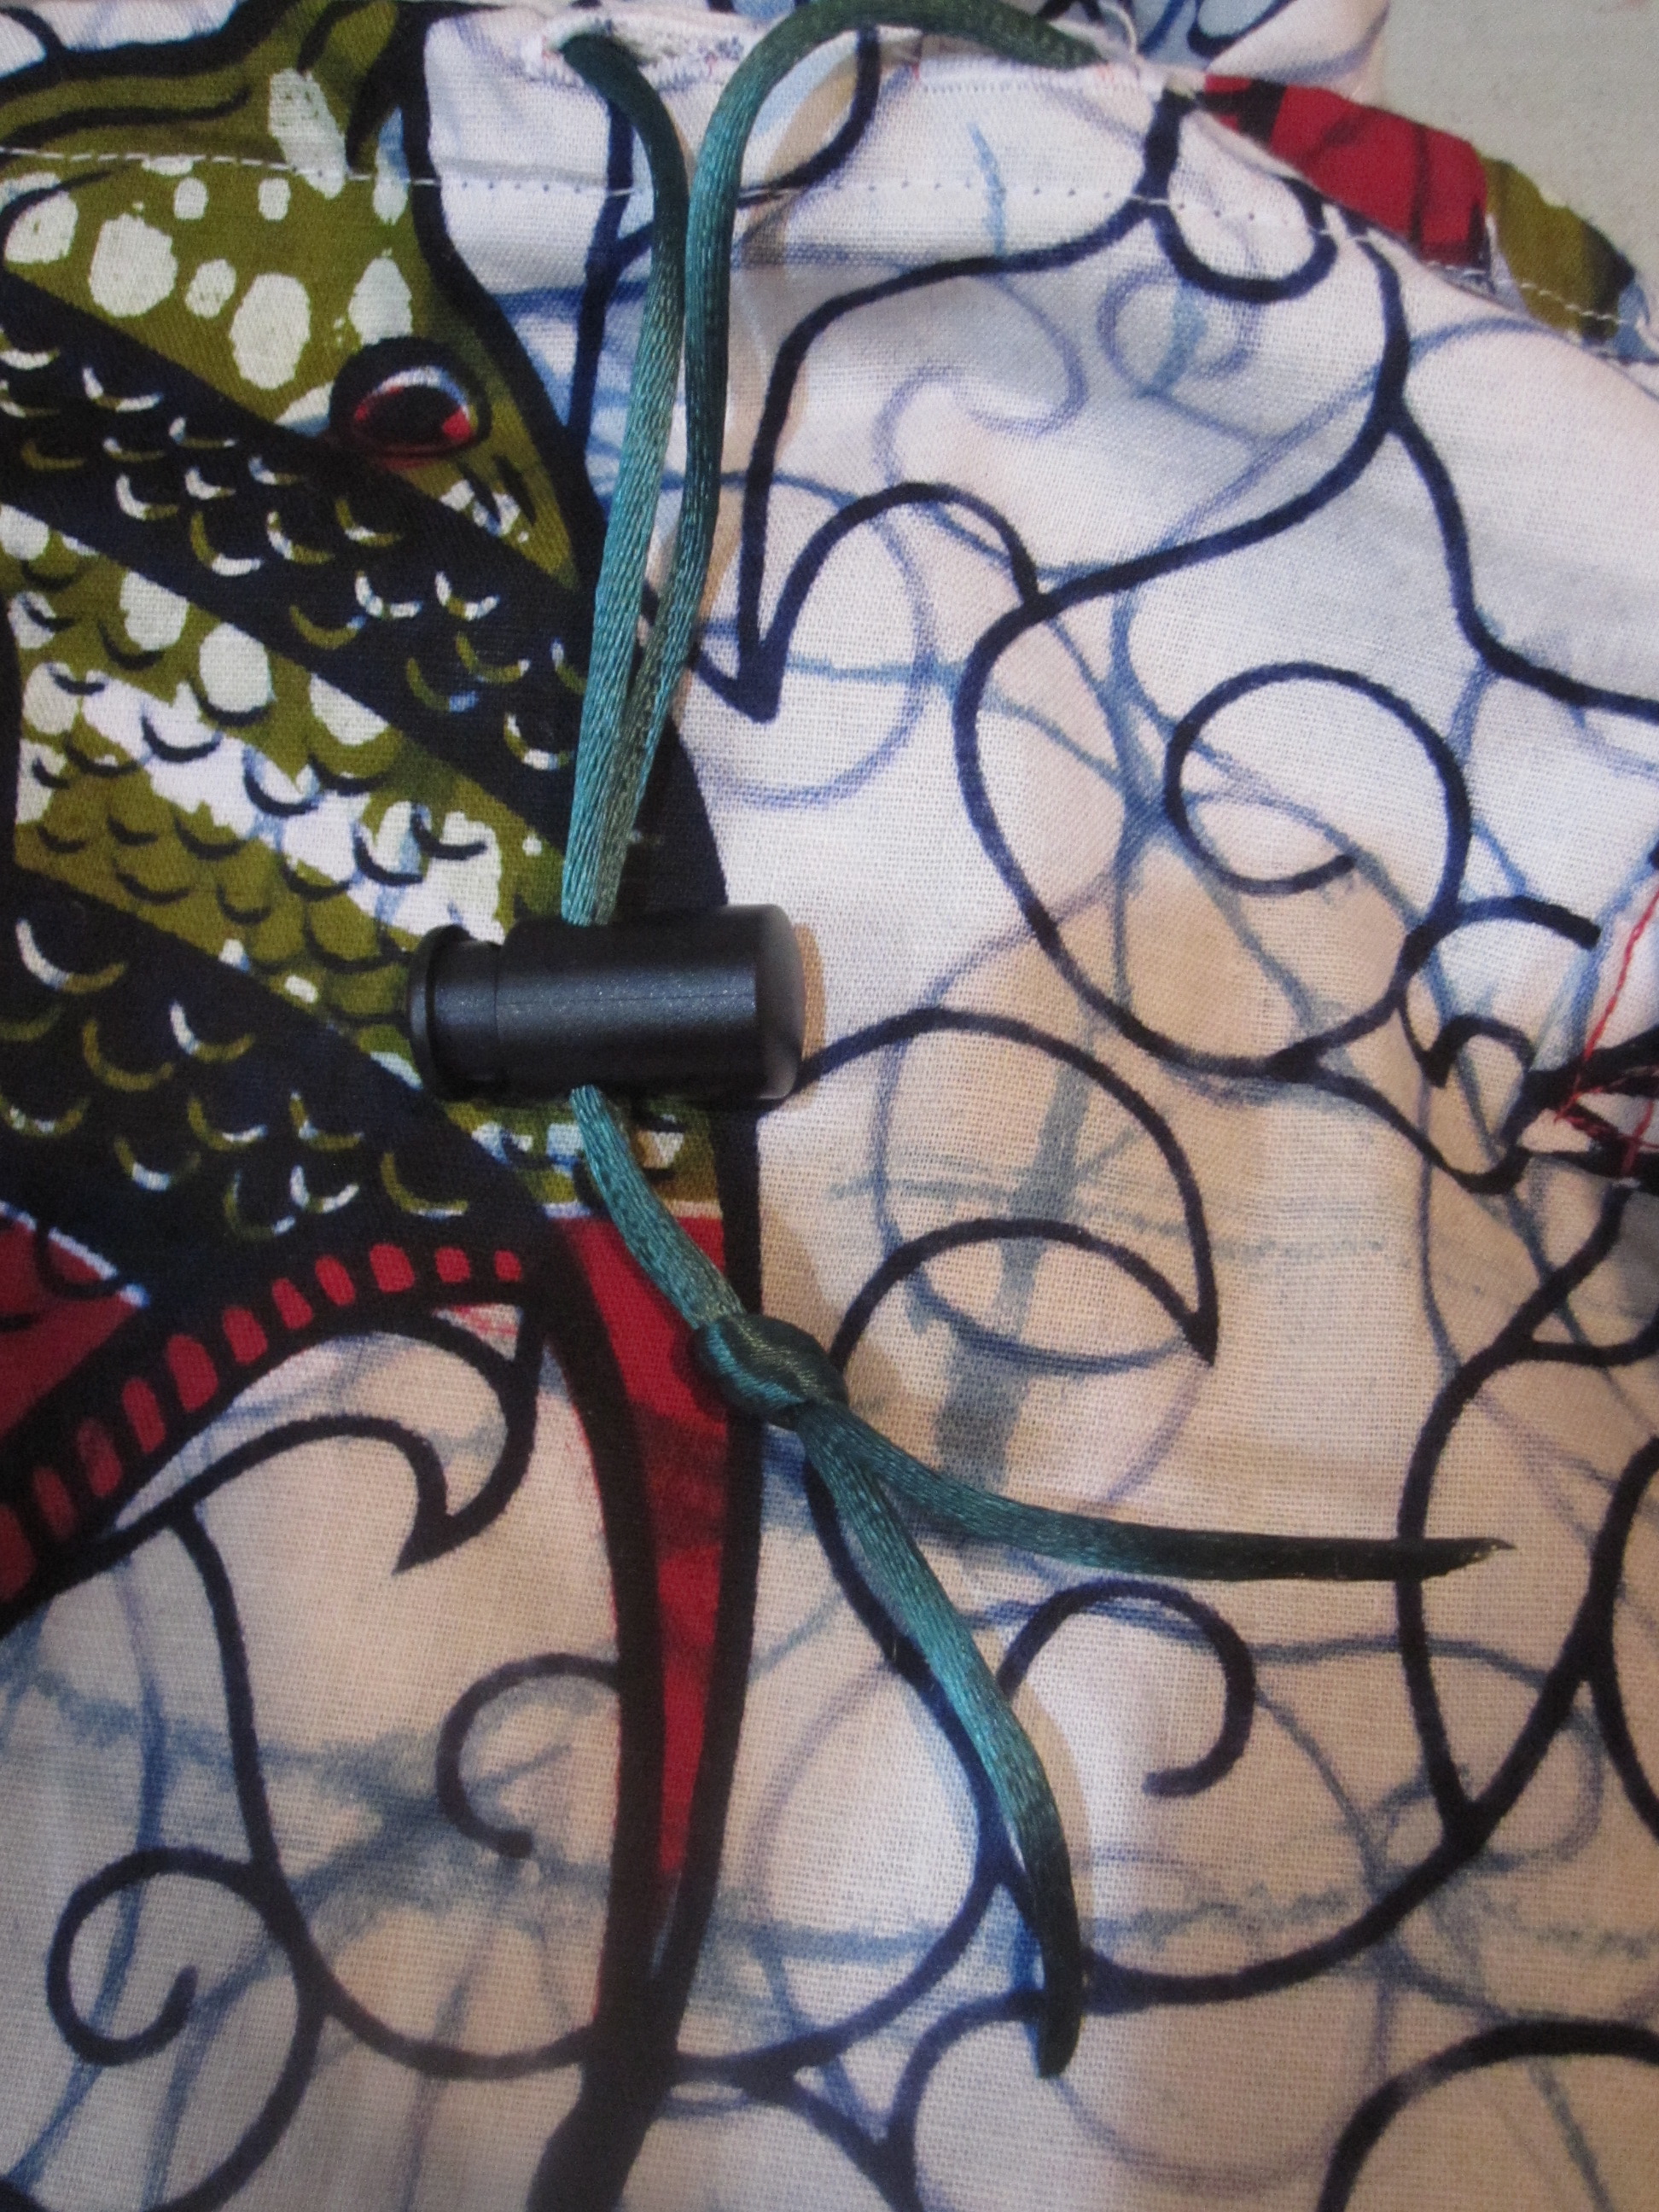
After you've threaded your drawstring through the casing, put your cord stop on and knot the ends to keep from accidentally pulling off the cord stop.


Handle turned and pressed


Next are the handles.  I interfaced the handles for sturdiness, but it's not strictly necessary.

Fold your strips in half lengthwise (so they will be 2.75" wide and 26" long) and sew the long edge.  Turn them right side out using a large safety pin (as shown in this video).  Roll them so that the seam allowance is in the middle, rather than on one of the sides (this is purely aesthetic, you can put the seam allowance wherever you want) and press flat.

Turn In Ends of Handle

Now you're going to turn those raw edges to the inside.  Just fold 1/2" to the inside all the way around and press.  If you find this too hard, zigzag the raw edges together and just fold them toward the side with the seam allowance.  Topstitch all the way around the handles, catching those turned under ends.


Measure Handle Placement


Now it's time to sew your handles in place.  One handle will be sewn to each front/back piece.   Measure down 3" from the top of the bag (the top being the fold for your drawstring casing) and 1 1/2 inches in from the side seam and mark this spot.  That is where the lower outside corner of your handle will go.  Mark this spot on the right and left sides of both the front and back.


Sew Straps With X


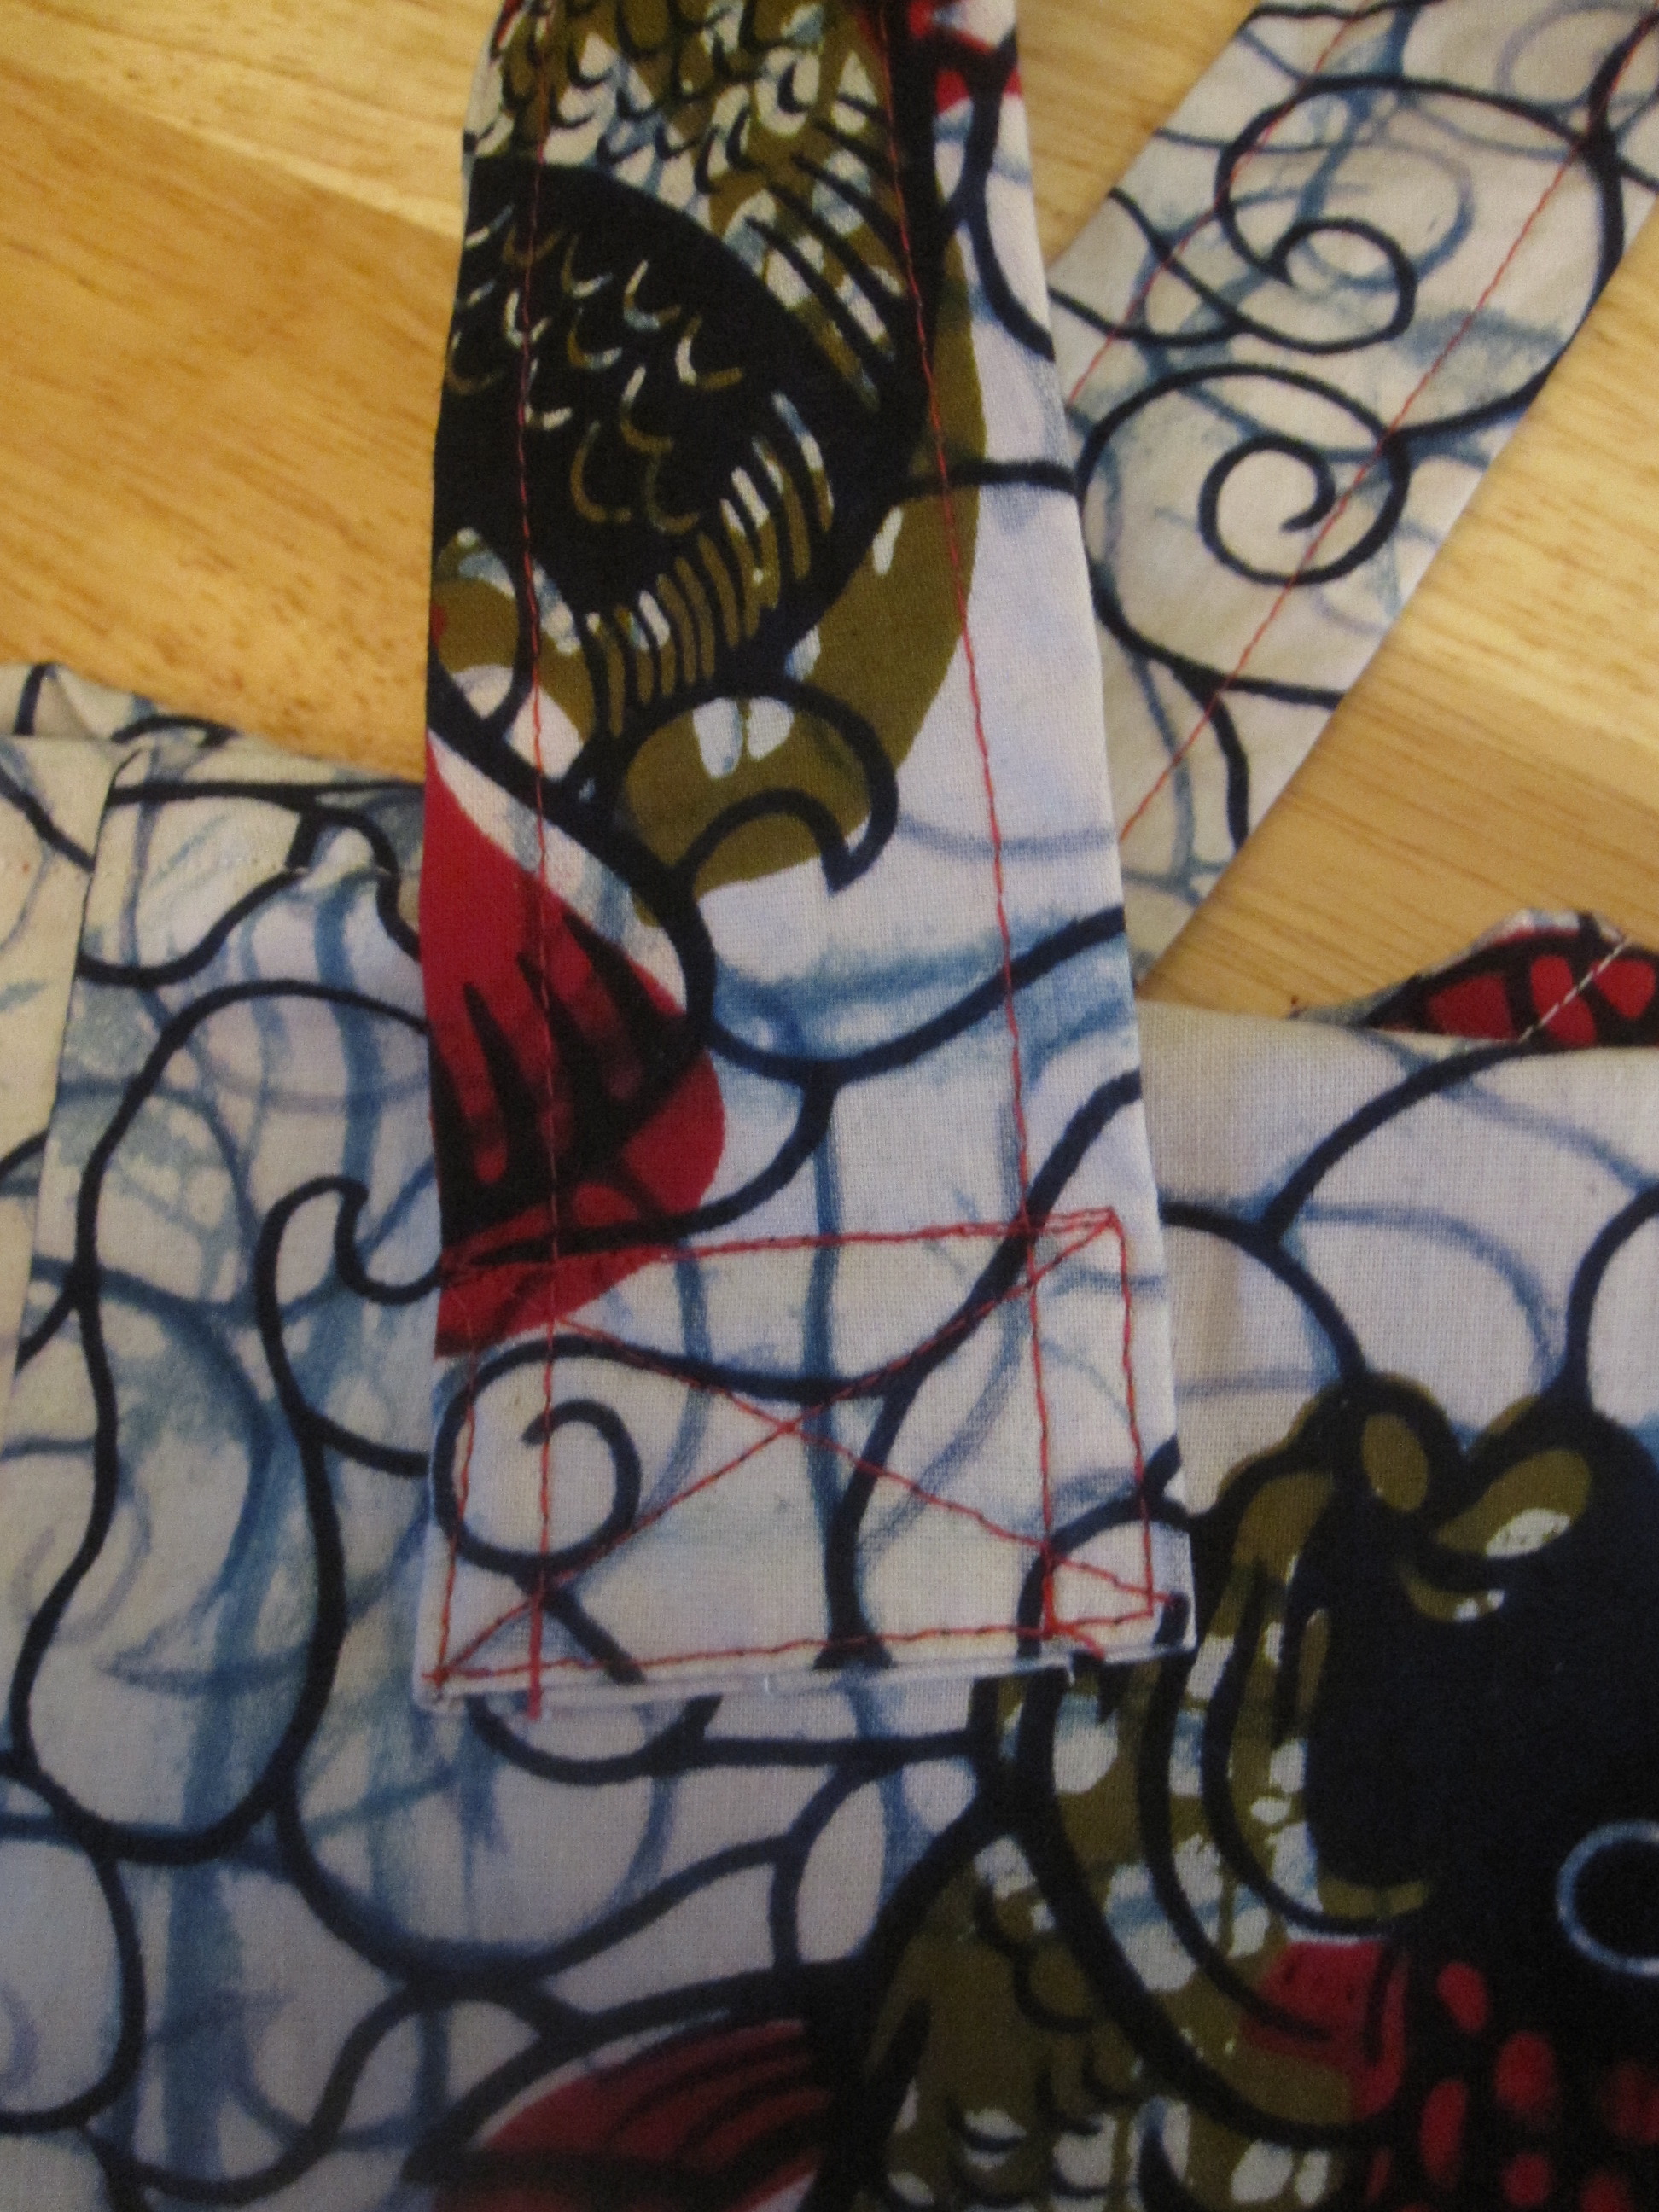
Pin your handles in place, aligning the lower outside corner to your marking, having the seam allowance of the handle toward the bag.  Pin the other end of your handle in place on the same front/back piece (the handles do not go over the top of the bag's opening).  Pay attention to make sure you haven't twisted the handle when pinning it before sewing!  Sew in place using an X with a box around it for maximum sturdiness.


Measure Velcro Placement


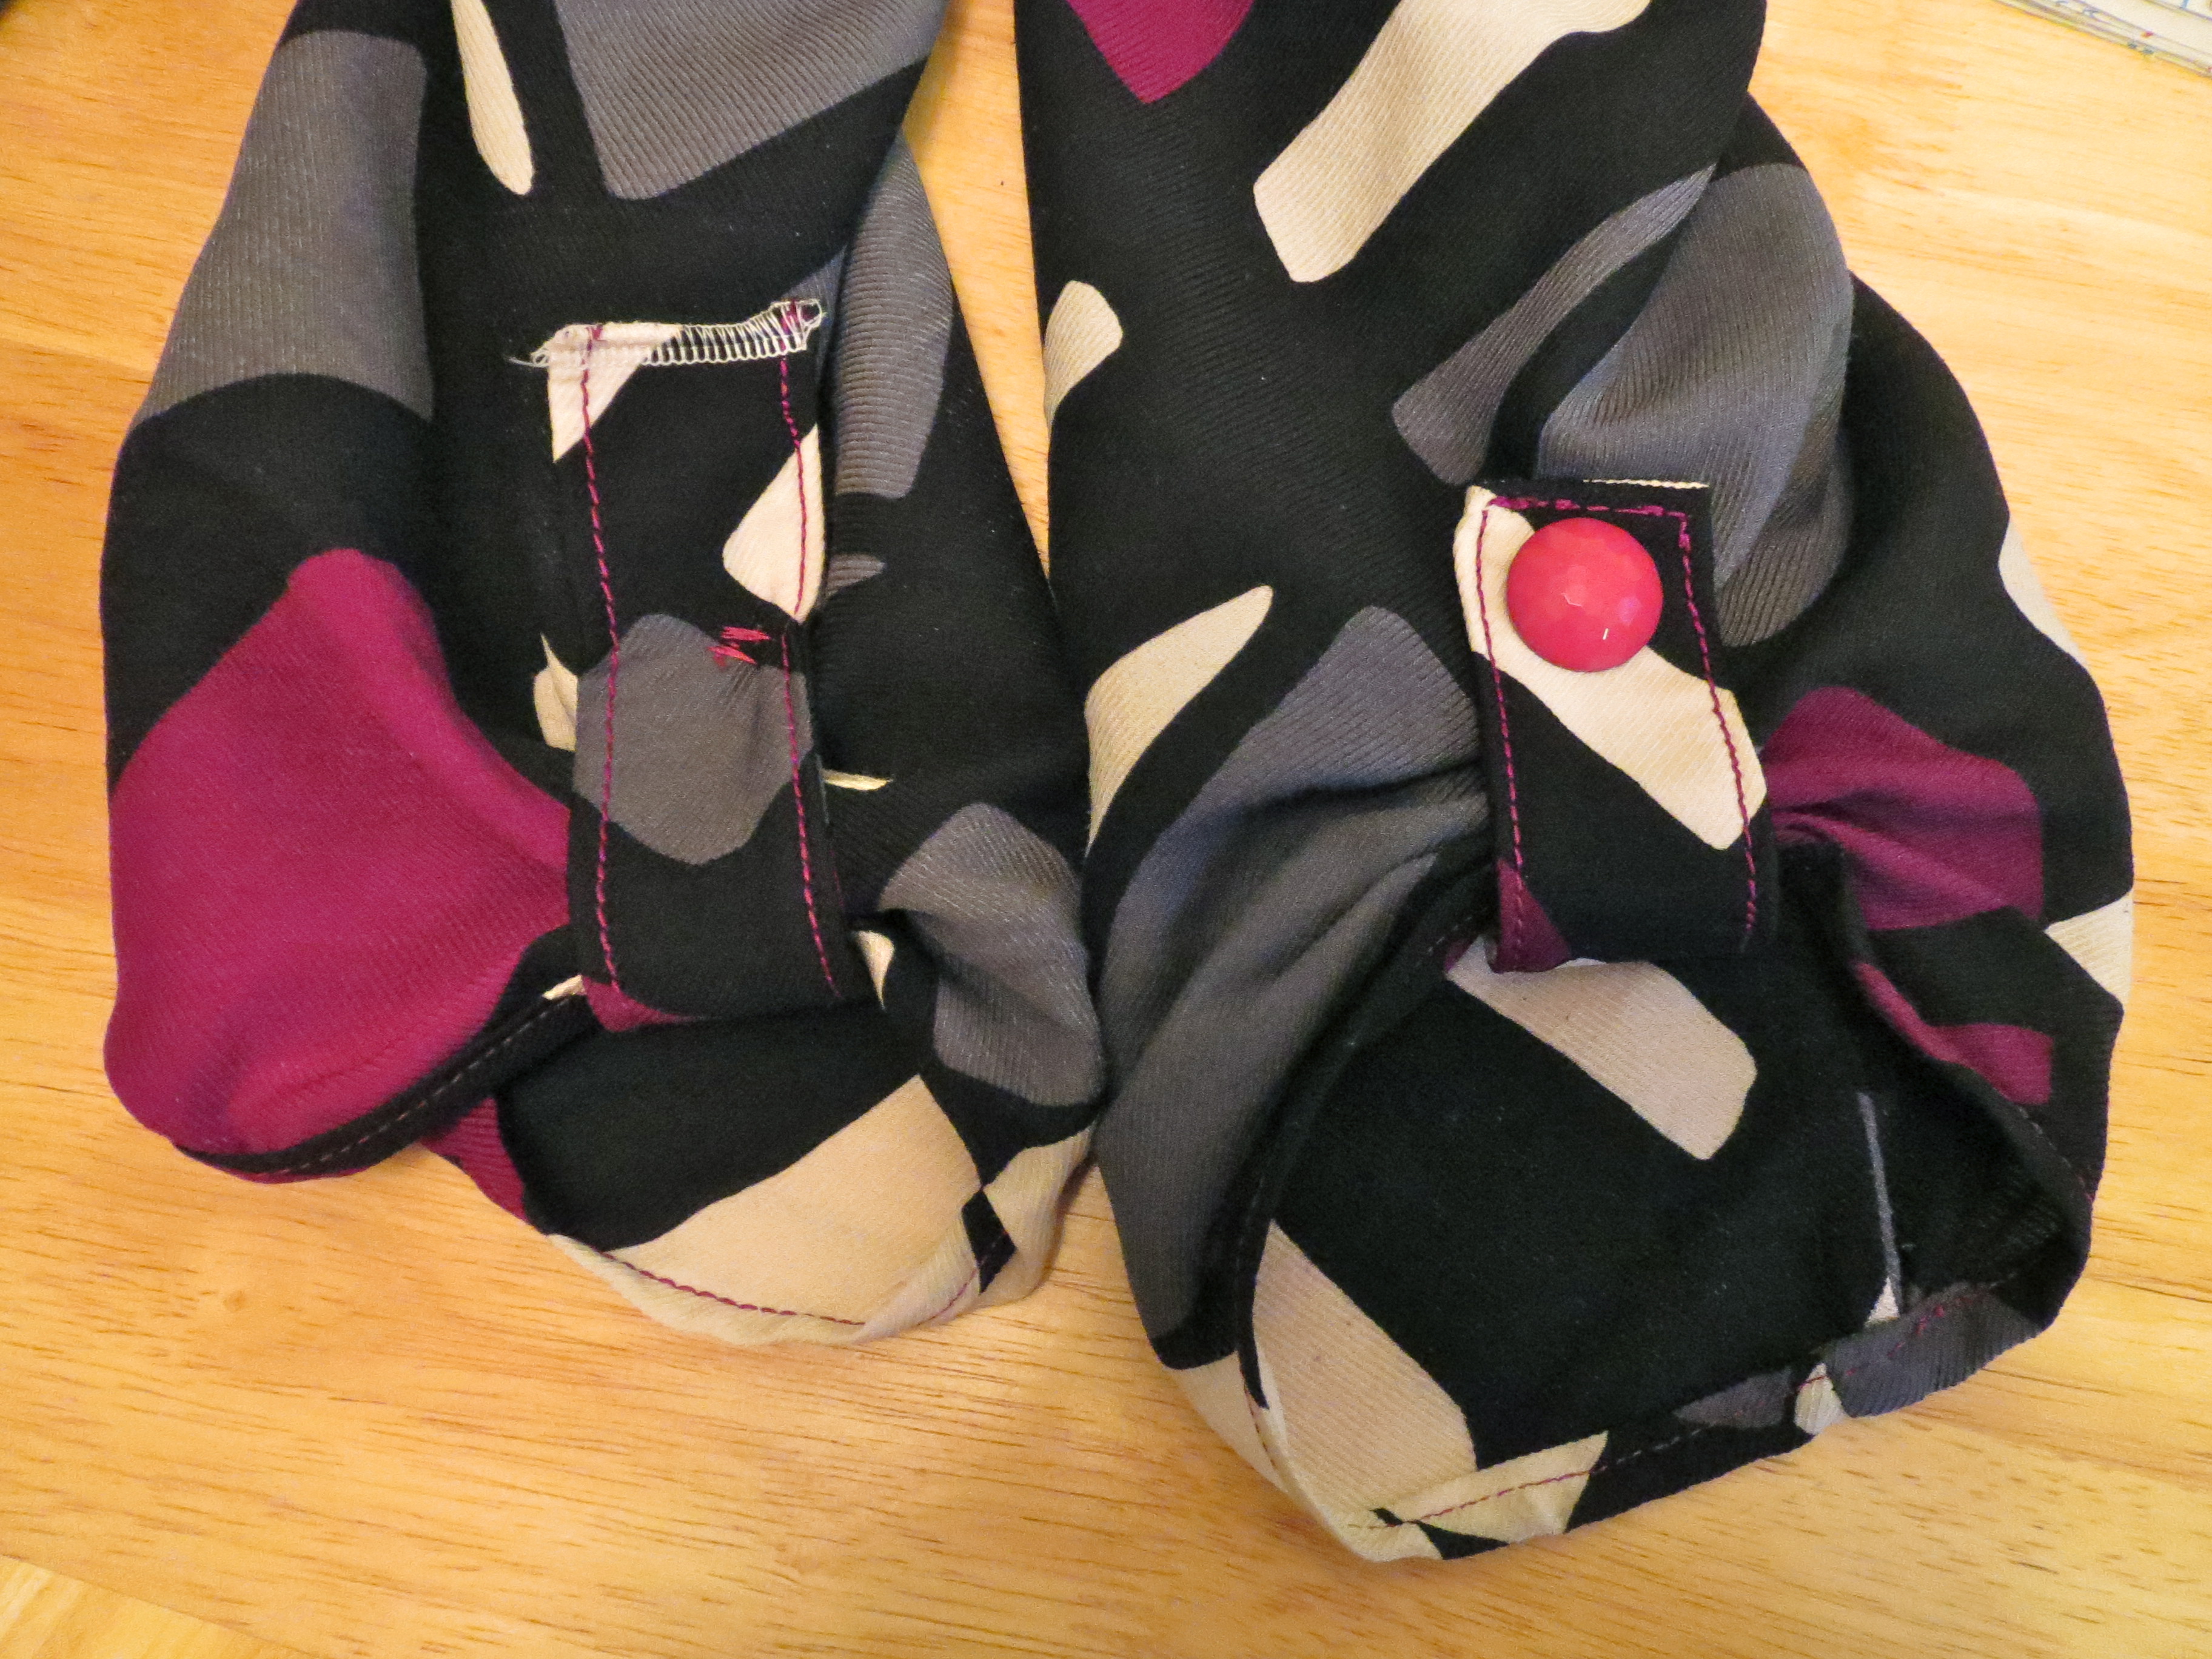
The final step is velcro strips on the side to attach to the baskets.  On each side piece and measure down 8" from the top.  Measuring from a seam, make marks at 3 1/4" and 3 3/4".  Mark this spot.  Cut two sets of velcro strips 2 inches long each.


Stitch Velcro

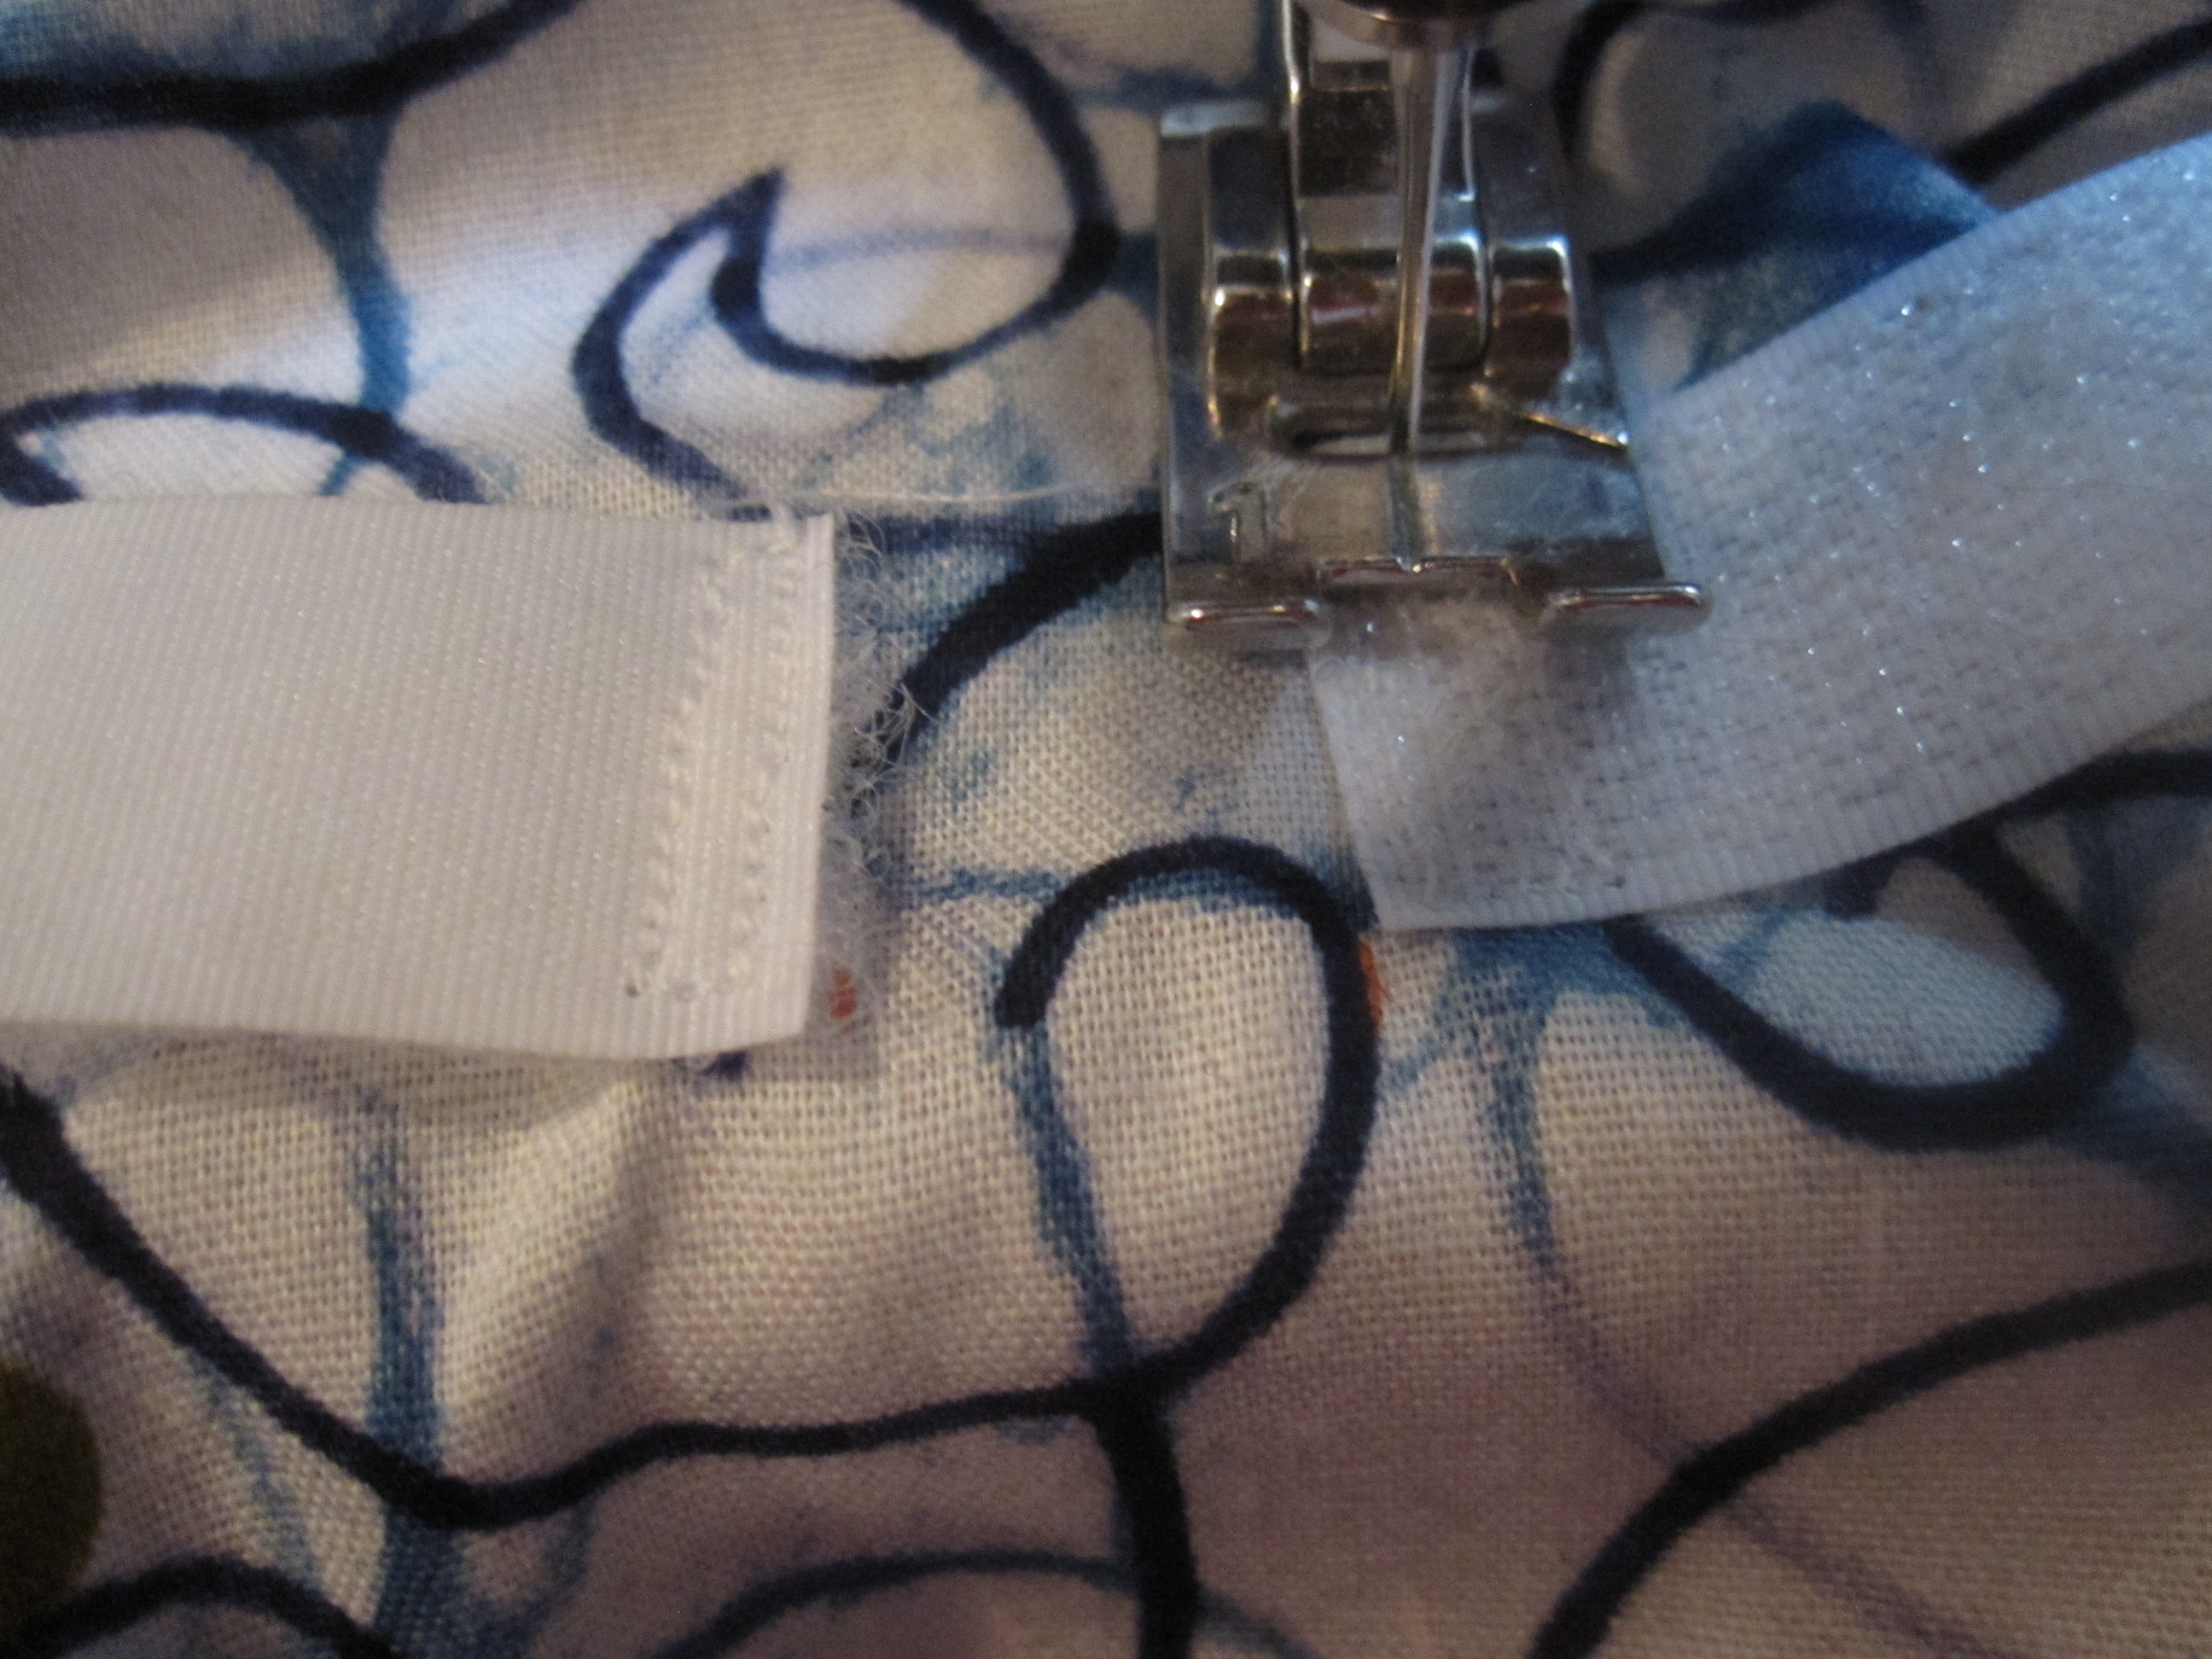
Spacing them a bit apart from the center, sew with one side up and one side down (otherwise they won't be correctly oriented to attach).  Use a small stitch length and sew at least two rows of straight stitching.  I did the rough side up and the smooth side down because when they are joined together the rough side is to the inside.  However, it's probably better to do smooth side up and rough side down so that when they're open (i.e., when you're carrying them through the grocery store) the rough side is against the bag.

I really don't know if the velcro is necessary or just superstition on my part.  However, my bags have never fallen out of my baskets no matter how full they've been--and if you ride DC's streets, you know that is NOT from lack of jouncing from pothole to pothole--and I always velcro them in place (and never use bungee cord) so I'll stick with my superstition.

Done!  Making two of these took me about 2 1/2 hours--although that included documentation time.  They are not a hard project and a beginner should be able to make them in 3 or 4 sewing sessions of a couple hours each.

Bag in Basket
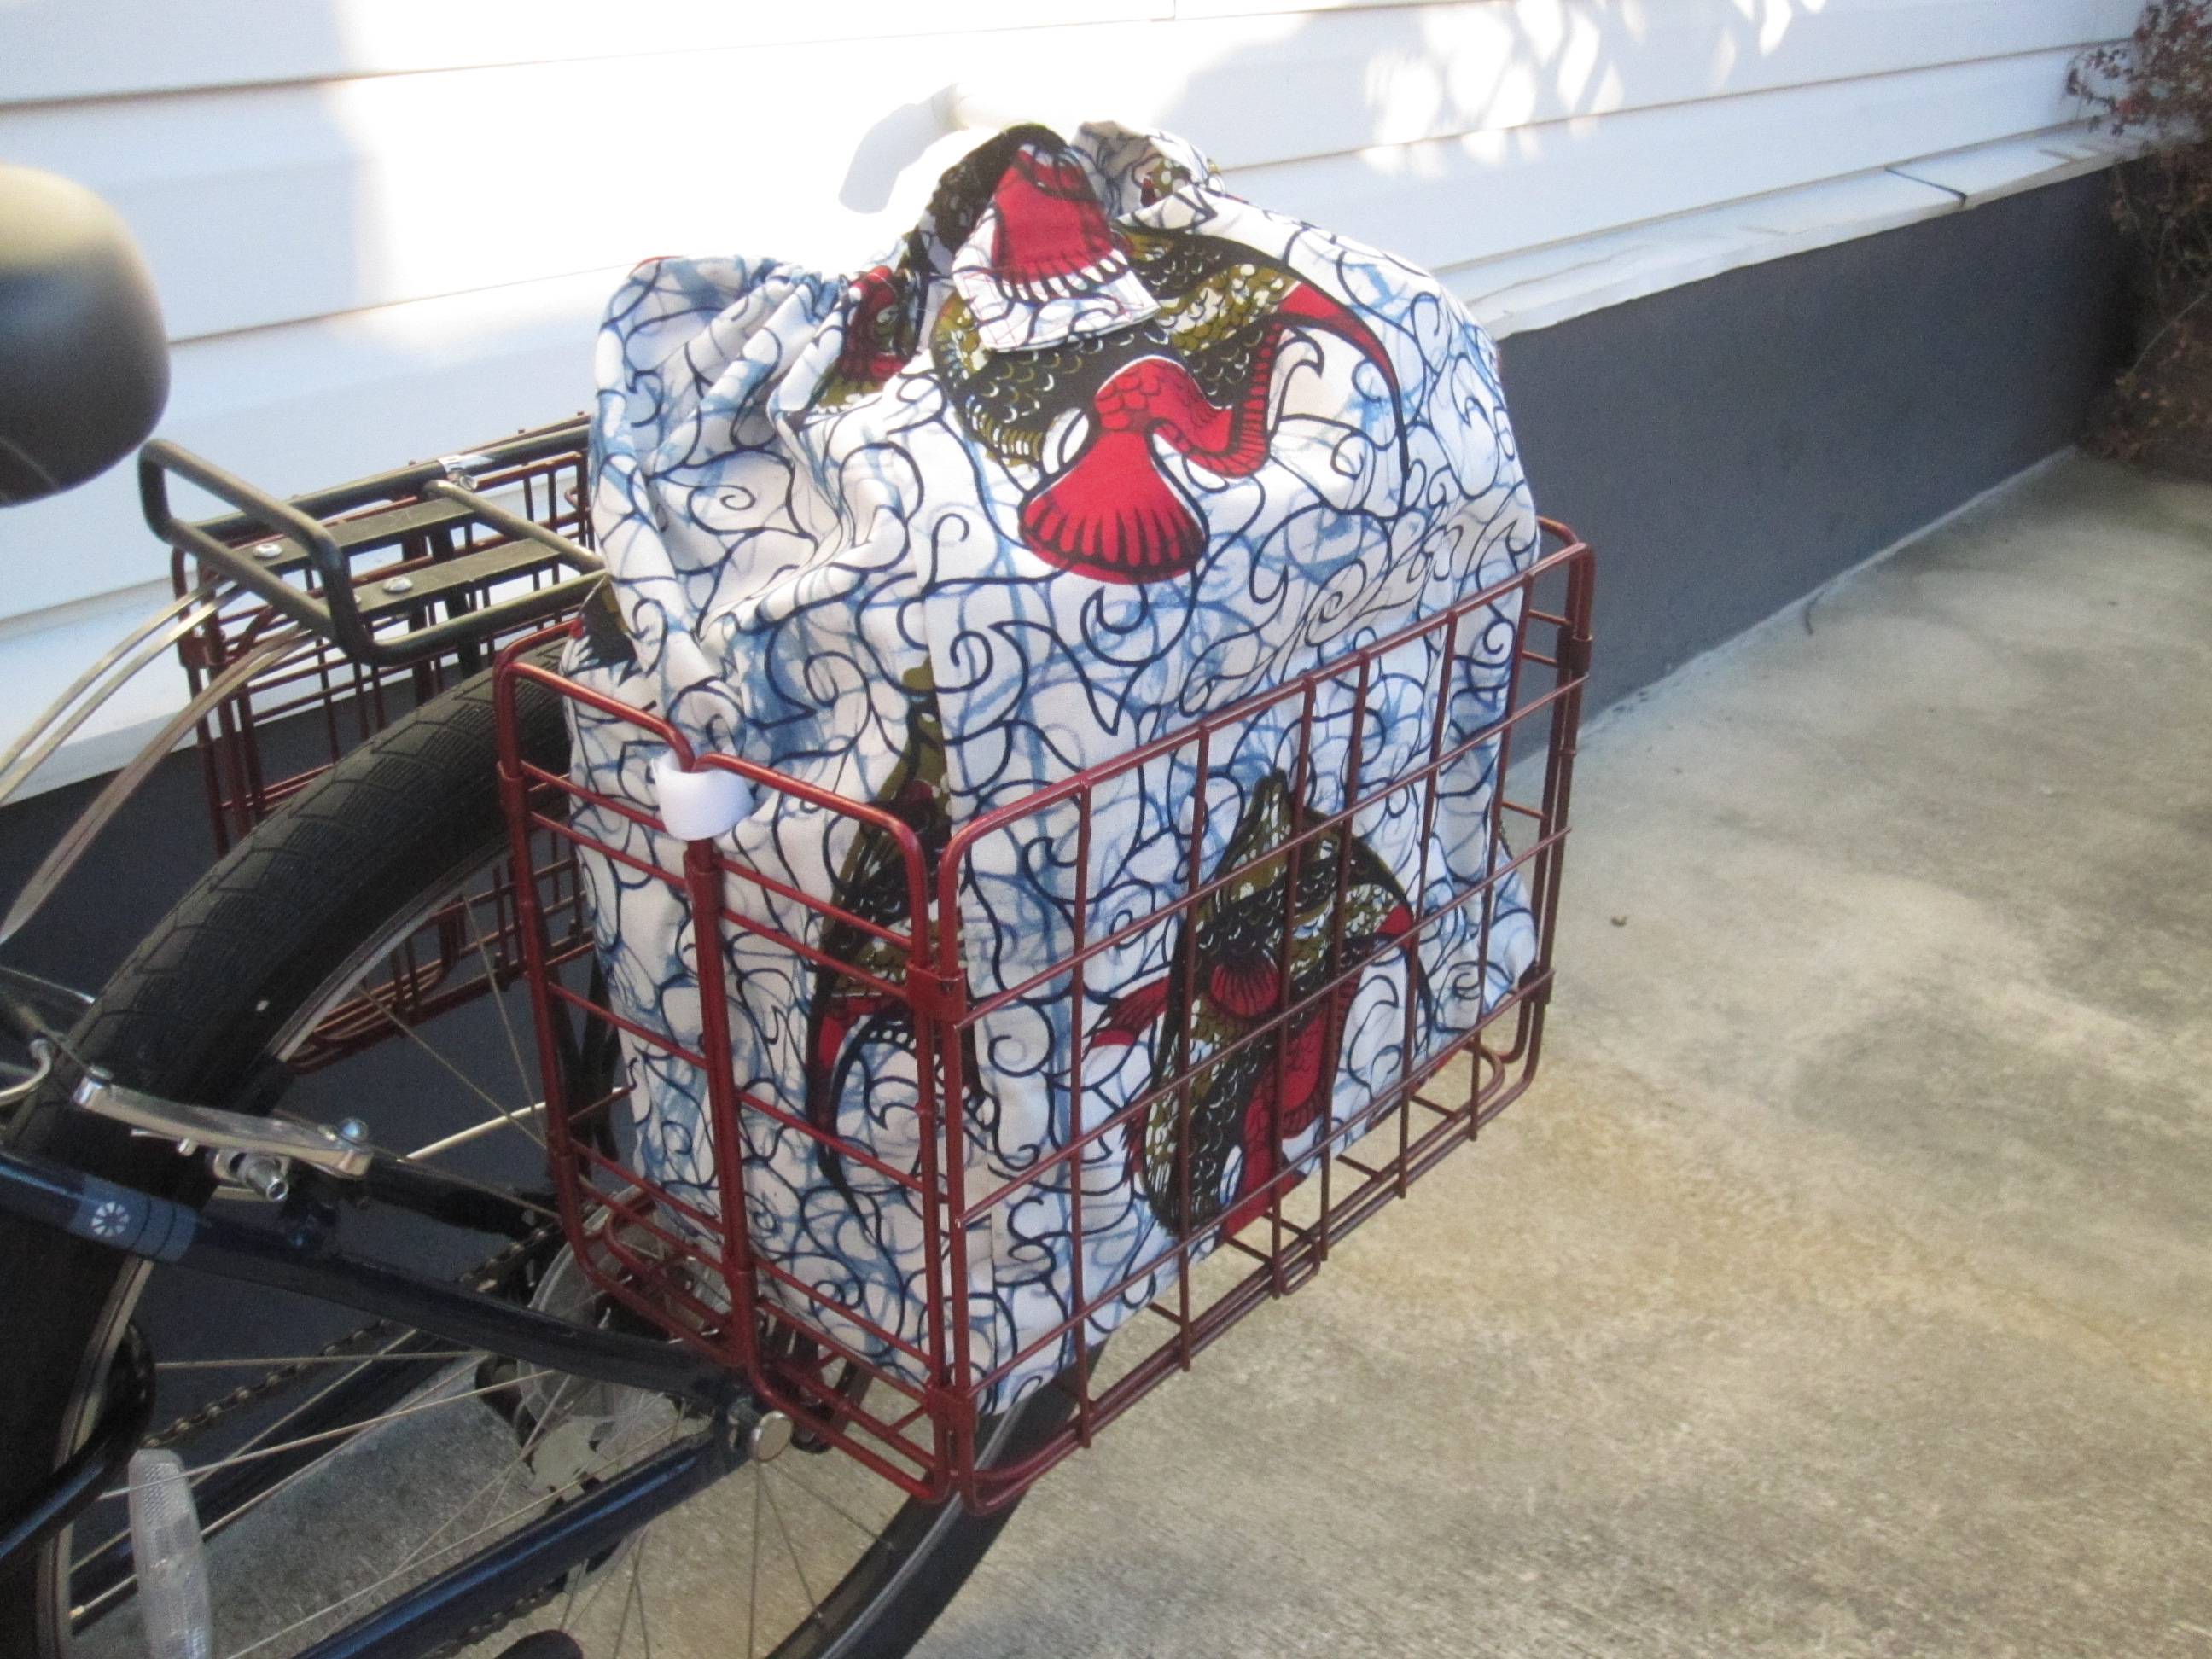
To use your bag, place it into the basket.  Pull the drawstring tight to close the top of the bag and snug the cord stop, then tuck the long loose ends of the drawstring into the little opening of the bag.  Tuck the handles into the little opening left at the top of the bag as well.  This is to keep the drawstring and handles from spilling over the side of the basket and getting caught in your spokes, which would be Very Bad.  Loop the velcro through the mesh of the basket and fasten it.  Ride off into the sunset (or off to the Potomac, where the shot of my bike "in the wild" was taken).

Size Full and Empty

My bags are plain fabric.  If I need something in them protected from rain, I wrap it in a plastic bag.  I like the fabric bags because they are light, fold down quite small, and most importantly can easily be washed and dried when groceries go awry.

However, you could use waterproof fabric for a more precipitation-friendly bag.  This blog is all about oilcloth.  Rose City Textiles/Fabricline has reasonably priced waterproof fabric for bags.

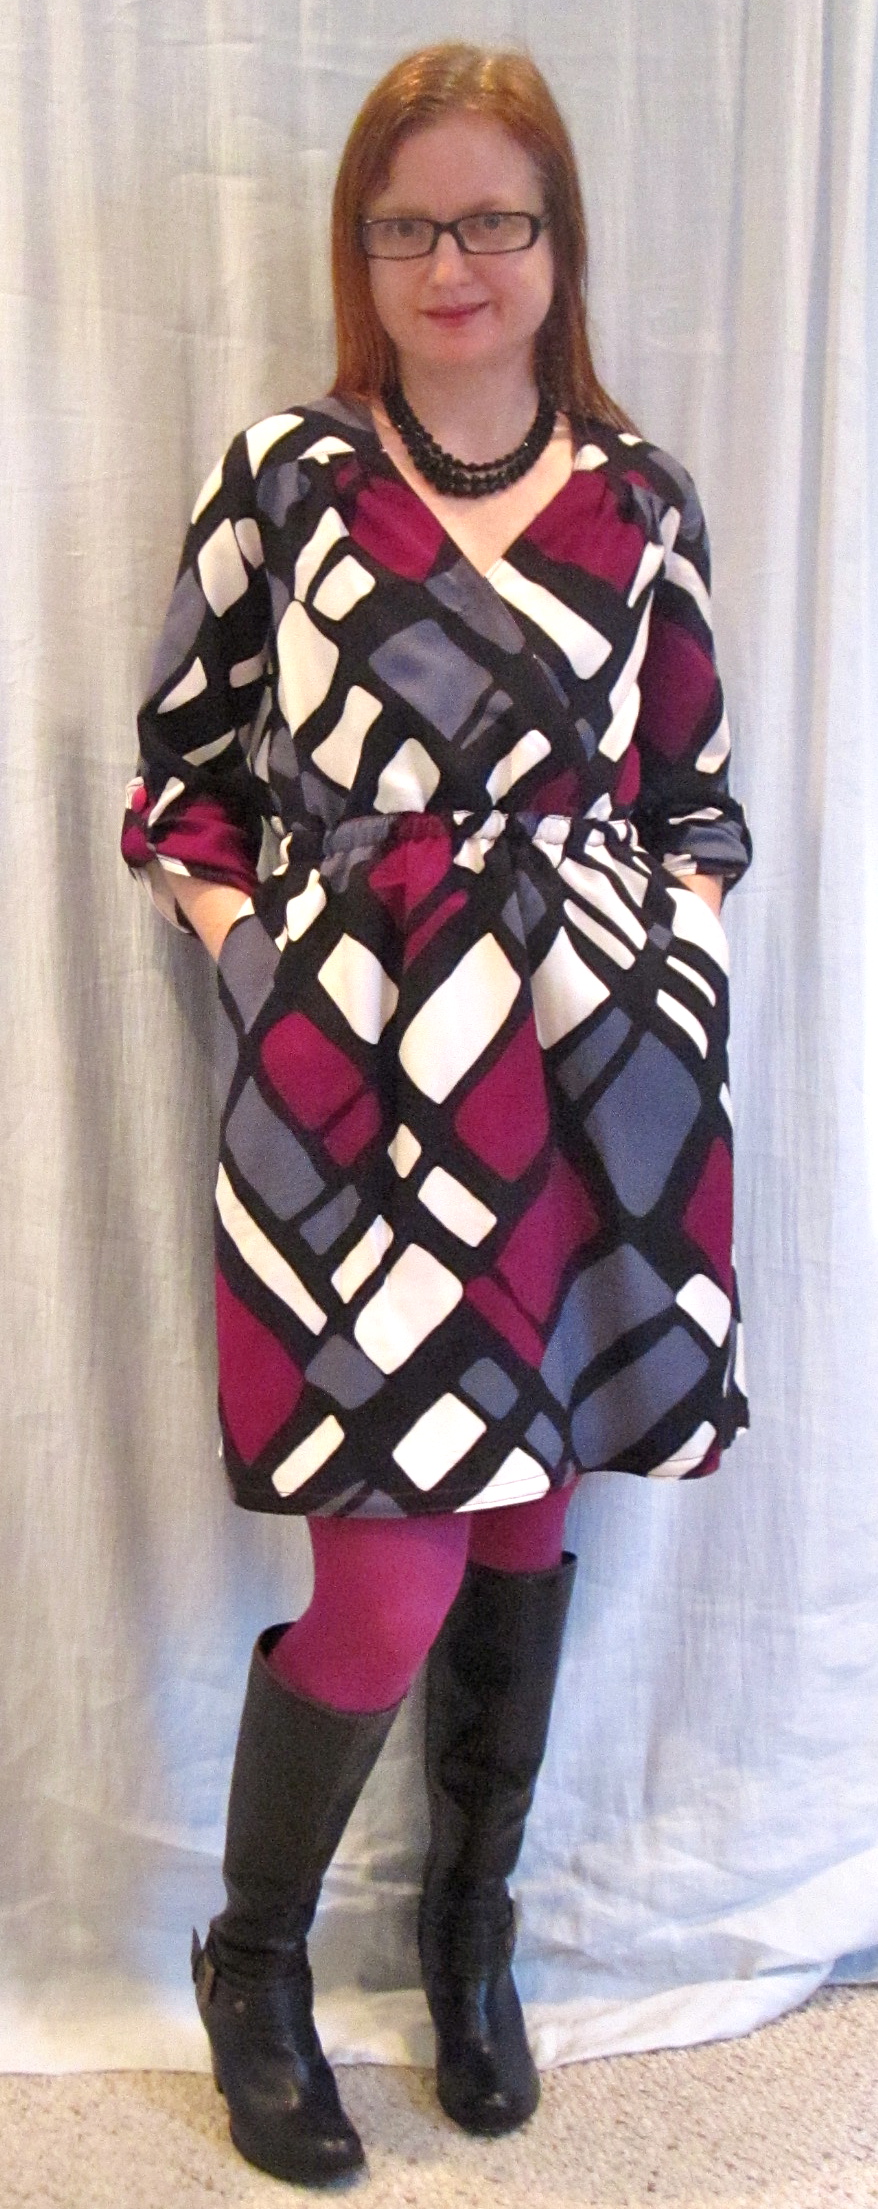
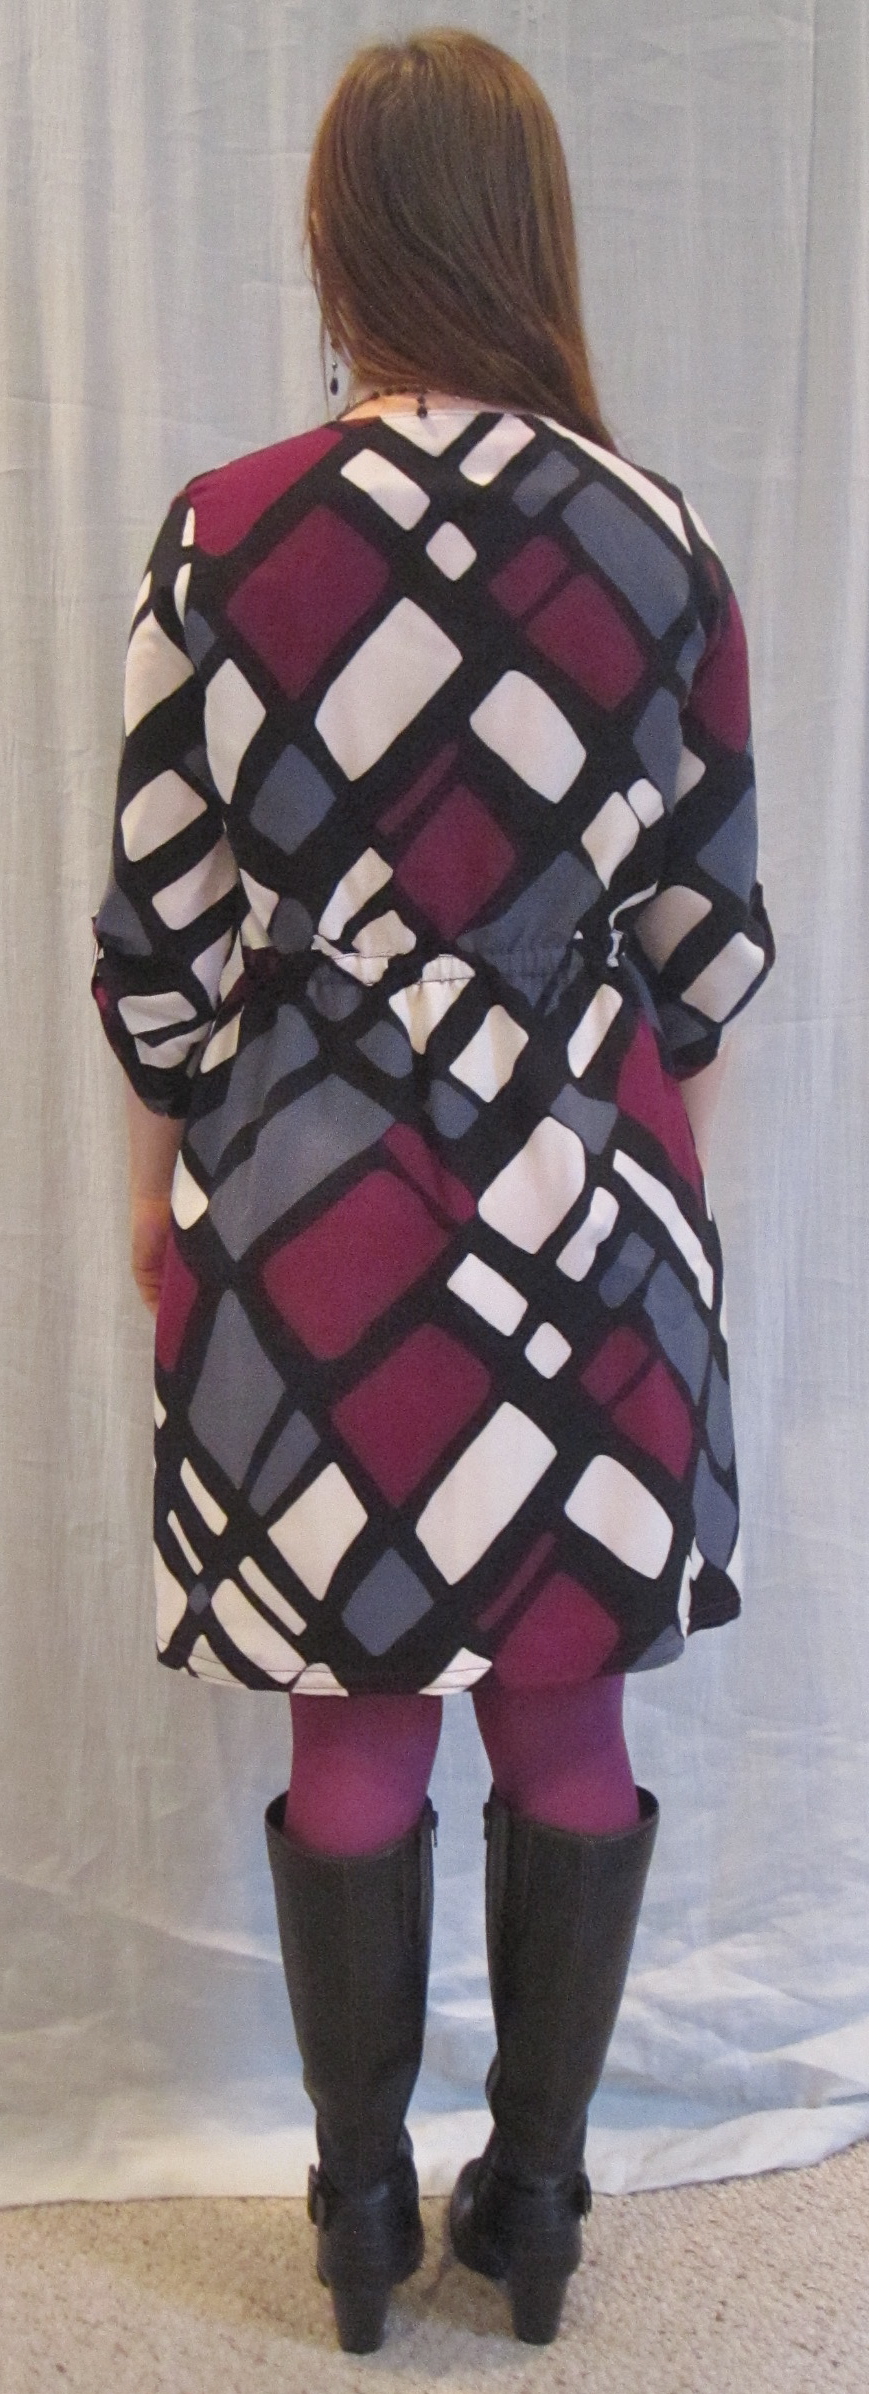
I made these forever ago and kept waiting to post this until I got more glamorous photos of me and my bike but I think we'll just go with what we have!

All photos are here.

Friday, October 18, 2013

McCall 6744, Grecian Knit Dress

M6744 Thumbnail

I did a ton of sewing for trip to Greece (as I think you can tell by all my recent posts). So much so that I didn't end up taking everything with me! McCall 6744 didn't make it into the suitcase, though I do like it as a casual summer dress.  You might recognize this fabric from Vogue 1282--I made the top out of the leftovers after finishing the dress.  I was surprised how much I had left considering I did "stripe" matching, both vertical and horizontal, with the flower motifs.

Do you like how "ethereal" the photos are?  Yeah, I discovered a fingerprint smudge on the camera lens after my photographer had already taken all the pictures.  Oh well!

Small Bust Adjustment

Many of the previous reviewers noted that the front bodice gapes; almost all of them had to wear a camisole underneath.  So I took a fairly aggressive amount out of the crossover on the front bodice to prevent that--you can see the three tucks I took in the photo at left.

While I don't have gaping and don't need a camisole, I ended up with a similar problem as with Vogue 8870 (my high-low hem birthday dress) where the bodice is short at center front and blouses a lot at the side seams.  That goes more with the style of this dress so I'm fine with it, though it benefits greatly from (of course!) a sash.

I think I just don't care for crossover styles where the crossover is shallow, ending just a few inches from center front.  A crossover that goes all the way to the side seam is easier to adjust for a small bust without distortion and more flattering and wearable for me, not to mention more secure.  I'm going to have to stay away from these styles in the future.

Shoulder Gather

There is not much to say about this simple dress.  One of the nice features is the shoulder gather.  It gives some shoulder coverage without a sleeve and allows for plenty of volume in the bodice to get the grecian drape.

Clear Elastic for Shoulder Gather


To make the gather I sewed the shoulder seam with the sewing machine rather than the serger, and then pressed the seam open.  I machine-basted long gathering stitches starting about two inches from the already finished neckline and ending about 1/2 inch from where the sleeve hem would be stitched down.  I pulled the gathering stitches tight, and from the right side stitched in the ditch, catching clear elastic underneath to keep the gathers in place.  Then I removed the gathering stitches and hemmed the sleeve.  The gathers could have ended further from the sleeve hem, as it does pull up a bit.


Front
Although it didn't make the cut for the suitcase (I thought it would be weird to be wearing two things in the same fabric in photos, and I liked the top better), I do like this dress despite the weirdness with the crossover bodice.  The pattern also has a plain tank bodice, a racerback tank bodice, and a crossover skirt option, so it's quite versatile.

I timed the sewing of it poorly. I wore it on the day the photos were taking, but I won't get to wear it again until late next Spring when it is warm again!  We've had some crisp days in DC though luckily it hasn't gotten truly cold for good yet, but this is just too summery to get away with in mid-October.

All photos are here and the pattern review is here.

Thursday, October 10, 2013

Achievement Unlocked: Fly Front Shorts

M5391 Thumbnail

So the fly front has bedeviled me for years.  Decades, even.  Something about it seemed so complicated, and it seemed to require more precision than I have the patience for.  I've read at least dozens and possibly hundreds of tutorials, but it has never clicked for me.

Hiking was the main activity I had planned for our Greece trip.  Since the only non-exercise shorts I own are my Adventure Shorts, I decided to add another pair to the stable.  And I also decided it was time to face my biggest fear:  the fly front zipper.

Elizabeth of SEWN recommended the fly instructions from Kwik Sew 3614, so I bought it at the last sale.  The instructions seemed good, although when I actually started following them I realized that step 4 is missing several crucial words and phrases:  "Move zipper toward as far as it will go without puckering underneath (edge of zipper is not even with extension).  Using a zipper foot, ."  I mean really, comma-space-period?  The missing word after "toward" I can maybe see getting by a very bad, very lazy proofreader, but comma-space-period is ridiculous.

EDIT:  Thank you, Elizabeth!  She supplied the missing text: "Move zipper toward right fly extension as far as it will go without puckering underneath (edge of zipper is not even with extension). Using a zipper foot, stitch only through zipper tape and right fly extension.

I also pulled up Debbie Cook's truly excellent jeans fly tutorial to keep Kwik Sew honest, though I had to mirror-image it in my head because a jeans fly is the same for men and women, while a women's dress fly is reversed.

Fly Opening

In the end, I don't know why I was so exercised about this!  I went slowly and completed each step without trying to think further ahead, and it came out perfectly.  I am always telling people that most sewing is not difficult, it just involves a LOT of simple steps.  There are a very few exceptions--I found bound buttonholes difficult, some origami patterns make my head explode, and sharp corners are extremely fiddly to execute--but most things are not that hard when you break them down.  And it turns out the fly is one of them.

For the pattern, I used the sloper developed in Annette Hickman's class.  She had to cancel the third session of the 3-session class due to a family emergency, so my pattern is not totally final.  The shortness of the shorts hides the fact that there is still a little bit of cascading wrinkling on the back legs.  Someday this will be solved.  Someday.  Also, the front needs a little more room over the belly.

Slant Pocket Construction

Another thing I faced was the slant pocket.   I copied the pocket and side piece as well as the leg width from McCall 5391.  I have never successfully made slant pockets that sit flush and don't poke out, and I didn't fully succeed here.  I interfaced the slant edge on the pocket, as instructed by M5391, but I should have interfaced along the opening edge of the yoke and then taped the seam when I sewed it, too.

Ribbon Stabilizer for Pocket

I retrofitted the pocket opening edge with ribbon for as far as I could reach after construction, but it is too little, too late.   The pockets poke out a bit in wearing and always will.


Center Back Seam with waistband


Redeeming itself from the typos in the instructions, I used the curved waistband from KS3614.  What fabulous drafting!  I will be using this waistband again and again.  I have been looking for years for a great curved waistband for my body (Burda's are ok but not wonderful for me).  Something about the way the grain is at CB it just snugs right against the body.  I taped the upper edge of the waist with ribbon to keep my very stretchy fabric stable.

Hike from Fira to Oia

The shorts star in another favorite photo from the trip, from our hike from Fira to Oia on Santorini.  Oia is reputed to have the best sunsets in the world, and there is a lovely cliffside hike from Fira (the main city) to Oia, where at some points you can see the ocean on both sides of the island.  Unfortunately, we didn't leave Fira until 4:30 so we had to hustle the 7 mile hike to get to Oia on time for sunset.  We made it in the nick of time! (You can see the photos from the trip here; the photos from this particular hike are here.)

All photos are here and the pattern review is here.

Tuesday, October 1, 2013

Vogue 1282, Donna Karan Cowl Variation

Vogue 1282 Thumbnail

I have had Vogue 1282 for a while, but wasn't motivated to sew it until I saw Cenetta's (The Mahogany Stylist) outfit; she originally wrote about the top here.  Suddenly I saw the possibilities!

I made most of this fabric into a dress, but had a large piece leftover.  Rather than just make a t-shirt, I pulled out this pattern.  I cut a 6 at the shoulders and bust, transitioning to a 10 at the hip.  Fabric limitations prevented me from cutting a 12 at the hip, and I needed it.

This is one GIANT pattern piece cut on the bias.  I appreciate that they give you a full size pattern piece, instead of a half pattern that you have to copy yourself into a full one.  I had to cut it on the floor, which involves knee pads and a lot of groaning.

I've never really understood bias with knit, but I figured I had enough fabric so I'd give it a try.  The resulting drape is very nice, but I'm not sure it's more drapey in this particular polyester knit than it would have been on grain.  For a sturdier rayon and definitely for a cotton knit, I can see how the bias would make a difference.

I cut a 6 at the shoulders and bust, transitioning to a 10 at the hip.  I ended up taking the tiniest seam allowance possible in the center back seam at the hip, so next time I will cut a 12 at the hip.

Interfacing Patch at Center Front
I stitched the center front seam up about 2 1/2 inches higher than marked.  It was impressively low.  Once I determined where I wanted that CF stitch line to end, I fused interfacing patches to both sides as suggested.  I shortened the stitch length to 1 near the end, using tiny stitches for extra strength.  I didn't have any issues with the stitches ripping out, though I may go back in and do a narrow zigzag at the top just for extra insurance.

Sideish

I tested out a weight in the bottom of the cowl, as directed in the instructions, but I didn't think it added a lot to the top.  In my tests at home the weight did not stop the "pocket" created at the bottom of the CF seam from poking to the outside rather than staying inside the point close to the body, a phenomenon you can see in the photo at right.  And since I was making this for vacation, I didn't want to accidentally wear this to fly in and fail the metal detector!

Now that I'm back and not going near a metal detector for a while (nor hiking many miles in the top with the weight bouncing against my sternum all the way up the mountain) I'll put the weight in and see if I like it better.

Sleeve
I wanted to try out this pattern with a sleeve, because I think it would make a nice winter top in a sweater knit or other heavier fabric.  I used my favorite flutter sleeve from Burda 03-2008-113 (which has a fairly standard sleeve head) and just popped it into the armscye.  The armscye is cut out of this one-piece top in a very oblong shape with a point at the armpit end, kind of like an (American) football shape, so I wasn't sure how a sleeve would play with it.  Other than having to set it in in-the-round because there is no side seam (I infinitely prefer to set in in-the-flat), I had zero issues with the sleeve, even with the unusual armscye shape.  Knits are so forgiving.  This pattern is definitely on the list for Fall/Winter sewing.  Now I have an excuse to go sweater knit shopping, right?

Back Neckline

The only thing I don't love about this pattern is the back neck.  When sewn as drafted I had serious sad little droopage/gapage at the CB neck, so I curved the seam in, taking about 1 inch on either side of the CB seam and it sits much more flush.  You can see that the neckline opening is finished by turning under a narrow hem, and then folding out and tacking down a cut-on facing.

I am not crazy about this, as I prefer elastic in the back neck of a knit top.  Next time I will probably create a casing using the facing and thread elastic through it, stitching in the ditch at the shoulders to catch the elastic.  I do not like a gaping back neck.  I could also experiment with trimming the cut-on facing off at the back only, serging in elastic and turning it down and then folding the front facing in place as before.  Because there are shoulder seams, this can be done cleanly.

Favorite Vacation Picture

For my Greece trip I packed 4 dresses, 3 tops, a pair of shorts, and a pair of yoga capris.  Everything got worn twice except for this top, but that's because it was new and I didn't want to sweat-stain it!  I wore it on the day we hiked from Perissa beach to Kamari Beach by way of Ancient Thera, where these photos were taken (yes, we hiked up from the black volcanic beach you can see in the background--it was steep!).

Although I only wore it once it is immortalized in my favorite photo of myself from the trip, at the "end of world" at Ancient Thera.  I think you can see how happy I am (though admittedly the top didn't have *that* much to do with it). (You can see the photos from the trip here.)

All photos are here and the pattern review is here.