Wednesday, May 30, 2012

Sinamay Hat Making Class with Artikal Millinery

Class with Finished Hats

The Seersucker Social is coming up on June 9!  You get dressed up and ride your bike around town, and it could not be more fun (Fall's event is the Tweed Ride).  Having a fabulous hat is de riguer and once I had my dress underway it was time to think about head wear.

I have wanted to learn more about sinamay, a flexible, moldable straw fabric, since watching this Martha Stewart video.  Somehow I stumbled upon the class list at Bits of Thread studio in the Adams Morgan area of DC, and saw that there would be a sinamay hat class by Holly Slayton of Artikal!  Perfect timing!

This was my first visit to Bits of Thread.  The outer door is a bit unobtrusive though if you have the address it's not difficult to find.  There are instructions for how to ring Bits of Thread on the call box.

Holly Slayton Modeling one of Her Creations


Holly is from the DC area but lives in New York now where she specializes in making bridal headpieces.  But she has a full line of hats and enjoys sharing her millinery skillz in classes.  Here she is modeling one of her creations.


Sinamay Sheets

You start with a sheet of sinamay.  Holly had brought a variety of colors for us to choose from.  The straw is easy to cut with regular scissors, so we just sliced off a piece to get started.


In Progress


 Holly had brought enough balsa wood millinery heads for each of us to work on.  While sturdy, the heads are easily pinnable.  With this free-form style, you just start folding and pinning until you get a shape that you like.

Once your shape is set, you take strategic stitches with sturdy thread so that it stays that way.


Students at Work


There was a lot of creativity within the class.  Holly's approach is to explain the basic principles of the materials and to set us free to create.  I am more of a "create within constraints" kind of person (hence why I love sewing but am horrible at and hate painting), so for me this was more about exploring the materials than anything else.


Decorative Elements


Here are some decorative elements that can be made out of sinamay, a bow and an orchid.

My completed project is a hat mostly only in the sense that it is sitting in my head (precariously--I have fine, slippery hair and needed a different kind of clip).


Source: debenhams.com via Trena on Pinterest


I should have done my research *before* the class into what kind of hat I might want to make.  I am thinking that I am into the saucer hat, as in this dark gray saucer hat (£45.00) from Debenhams.com


And, of course, obligatorily as seen on Kate Middleton (love the flourish of the curly feathers!).

Source: hatsandveils.net via Trena on Pinterest


I also really love this one, which appears to be cut as a spiral.

There is plenty more inspiration on my hats board on Pinterest and all photos from the class are here.

So right now I have a hat-making fire in my belly!  I'm not going to tell you how much I spent at Judith M Millinery Supplies and Hats by Leko/HatSupply, nor that I bought a balsa wood head because I realized too late after I bought my groovy aluminum hat forms that you really need a pinnable form.

Thursday, May 24, 2012

Simplicity 2938, Silk Princess Seam Tank


Source: zappos.com via Trena on Pinterest


Is there anything more luxurious than a silk tank?  It's easy to wear and comfortable for hot weather, but instantly dressy enough for most any occasion.  You generally have to go pretty high end to find silk in RTW, like this Cynthia Rowley Printed Silk Tank ($275).

Front Closeup
Mine was a little easier on the wallet.  I got this silk print from Fabric Mart for $9.99/yd several years ago.  I made it into Vogue 2858, but I never got much wear out of the dress.  It had a dropped waist which just does.not.work for me, and I made it when I was still learning fitting (well, I'm still learning--I guess I mean earlier in the journey) and it was slightly too tight at the ribcage; I was afraid a deep breath would split the fabric.

So after years of not wearing it, I finally took it apart and salvaged the fabric from the skirt.  I had just enough to make this top (the hem is a serger rolled hem because I didn't have enough length for a real hem).


Staystitch then Serge

 In my previous iteration of this top, I used a self-bias tape to bind the neckline and armscye edges.  For this one I decided to finish with foldover elastic.  Who says it's only for knits?

To start, I staystitched the neckline and armscye.  I was happy with the neckline where it lay in its raw state, so I stitched just a little in from the edge (retaining the seam allowance in the final garment).

For the armscye, I staystitched at 1/2 inch, 1/8 inch shy of the 5/8 inch seam allowance.  This was to prevent stretching and  to mark my line for seger finishing.

Serge both the neckline and armscye to prevent fraying.

Stitch Wrong Side Elastic from Front


When I went to Golden D'Or in Dallas over the winter holidays, I was hoping they would have foldover elastic.  They had some, but the choices were kind of weird and the only thing that appealed to me was this black and copper elastic.  When contemplating this tank top, I thought it would be perfect.

When I showed my sweetheart tee finished with FOE, Country Girl Couture asked that I share my two-step process for application.  My previous attempt to apply FOE by sandwiching the edge of the fabric had been a disaster.  Maybe I don't pin well enough, but the odds of me catching the fabric were about even with not catching.  So here's what I do instead.

First, stitch the FOE to the wrong side by putting the FOE underneath the right side up the fabric, against the machine bed/feed dogs, keeping the fold at the edge.  This was kind of difficult as the fold was not easy to see on this particular FOE.  It's more obvious on most, I think.

Elastic on Wrong Side

If I had been doing this for a knit, I would have used a wide zigzag here, but since I didn't need any stretch I just used a straight stitch.

Here's the view from the wrong side (you can see the right side with overhanging elastic here).


Flip Elastic Over to Front


The next part is really easy.  Just fold the elastic over to the right side and stitch in place.

For a knit, I would use a narrower zigzag and stretch the elastic slightly as I sewed (just because a narrower zigzag looks nicer, in my opinion).

I had a bit of a tough time getting an accurate straight stitch on this pass; the stitch wanders a bit.  I think I would have done better with an edgestitching foot and adjusted needle position.

Finished Elastic-Outside


It makes a nice and easy finish without too much bulk.  So think outside knits for FOE--it's a great substitute for bias trim.

Here's the finished elastic from the inside.


French Seams


Because I was sewing with silk, I used French seams throughout.  The only exposed edge is at the hem, where (as mentioned) I finished with a serger rolled hem due to lack of length in the fabric.

As in the previous version, I left off the zipper.  The top easily pulls over the head.
Front


Back

You can see that my only real issue with this top is that the print is slightly offset at the CB seam. I didn't have enough fabric to match it exactly.

I had in mind to bring this top to keep at work to match a suit I have there.  Right now, I don't have a top for under the suit so I'd be sort of stuck if I actually needed to wear it!  (I also have about 5 different blazers, enough to match just about anything I might wear.)

But it turned out so cute I don't want to banish it to work!  So now I have to figure out a boring top to make that I won't be tempted to keep at home.  Heh.

Cidell took the photos for this so there are some great ones!  All photos are here and the pattern review is here.

Tuesday, May 22, 2012

Patterns and Shoes

I went on a fabric fast for Lent.  I managed to break it the first week when Fabric Mart got some Dry Flex in stock, but I have been steadfast since then.  I even skipped Fashion Sewing Club at G Street Fabrics in April so as not to be tempted.  I don't have an end date in mind, though I really need to come up with one--without a specific date or event to look forward to, I am more likely to slip up.  However, my big victory for the month was going to the May Fashion Sewing Club and buying only ribbon and zippers--no fabric!

However, my fast does not extend to patterns.  I picked up a bunch during the BMV online sale, and then got a few more at Joann.  I need Joann to have a Simplicity sale on one of the random dates I am there.

Woven Dresses 5-2012

Woven dresses.  I've resisted Vogue 8631 in the upper left for a while now.  It's a great shape, but the oversize fit is a bit of a non-sequitor with the style and I don't like the super wide armscye.  However, no other patterns have come out that refine those features to my liking so I'll have to size down and hope it works. 

Knit Dresses 5-2012

Knit dresses.  The Suzi Chin on the left bears a strong resemblance to the lovely Issa London dress spotted by The Selfish Seamstress in a shop window.  I am wondering if the McCall dress on the right can be made in a woven.  It says it's for knits, but as a wrap dress it only needs to go up a size to work for wovens, right?  I'd want a lot more underlap on the skirt, though, regardless of whether it's in woven or knit.

Tops 5-2012

Tops.  I really like that Palmer/Pletsch wrap top on the lower left.  The shoulder pleats are a nice detail, and the wrap looks like it's a bit higher and secure.  I see it more for cool weather than warm as it seems a lot of fabric.  I'm hoping a lot of people on Pattern Review make this so I can get some ideas!

Dresses 5-2012

Fancy dresses.  I had somehow never noticed the vintage dress on the left.  I like the simple shape in front with the surprises in the back.  I am also thinking the volume in the back will make it comfortable for biking.  I had thought to use one of my African fabrics for it, but now I'm thinking maybe navy blue with white for the back neckline, sort of a reverse sailor look?  Hmmmm.

Butterick 5749

Only two of the patterns have firm ideas on what they'll be made into.  For the Issa knockoff, this watercolor print knit.  I'll have the stripes going vertical for the bodice and skirt and horizontal for the midriff.


Vogue 8755


For the Vogue colorblocked dress, these coordinating fabrics from Africa.  They are the same fabric, but the left one was block printed.  My friend who brought me these from when she lived in Liberia said the coordinates are very popular for tiered ruffles.

However, I can't decide if the print should be the main body as in the pattern envelope, or the fauxlero.  I'm leaning toward having the print as the fauxlero and the solid as the main body.  Thoughts?


============

Thanks to all who have pointed out Hot Patterns' new pattern that bears a suspicious resemblance to the DVF Grandie top I tried to knock off.  Alas, Hot Patterns is just not drafted for a body shape that remotely resembles mine.  It is easier for me to start from scratch than try to use one of their patterns.  Though I am curious about the shapes of their pattern pieces.  I may return to the Grandie top someday, but it won't be for a while, LOL.

=============

Side


Samina asked about the shoes I was wearing with the Grandie blouse.  I get compliments every time I wear them for photos and in real life.  But here's the secret:  I got them for $15 at Ross.  I wear dress shoes for work so infrequently (and in real life never) that I decided to start buying cheap shoes instead of nice ones.  I was only getting a few wears before the heels went hopelessly out of style so the cost-per-wear was too high to justify a nice pair.  I have to say, I made an auspicious switch in these shoes!


The brand is Sam & Libby.  I got them maybe up to a year ago, but when I stopped by Ross a couple of weeks ago I spotted another pair in my size.  I'm not going to lie to you:  I bought them.  Now I have a pair for work and a pair for home.  I don't know how regional Ross's offerings are, but it may be worth a quick run-through of your local store to see if they have them.  Despite the low price, they are surprisingly comfortable.

Wednesday, May 16, 2012

One Yard Project: Dirndl Skirt

Dirndl Skirt Thumbnail

I have a love/hate relationship with Pattern Review contests.  It's fun to sew along and have encouragement, and it's also nice to have outside forces determine your next project rather than making the agonizing decision myself.  On the other hand, I have a big list of projects that I really do want to make and only about half my contest entries actually come from that list.  So I deviate from things that are high on my sewing list to make things that don't appear at all, simply to fit within the contest parameters.  Despite all this, the contest often wins out.  I guess I like the company.

The One Yard Project contest is a new one (it ended yesterday; I finished the skirt and pattern review on time but had to finish up the photos*), and it's a clever idea:  You have to find a use for those short lengths in stash.  They did allow you to cut off one yard from a longer length and use it, but I think the better challenge is in using an orphan piece.

*Although the contest closed early, before midnight, and I wasn't actually able to enter it.  Entered, yay!

This polyester chiffon (or maybe it would be georgette) came from the swap table at PR Weekend Montreal.  It has many of my colors in it--turquoise, olive green--but somehow isn't *quite* right for me, perhaps because the overall effect is more muddy/muted than clear/bright.  The piece was 34 inches long (for my metric readers, a yard is 36 inches).


It had a small burn hole in it (like the edge of an iron--no missing fabric), which I fixed with interfacing and zigzagging.  The trickiest part is lining up the cut edges and pressing the interfacing on to keep them together.  Sometimes it's easier to put a piece of interfacing, glue side up, on the ironing board, then place the skirt right side up over the patch.  Line up the edges and then press.

Once the hole is interfaced, just run a close zigzag stitch over it (from the right side, so you can see the hole).  If your thread matches, the fix is nearly invisible.

I've gone back and forth about this fabric way too many times in the two years I've owned it.  It would make a nice flowy top, but the overall color effect isn't great near my face.  I almost made it into a skirt for my bike wardrobe for The Netherlands, but balked.  Because of fabric limitations, I either had to have the print running vertically (as I finally ended up doing) or add a contrast waistband if I wanted the print to run horizontal.  Stripes are big right now, but they are pretty much all horizontal, so vertical stripes might look dated.  But a contrast waistband limits the tops that can be worn with a project.  Dilemma.

The One Yard Contest made me finally just make a decision.  I decided to go for vertical stripes, throwing outdated caution to the wind.

So that I didn't spend too much time on unplanned sewing (and didn't have to deal with the waistband situation), I decided to do a gathered elastic waist.  Of course, I had to make it complicated and it probably would have been easier in the end just to do a waist facing and zipper!

Create Double Elastic

On the PR trip to Montreal, I found some olive green picot elastic that happens to be a good match for the skirt.  However, I feared that the picot elastic alone would not be strong enough to hold up the fashion fabric and lining (lining does not count against your one yard allotment, under the terms of the contest).  So I stitched it to some sport elastic.


Stitch Lining to Waistband

I was hoping to just stretch the elastic to fit the fabric, but the width of the fabric greatly exceeded the elastic's stretch so I gathered the skirt and the lining.  I first sewed the wrong side of the lining--so that the right side would end up facing outward--to the elastic with a wide zigzag stitch (to allow for stretch).  I positioned it so the left "bite" of the zigzag was close to the decorative picot edge of the green elastic, meaning that picot edge would stick up over the waistband.


Stitch Fashion Fabric to Waistband


Next I gathered the upper edge of the fashion fabric and positioned it in place right side against the elastic, sandwiching the waistband.  I stitched from the lining side so I could use my previous stitching as a guide, again using a wide zigzag for stretch.


Finished Waist


I flipped the fabric to the right side and there was my little picot edge!  I pressed the fabrics down, but finding them still very bulky I topstitched with a twin needle to preserve stretch.  However, the twin needle stitching does not have as much stretch as a zigzag and I have to pull the skirt on over my head instead of from the floor over my hips.  The topstitching negates all the work I did to sandwich the picot and I could have just gathered the fashion fabric and lining together, but c'est la vie!  I knew this would be a quick and dirty project.


Serger Rolled Hem


The lower edge of the skirt is finished with a serger rolled hem to keep it as light as possible, and also because it's easy!

I sewed in a button to mark center back.


Pink Top-Front
Red Top-In Motion


While an elastic waist dirndl is not the most flattering thing ever, this skirt can theoretically be worn with a tucked in top to show off the elastic.  The elastic can also be covered with a belt, or a top can be worn over it.

I'm not totally in love with this skirt, but it is useful, bikeable, and will work just about year-round, depending on how it's styled.  It matches a lot of the solid-colored tops I have in my closet.  It also has a nice flow, as you can see at right.

I wore it yesterday and it is comfortable and breezy for a humid Spring day in DC, but the slippery rayon lining means I can wear it with tights and boots for winter.

All photos are here and the pattern review is here.


==========================

I sat out the "best of" contest, even though I eventually want to make another Simplicity 2369  mock wrap dress, which made the list.  I had to draw the line somewhere!

Do you enjoy contests, or do they interrupt your "real life" too much?

Friday, May 11, 2012

Simplicity 2365, Wing Collar Shirtdress

S2365 thumbnail
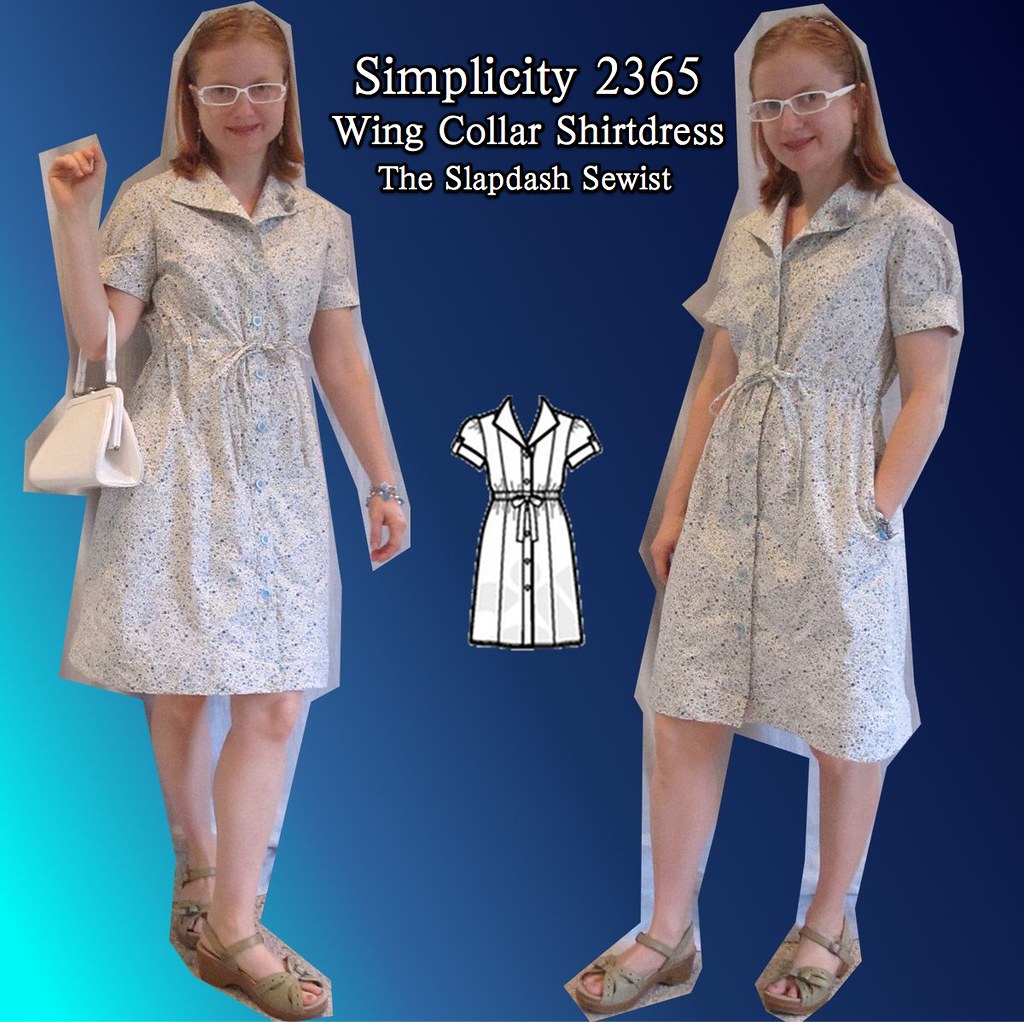
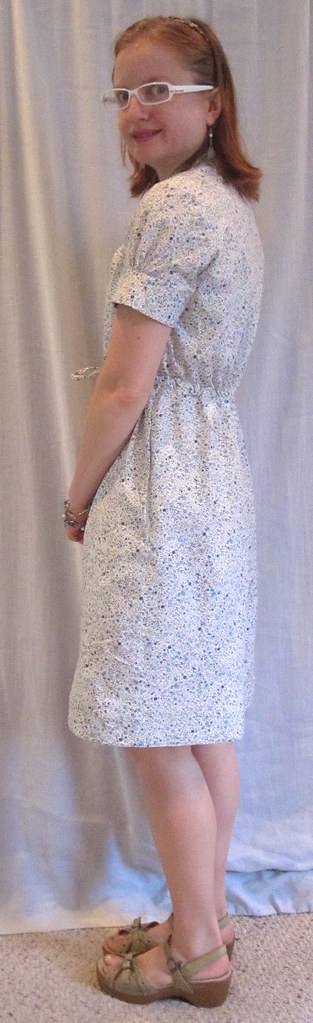
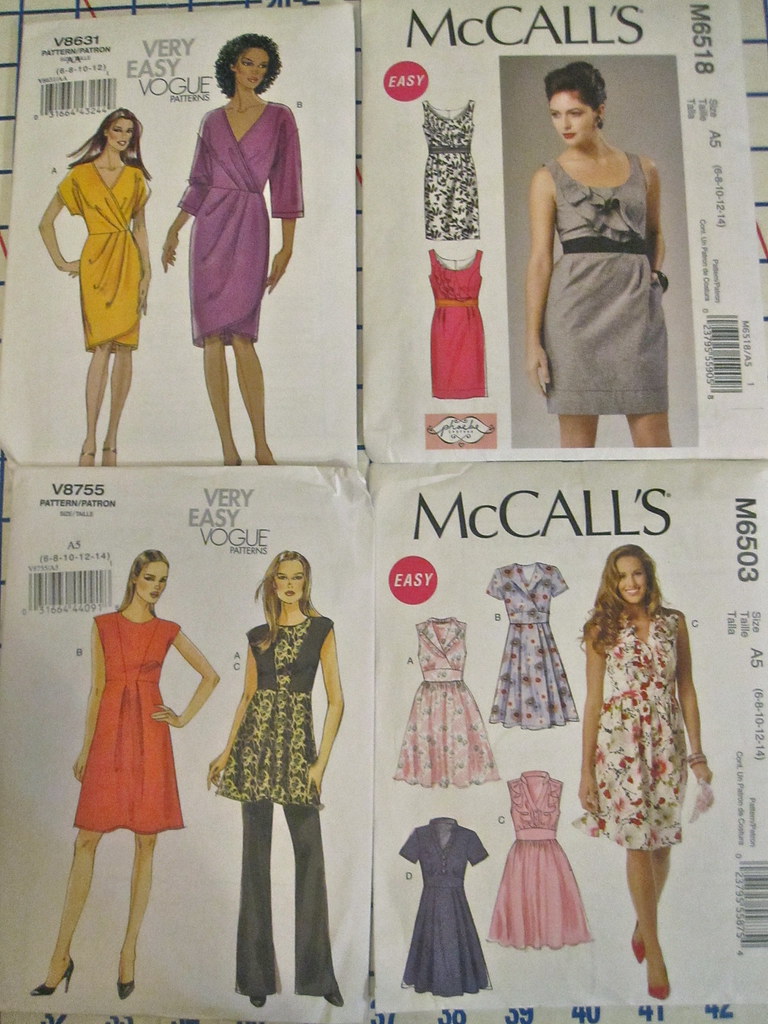
I bought this pattern, Simplicity 2365, sometime last year, I think.  Shirtdresses have been popular the past few years, but I find dresses tricky to fit without a waist seam (see, e.g., 
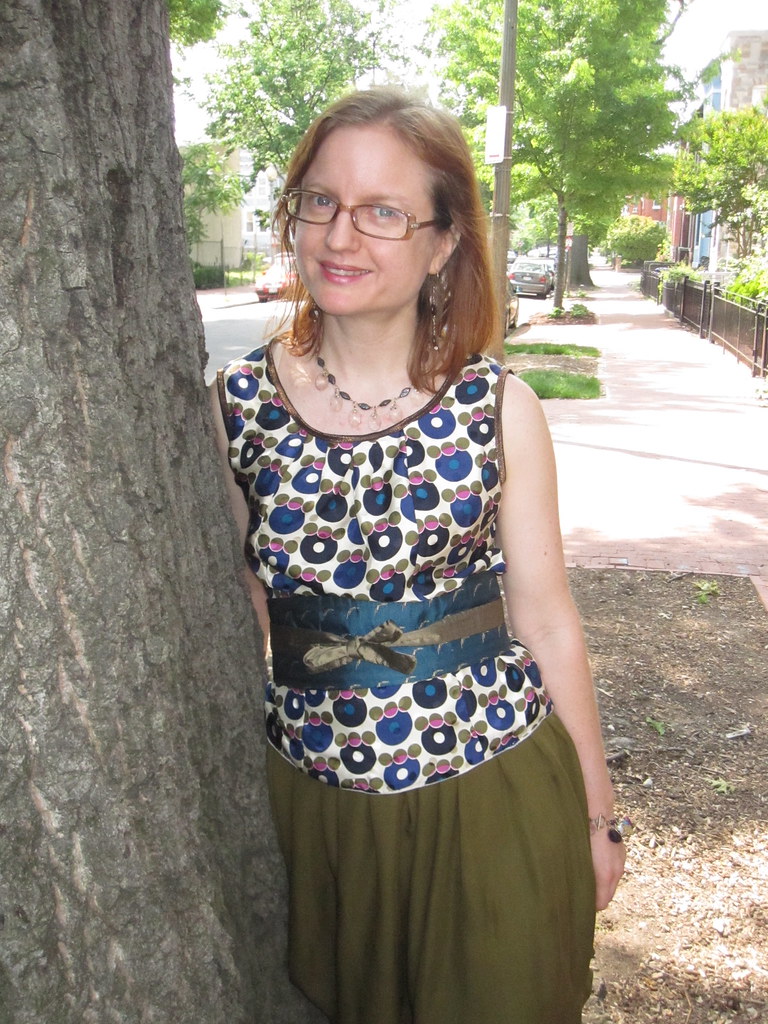
Burda 10-2011-123).  However, this one works as one piece because it is not fully fitted, while the empire drawstring gives it some shaping so it's not a sack.

I also really like the collar.   Incidentally, what do you call this kind of collar?  Google-searching indicated wing collar or revers, but for all Google's knowledge I haven't found it to be overly smart about fashion technicalities.

The pattern includes another variation, a more traditional tunic with pintucking, which has been very popular.

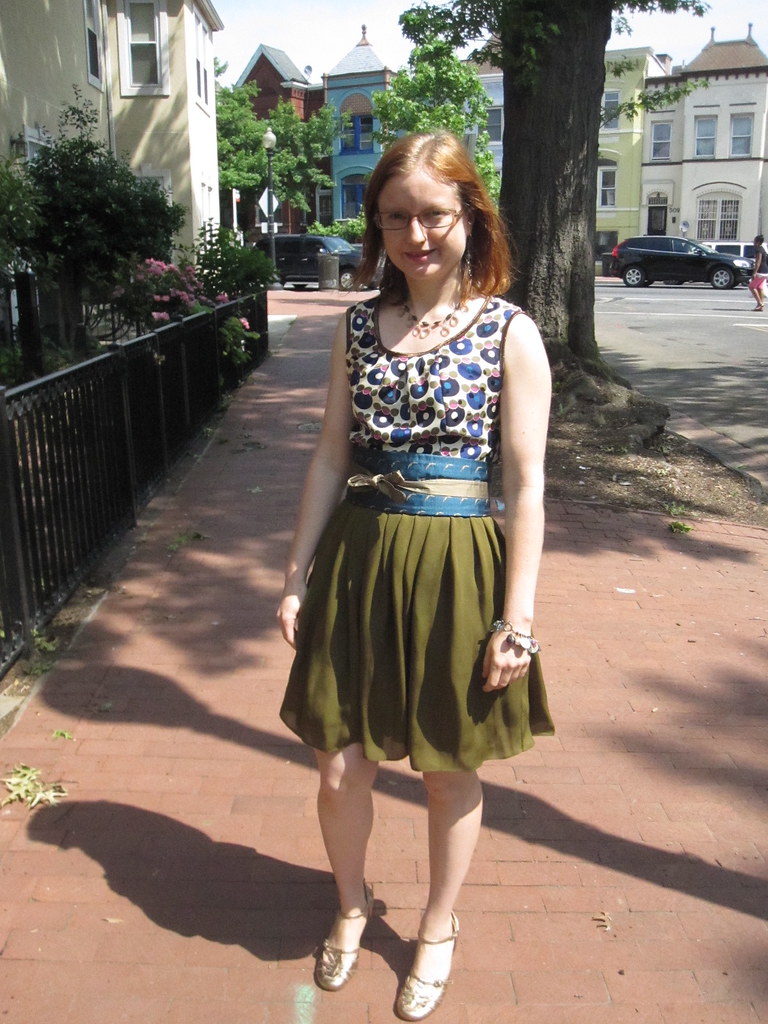
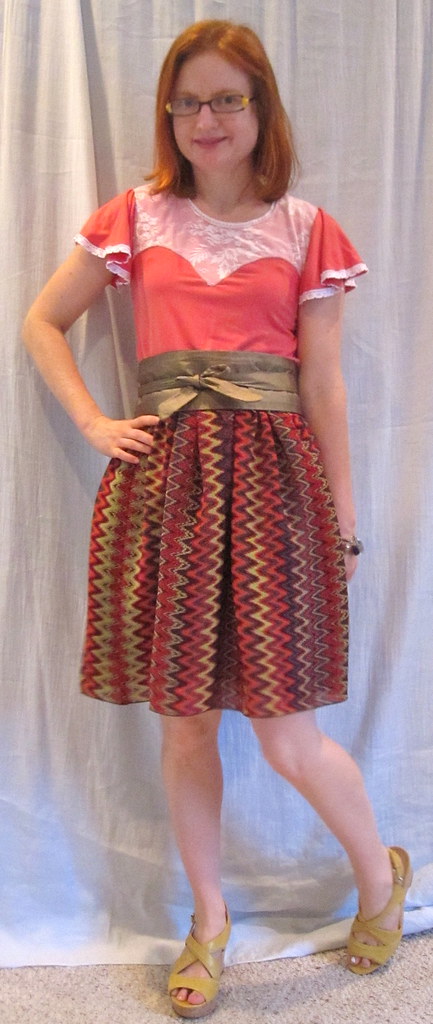
To get a dress I added two inches to the tunic length (view C), but it was way too short.  I didn't have much choice on this project because of limited fabric, but next time I would add 5-6 inches for ample length and hem allowance.

SBA
Broad Back Adjustment


I started with broad back and small bust adjustments.  LOVE a princess seam, man.  So easy for bust adjustments.  With the amount of ease in the dress, I'm not sure my SBA really made a difference but it makes me feel better.


The collar and placket are a single pattern piece--with a seam at center back--which is really nice design touch.  Without a seam at the neck, the collar sits really nicely.  I love that there is no bulk from the placket/collar intersection, which is the bane of my existence on standard blouses.

Stitch Facing to Wrong Side


As per my usual procedure, to make things easier and allow for a machine finish I applied the collar/placket facing to the wrong side of the fabric first.


Stitch Upper Collar/Placket to Inner


Next, I sewed the "outside" collar/placket to the facing (not really outside because the "inside" or facing collar/placket is folded out for the collar) along the outer edge of the facing.

Turn Under SA and Pin Upper Collar/Placket


Turn under the seam allowance of the outer collar/placket and pin in place.

Topstitch Collar/Placket


Finally, I topstitched the turned under the seam allowance of the outer collar/placket close to the edge.  Very easy, nice clean finish, no tedious hand-sewing or nerve-wracking topstitching from the top and hoping you've caught the folded seam allowance on the underside (as per the pattern instructions).  With this print, the topstitching is fairly invisible


I used some vintage buttons, which is always fun.  I bought them at a Goodwill trunk show in 2009 for $1.99.  They were made in Japan and originally cost 29 cents, but I have no idea what that means for the age.  As it turns out, the buttons are pretty much decorative--with the drawstring untied I can just slip the dress over my head.  I wouldn't have opened the buttonholes if I'd known that (and won't if I make this again).  I realized after sewing the buttons on that they are very dusty inside, LOL.  I never thought about it, but I suppose they have been sitting around for several decades and were bound to be a bit dusty!  I hope the color doesn't look too different after they come out of the wash.


Casing

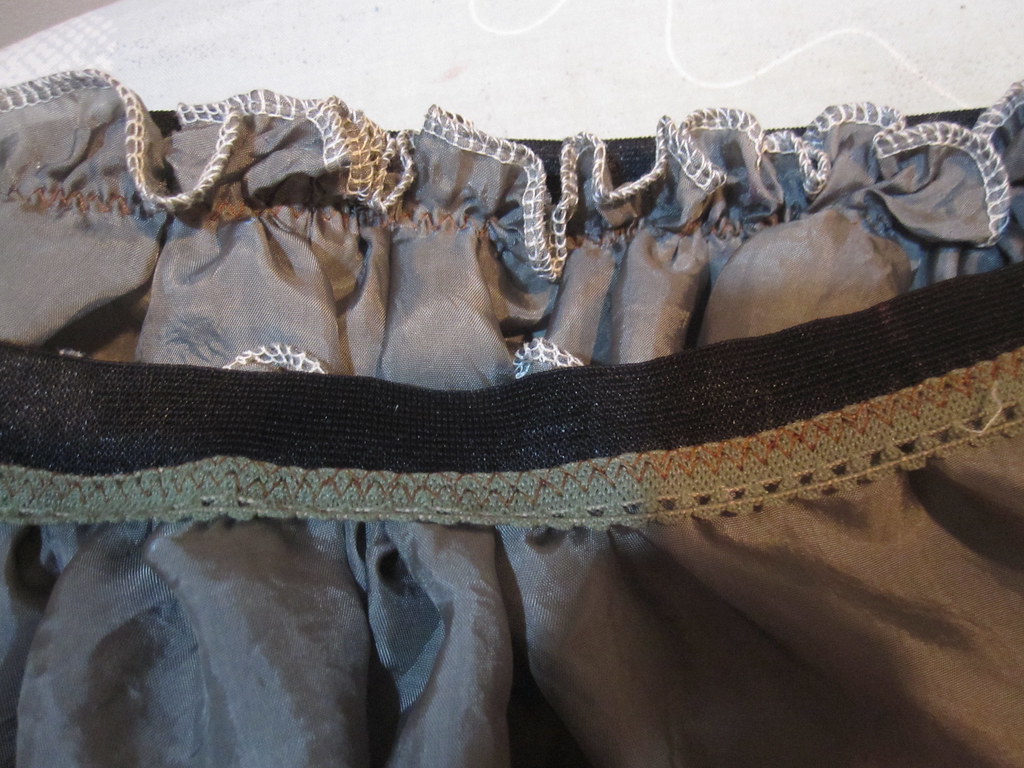
Since I was making a dress and not a top, I thought I would move the casing for the tie down about 1 1/2 inches, as I felt the marked height would have been too empire on a dress.  However, when I got the dress try-onable I pinned a piece of elastic in place to test various heights and I ended up pretty much at the marked line.

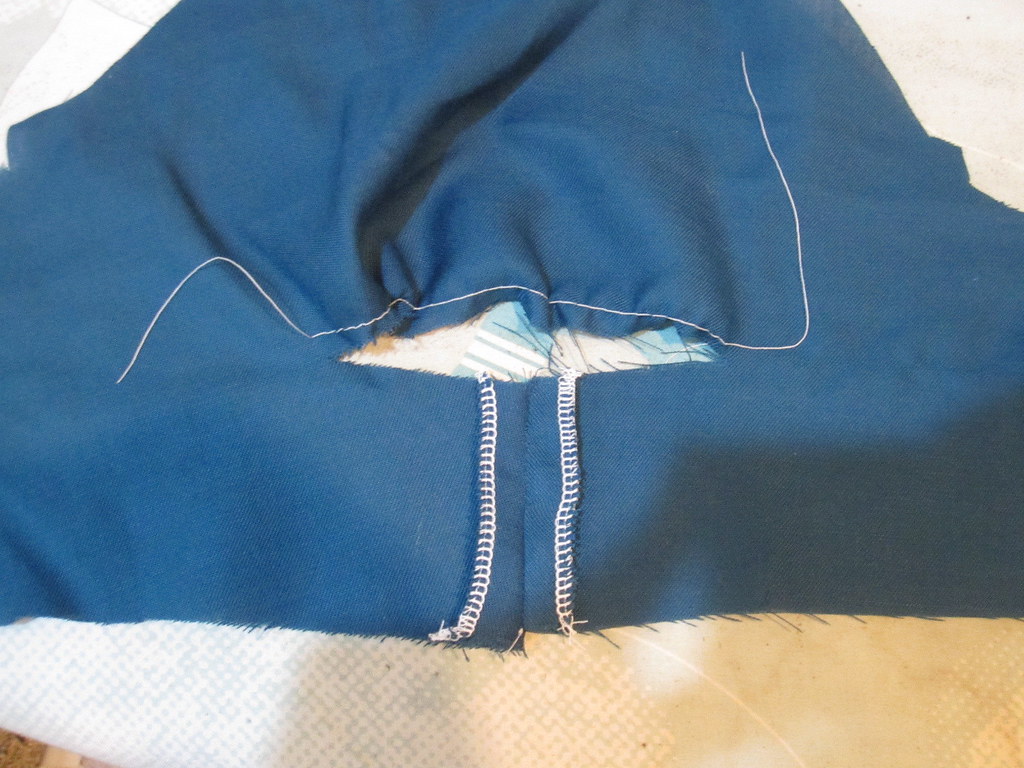
The casing is applied along the inside at the marked placement line, not at a seam which is my preference. This was a little nerve-wracking for me because a straight line gives me the vapors.  I think it is a little low in the back. Rather than use packaged bias tape, I just tore off a cross-grain strip of batiste--the bias function is not needed. Where the tie emerges next to the placket you sew a buttonhole. 

I made my tie with two fabric pieces connected by about 3 inches of elastic in the center so I wouldn't have to yank the casing straight to put it on and take it off.

Stitch Pocket to Princess Seam

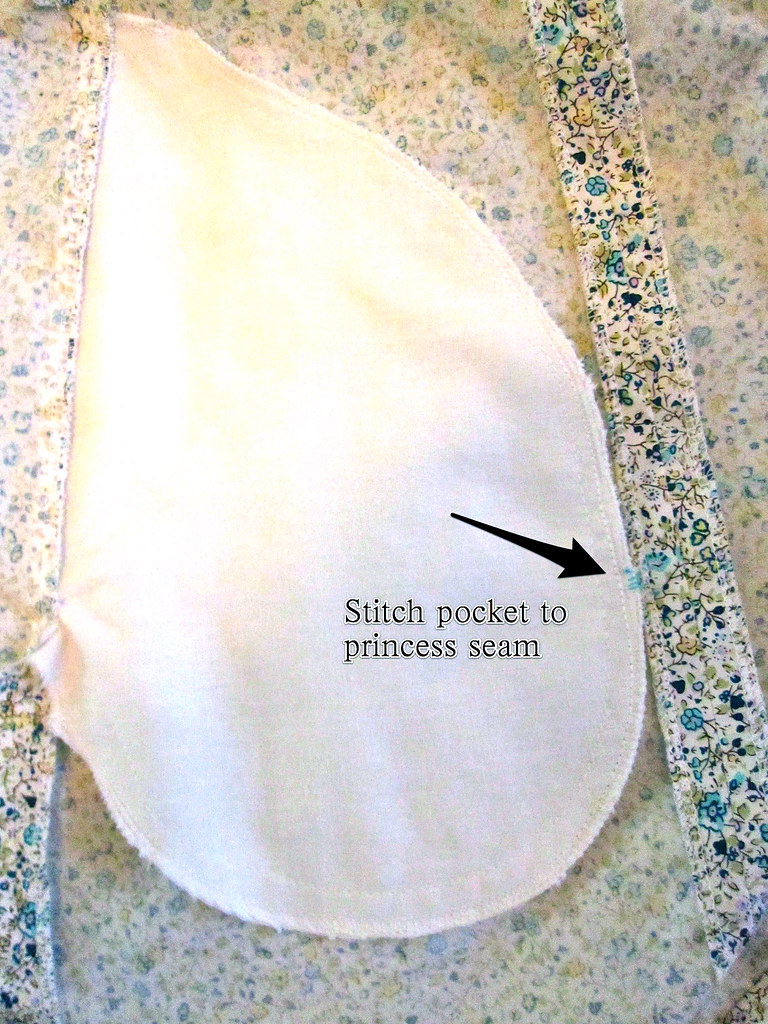
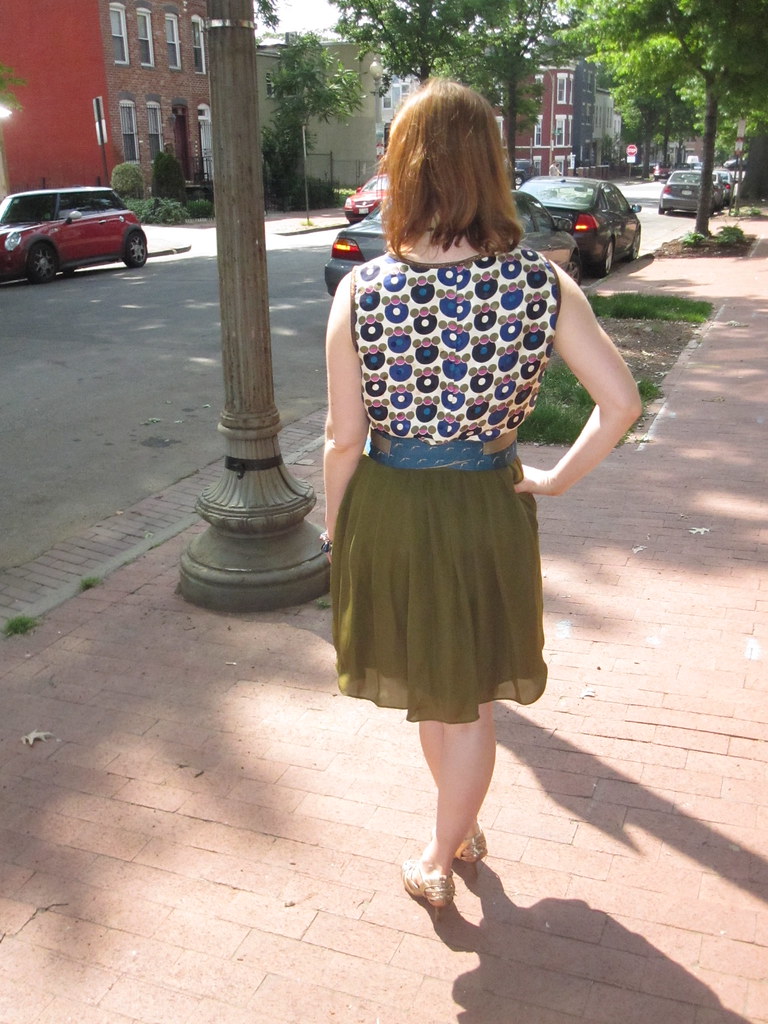
Also because it was a dress, it really seemed to need pockets.  I did a little reorganizing recently and *finally* got around to putting up a cork board to holds frequently used patterns/elements in plastic sleeves, including a couple different pockets.  I didn't have enough fabric to cut self pockets so I used cotton batiste.  I should have thought to face the pocket pieces attached to the back with small scraps of the fashion fabric because the white fabric shows if the pocket pulls open.  I solved this by tacking the pocket to the front princess seam to keep the pocket pulled toward the front.  It works pretty well.


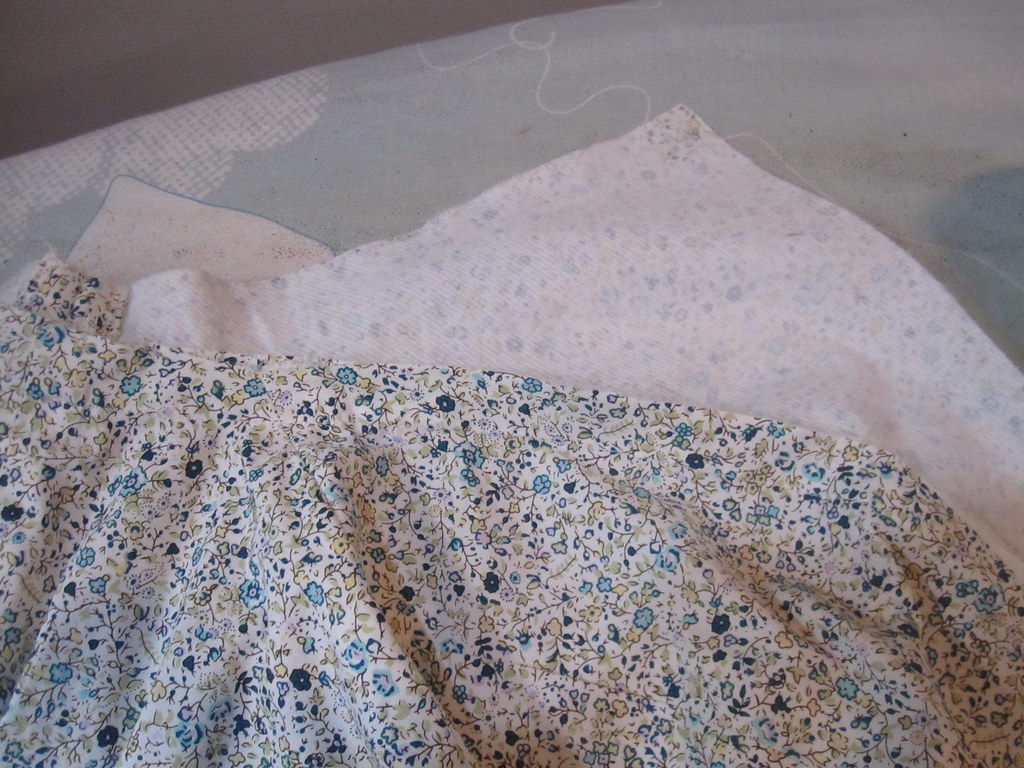
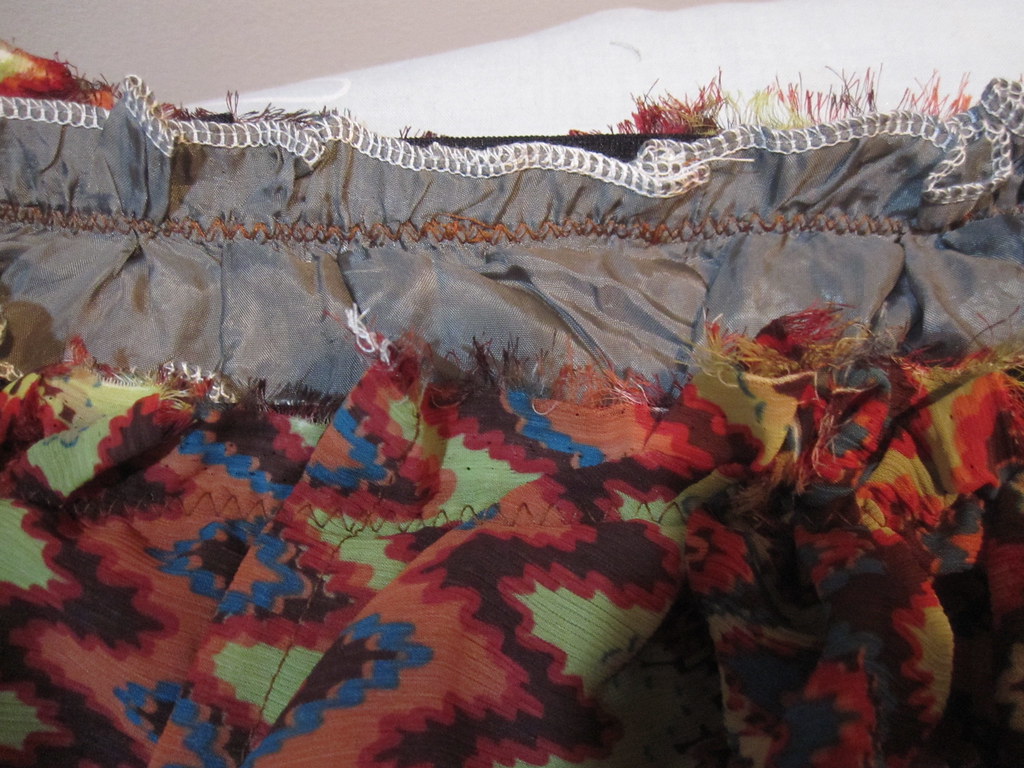
When the dress got try-on-able I realized it would be way, way short.  I cut 3 inch wide strips of fabric from my scraps--and they were definitely scraps, as you can see by the pile of what I had left after cutting my hem strips!--and pieced them together.  I debated possibly making a ruffle, but in the end decided to do a simple faced hem band, using the same inside-to-wrong-side-first method described above for the placket/collar.
Pieced Hem Band

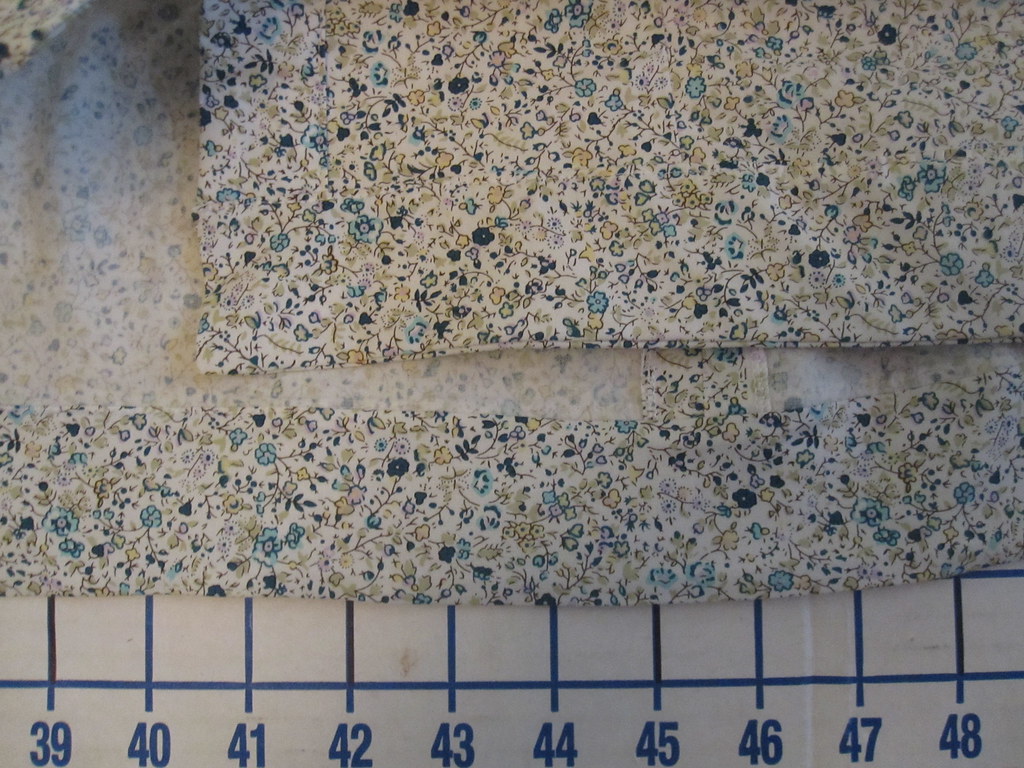
In the end, I actually could have done a 1 1/2 inch hem band instead of 2 1/2 inches, as the dress could be slightly shorter, but eh.  I am sort of prudish about hemlines for work.  I'm comfortable with right at the top of the knee; any higher and I think about it all day, wondering if I've gone too short.

For instance, I don't wear my Burda 02-2009-124 lace dress very often because I feel that it is a whisper too short--only about 3/4 of an inch, best seen in this photo, but enough to make me worry that I am lacking propriety.  (BTW, I did go back and fix the zipper, trimming the lace to the edge of the finished zipper edge and hand-stitching it in place so there is only one layer of lace there.)


Sleeve Closeup


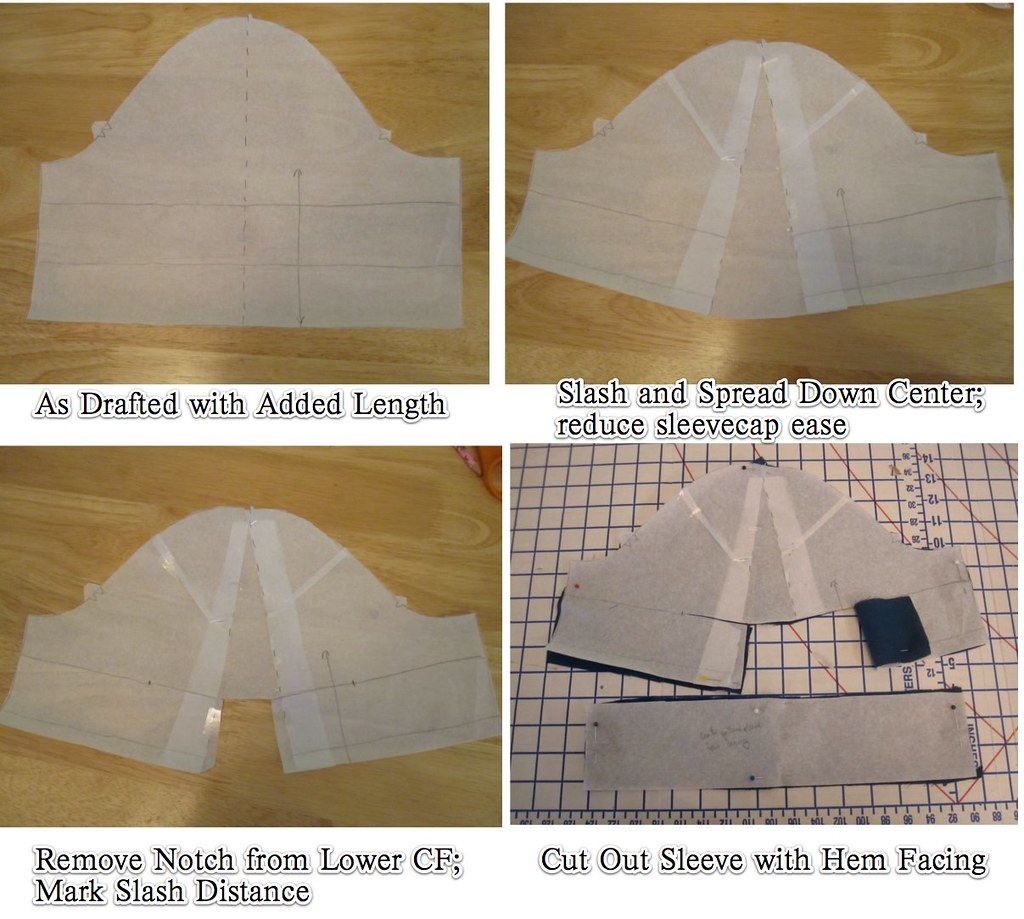
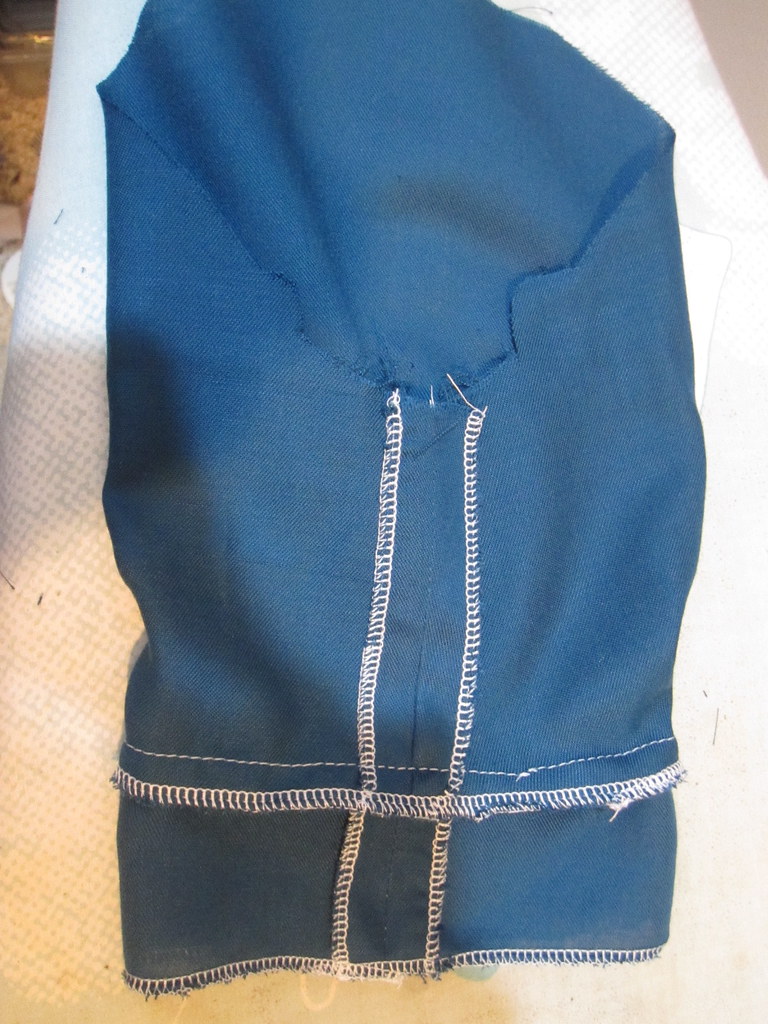
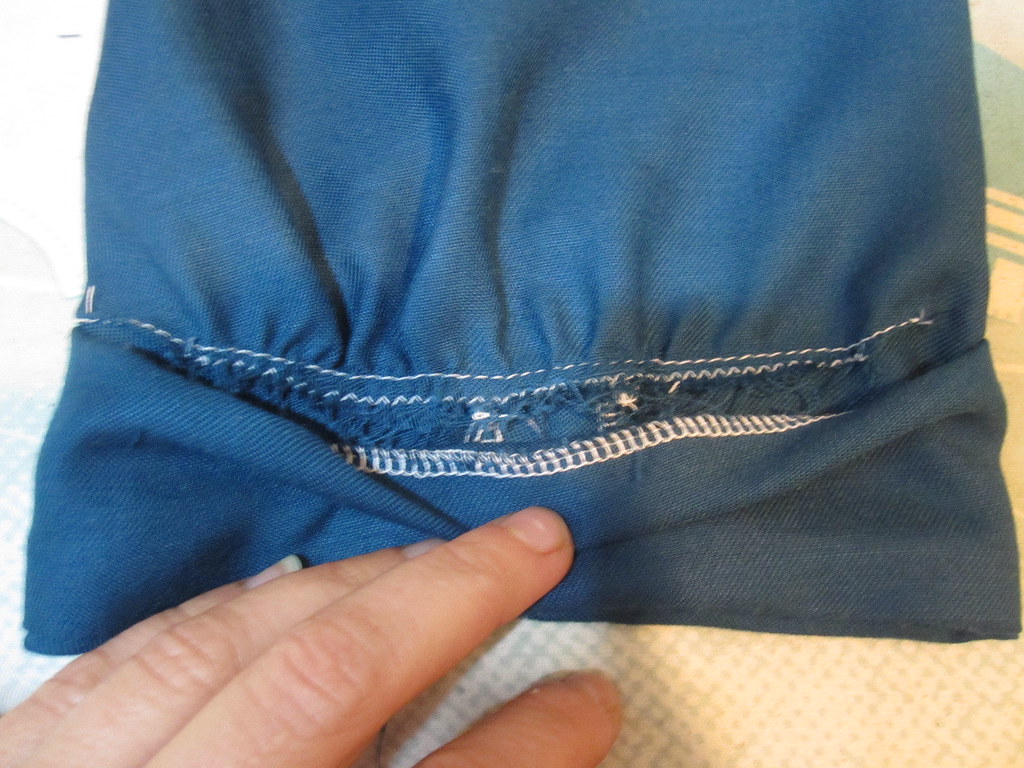
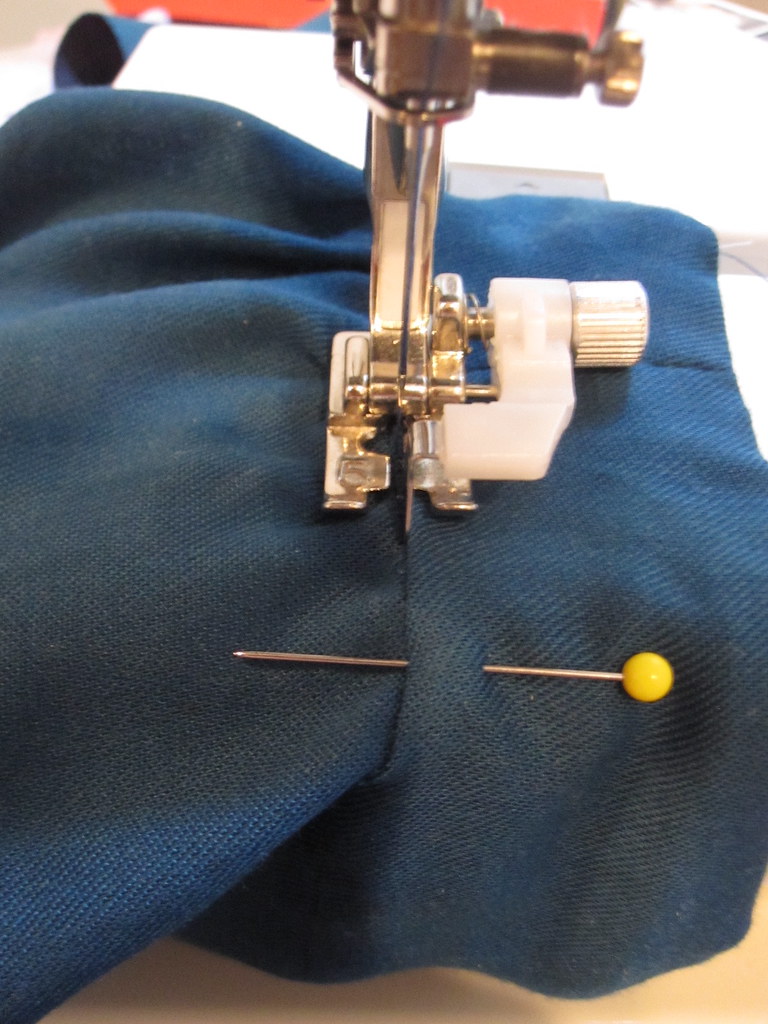
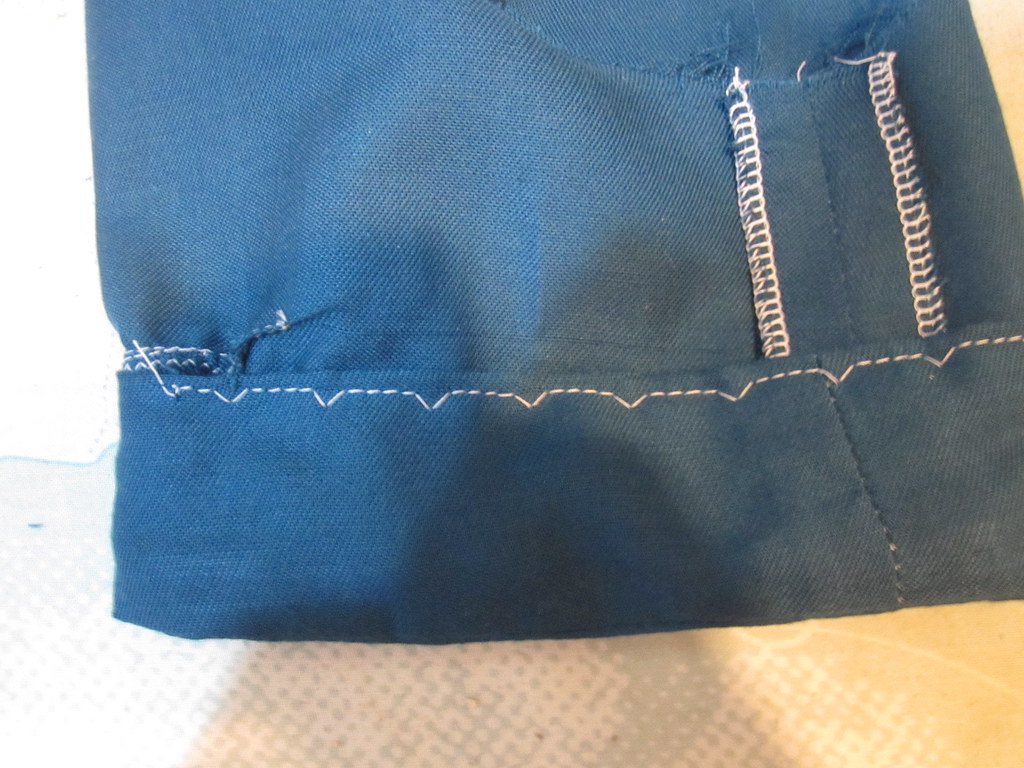
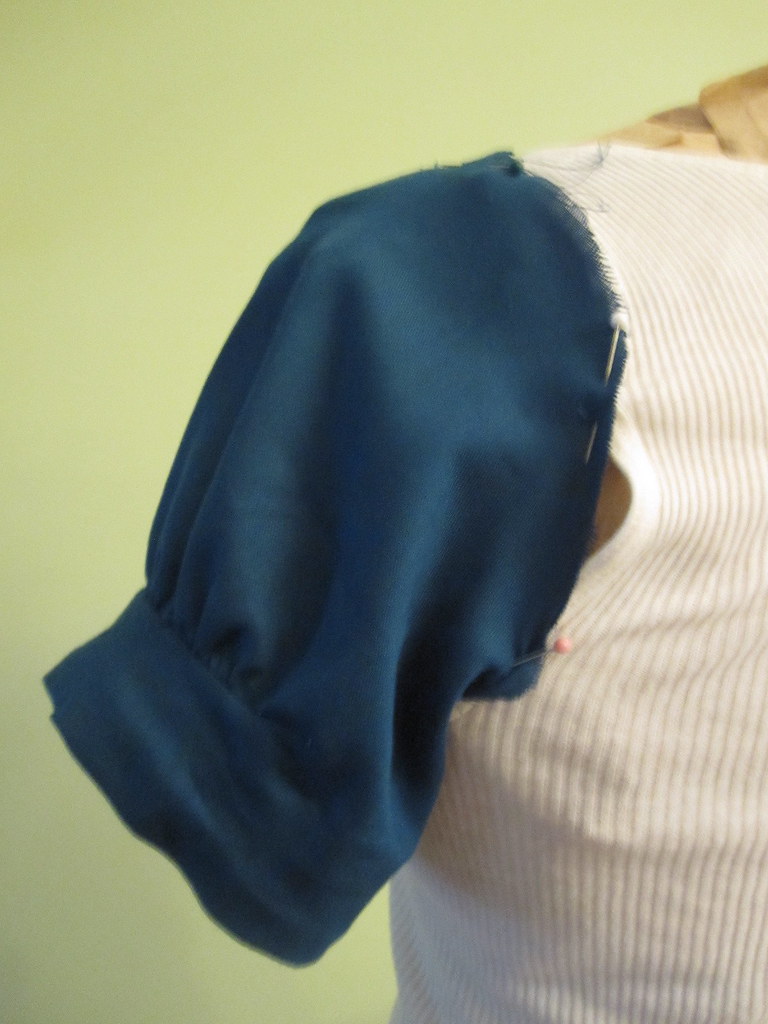
I used the faux hem band gathered sleeve variation described here (hand-stitching to the gathered seam instead of stitching in the ditch).  I am really happy with the way it looks on this dress.  It is a nice complement to the feminine style and so much more interesting than a plain sleeve!  Though in Simplicity's defense, there is a drafted short sleeve with a cuff and tab detail that is more fun than a plain sleeve.


Side BackFront Closeup


I bought this fabric nearly four years ago from Chic Fabrics in New York ($5/yd).  The print is in my colors and I couldn't leave it there, but it took a while for these little Liberty-style florals to come into fashion.

I had considered various projects through the years but nothing really grabbed me until now.  I think I aged it just the right amount.  `-)

This pattern turned out just as well as I'd hoped.  I really love the collar and it is a great place to showcase this brooch from my mom.  I can definitely see making it again with long sleeves as a winter blouse. 

All photos are here and the pattern review is here.

Monday, May 7, 2012

Gathered-Hem Sleeve Variation

A couple of months ago I was walking down the street and saw a woman in a nice professional dress, a well-fitted sheath with a flattering sleeve gathered into a hem band.  Or so I thought.  When I got closer I saw that while the center of the sleeve was gathered as though into a hem band, the sides of the sleeve were not gathered and, indeed, did not have a seam.  I was so intrigued that I nearly circled her trying to get a good look.

For some reason I have a thing about basic, standard sleeves.  I make them, but they bug me.  I guess I feel like I should be more creative than that?  Anyway, I had to figure out these sleeves.  It took me some cogitating, but I finally envisioned how it had been done.

Sleeve Drafting

I started with the basic short sleeve.  I added two sections of length, one for the integrated hem band one one for the hem facing (I cut off the hem facing piece and used it separately).

Next, I marked a line down the center of the sleeve, coming from the shoulder marking, and slashed from the bottom of the sleeve up through the seam allowance at the shoulder.  This being a Simplicity pattern, I also took the opportunity to take out some of the ridiculous sleeve cap ease favored by the Big 4.

I filled in the spread area with tissue, then cut out a notch from the integrated hem band section.  This is to give extra fabric above for gathering.  Then I marked the slash lines at the original sleeve length, 3 inches from the center on either side.

You can see the slashed area in the cut out sleeve.


Sew Lower Center Seam

To construct the sleeve, first sew the center seam in the integrated hem band.

Then put in a gathering stitch on the area above the slash, about 1/4" from the edge.

The fabric I was using for muslin was rather shreddy.  If I was using a fabric like this for my real garment I'd probably zigzag it before gathering.
Gather and Stitch with Narrow SA


Pull your gathering thread (you can see I just used one row of stitching for this short area) to match the lower edge.
The seam is sewn like a fisheye dart, tapering at each end.

The real trick is taking a tiny seam allowance so you don't distort the length of the sleeve.

I zigzagged the edges together once it was sewn--no room for a serger in there!


Stitch Hem Facing to Lower Edge


Next step is to sew your hem facing to the lower edge.


My hem facing is just a straight piece of fabric.  It might be better to have it slightly curved to match the curve of the sleeve, but it didn't give me any trouble.


Hem Facing Over Gathered Section


The hem facing needs to be long enough to come up above the dart/seam of your gathered section.

Here, you can see that I've turned the seam allowance under.  The folded edge will extend past the dart/seam.


Stitch in the Ditch


For the test sleeve I took the easy way out and just stitched in the ditch along the dart/seam to keep the hem facing in place.


Hem Facing-Inside


 I stitched the rest of the hem facing in place using a machine blind-hem.
Finished Sleeve Side
Finished Sleeve Front


And the finished sleeve!  I was very happy that I actually managed to crack this code.

Before sewing it up for the actual garment I made two changes.  First, my slash was too long, so that most of the ungathered/unstitched fabric was hidden under the arm.  I cut the length in half for the final version.

Side

Second, the integrated hem band sticks out at the center seam.  For the final version I trimmed some tissue off the vertical seams of the integrated hem band, starting at the bottom and tapering to nothing at the slash.  However, as you can see, I didn't trim off enough and the band of the final version still sticks out at the center seam as you can see in the front shot.  So that needs a little more refining.

All photos are here.

You can read about the dress I used the sleeve pattern for here.