Tuesday, June 29, 2010

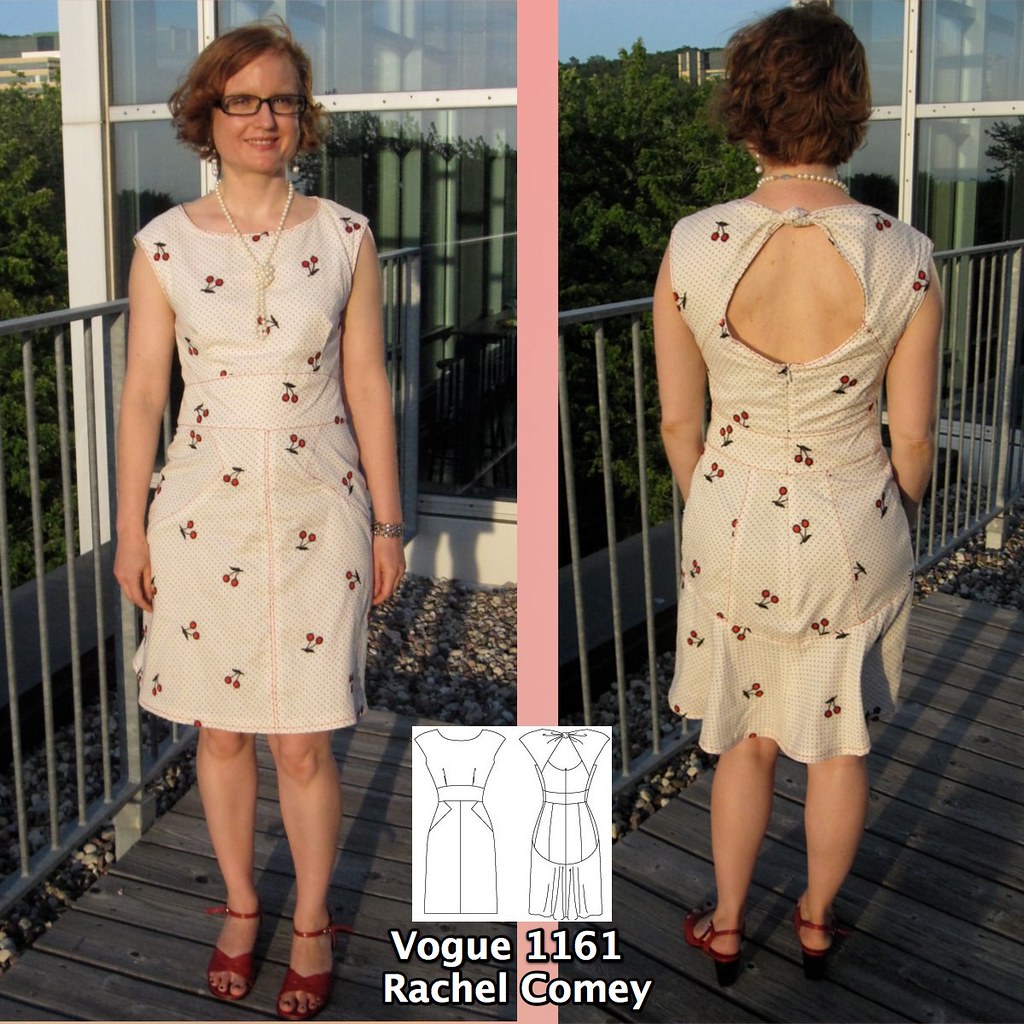
Rachel Comey Vogue 1161: Business in the Front, Party in the Back

V1161 Thumbnail

I was afraid that I wouldn't have time to do any sewing before PR Weekend Montreal, and would be forced to wear something that had already been seen to the cocktail party. Horror! However, I had a burst of sewing time and energy the weekend before leaving (I flew out on Monday) and managed to turn out not only this dress but another dress *and* a top. Phew! I was quite worn out by the end.
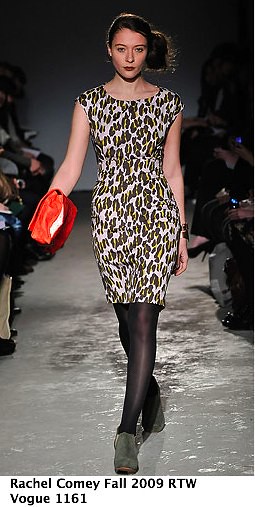
Rachel Comey Fall 2009 Ready-to-Wear Collection Slideshow on Style.comI have been without access to a car (and Joann pattern sales) for over 6 months now, and I had been itching for some new patterns. I went to Dallas for work and rented a car and managed to find a Joann near the conference where I was speaking and snuck over to hit the Joann sale before heading to the airport. Vogue 1161, this Rachel Comey, was my top pick of the patterns I picked up. I don't really dig the original in animal print, as shown on the pattern envelope and on the runway. I am not really drawn to animal print in the first place and the busy print hides the great design lines. And the design lines are fantastic! Love the demure front bodice with open back, separate midriff, and the seaming on the skirt with the flat front and slightly flared back. Such interesting design! I kind of wanted to call it the "Mullet Dress" because it is business in the front and party in the back, but it doesn't *quite* capture the elegance of this piece.

Although I think the pattern is probably best in a slinky, drapey, silky fabric, my $3/yd cherry-embroidered cotton voile from London Textiles at PR Weekend Philly was such a perfect print for the dress that I had to give it a shot.

I was making this in a hurry so I didn't take any in-process photos. To prep the pattern I:

-narrowed the front pleat for an SBA. While the directions have you just fold over the pleats at the seamline, I stitched the pleat up to right under the bust. I find it just looks like saggy boobs if I don't.

-added an inch to the hem in cutting, as it looked a bit short and I wanted the option of longer if I preferred. I ended up taking about 3/4 of that inch off in hemming.

-added width wherever possible in the skirt pieces to increase the hip size, as the envelope had 6-8-10-12 and my hip really prefers a 14. I added at center front (also to accommodate belly), center back, side, and the CB/side back seams for a total of probably 2 inches (which is larger than a 14, I'm sure). The dress is comfortable and not unduly large, so I think it is drafted to be quite snug. Again, this would probably work better in a silky fabric that would skim rather than cling, but frankly I'd be uncomfortable about it.
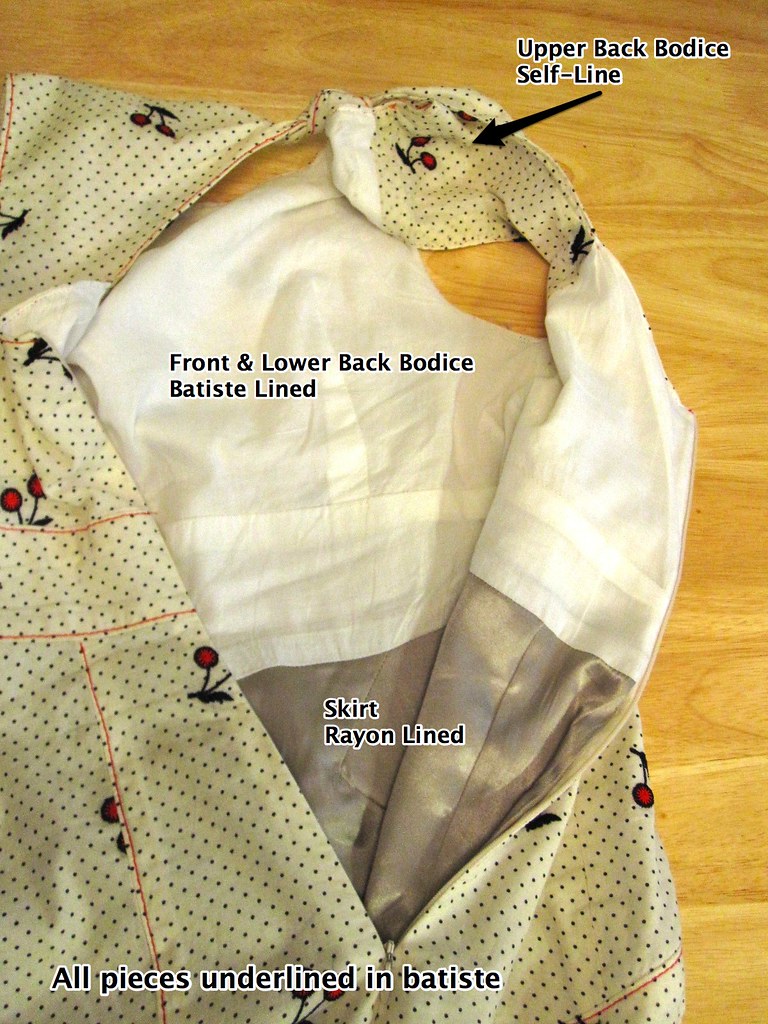
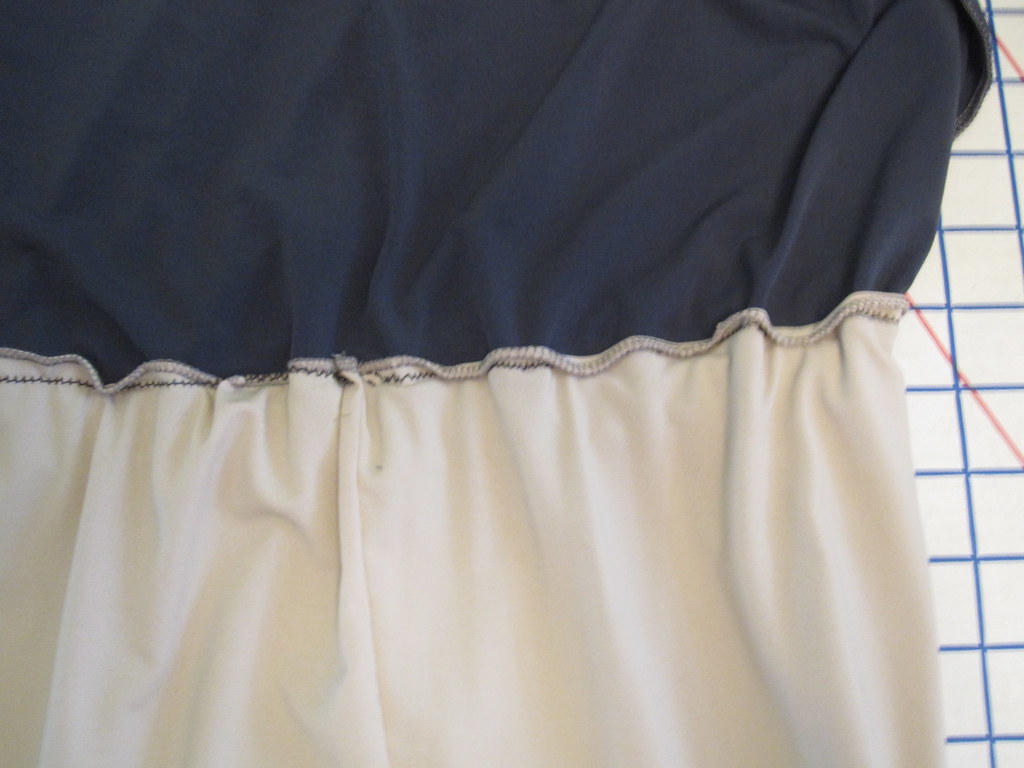
Inner Workings My voile was quite sheer so I underlined each piece in cotton batiste. I was hoping to get away with not underlining the skirt, but as I used a gray slippery rayon lining for the skirt the color change was too much without the underlining.

I lined the front and lower back bodice in cotton batiste, but used a self-lining in the upper back. I was concerned that when I tied the knot the white batiste might flash through. I didn't experiment to see if that would actually happen, but I think self-lining was definitely the way to go with the upper back.

I lined the skirt in a slippery rayon from the Vera Wang collection on Fabric.com so that it would drape nicely. I think it would have been nicer to have a plain skirt front and back for lining, rather than repeating the bulk of the seams with the lining, but with my limited time I was not up to figuring out how to put the tissue pieces together to create a single piece. Well, even with all the time in the world I'm sure I wouldn't have done a great job. As it is, my lining doesn't add too much bulk and with the extra room in the hips there is plenty of space for all those seams.


Topstitching DetailI topstitched most of the seams--no way was I going to all the trouble of putting together all those millions of pieces and having it hidden by the print! This is what mystifies me about the original--all that design thought and detail and it doesn't show at all. Some of it affects the hang of the garment and the way it moves, such as the flare in the lower back of the skirt, but the princess seaming of the upper back skirt and the triangular inset of the upper front skirt are mostly decorative (darts are rotated into them, but darts are easier to draft and sew than piecing).

I used two threads of regular sewing thread in the needle; I think I should have increased the tension because some of the stitches are looping out a little. I was undecided how to treat the center front skirt seam because I didn't do a double row anywhere else, but I think the double row works. After I finished all the topstitching I realized that the triangle points of the front skirt insets are not parallel! The one on the right is nearly an entire inch lower. Man. If that doesn't convince you I am a slapdash sewist I don't know what will. Except maybe that when I realized this I didn't even consider unpicking the skirt, I just ripped out the topstitching and fudged both sides so that the topstitching makes it appear that the points are approximately parallel.
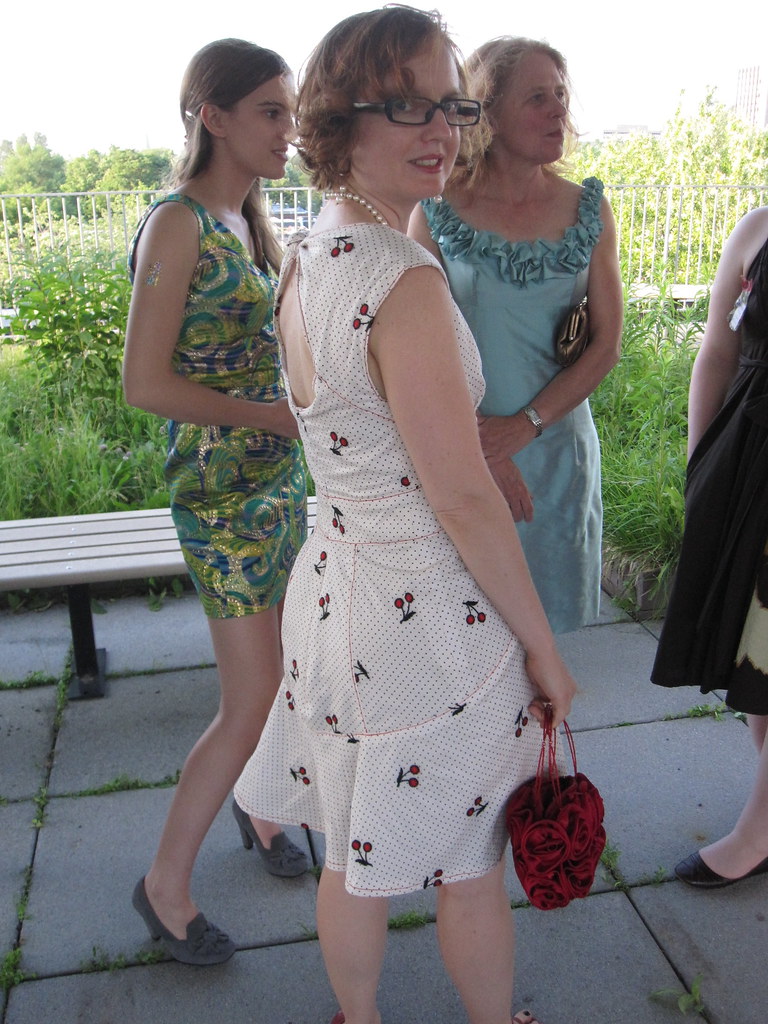
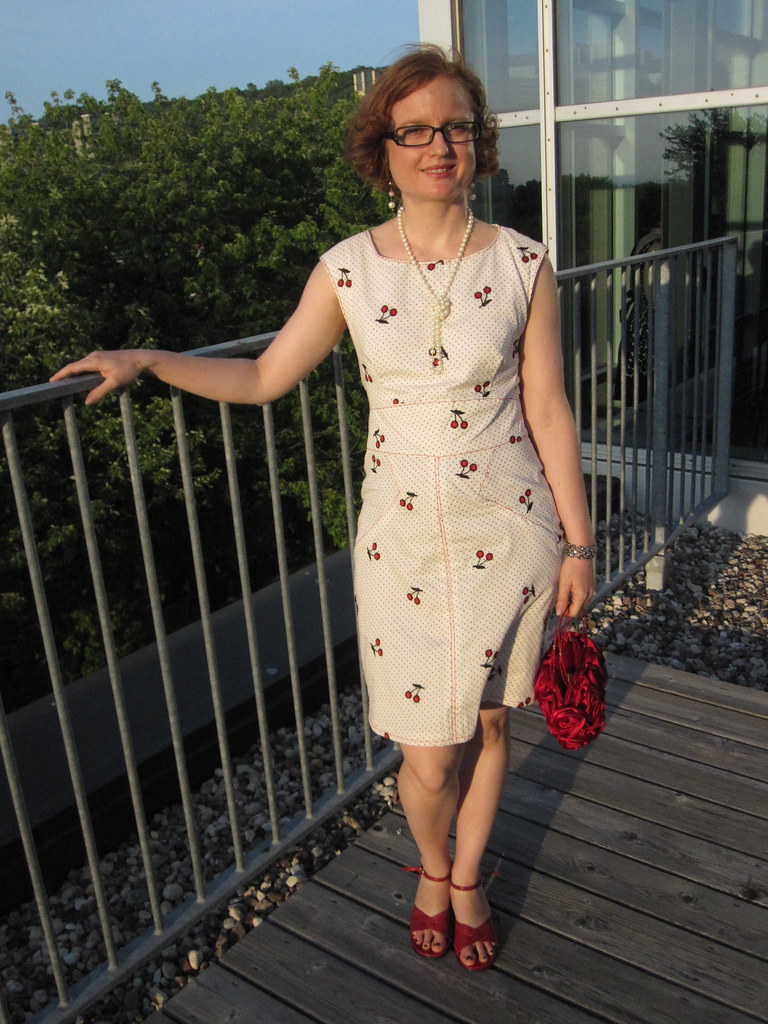
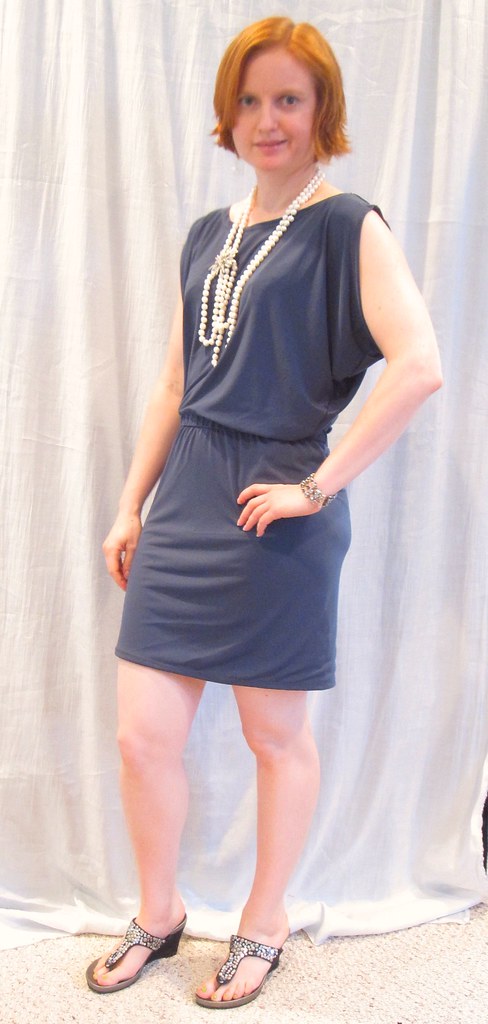
Back V1161 LOVE the way this dress came out. It is understated sexy while still being comfortable to wear. The open back is a cool surprise and makes it seem really bare, when in fact it's not that low and I can just wear a regular bra. Apparently there have been concerns about back gaping on this. Although the back of mine is more round than the geometric, angular back of the line drawing, I don't have a problem with it gaping although it wouldn't have hurt for me to ease the upper edge of the lower back onto some twill tape when doing my topstitching. With the upper back, you can make the knot tighter or looser to deal with any gaping (within a small margin; it won't solve a big problem).

When planning and making it I was hoping I could wear it to work with a little shrug to cover the open back, but alas, I think it is only a date night dress. I wore it on Saturday to go to dinner and a girl in the bathroom asked me if it was from Anthropologie. Theoretically this dress is a step up from Anthropologie (this comparable Rachel Comey dress is nearly $500), but it was still a good compliment!

All photos are here and the pattern review is here.
Friday, June 25, 2010

PR Weekend Montreal 2010

I was thrilled to get to Montreal and do some sightseeing, but the impetus for my visit was PR Weekend Montreal 2010! It was such a great location for PR Weekend. It is beautiful and easily navigable by public transportation, including the fabric shopping. Anne-Marie arranged for everything to take place very conveniently at the Universite de Montreal and for us to stay in the dorms there so it was easy to attend all the events (although my inability to read maps did stymie me occasionally). It was completely fabulous and I'm so glad I got the chance to go. The organizers (Anne-Marie, Connie, Kay, and Claire) did an amazing job and it was so fun to meet so many new people and see old friends again.

Kathryn Brenne Jeanne and Emilie of Jalie

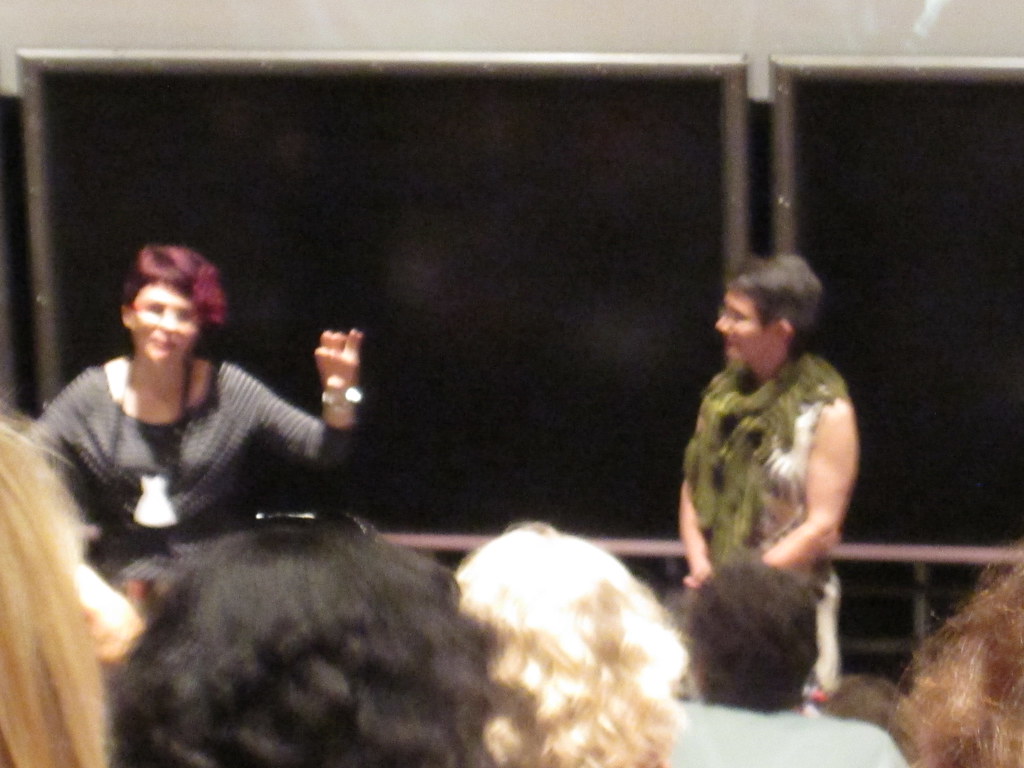
We started off on Friday with lectures by Kathryn Brenne and Jeanne and Emilie of Jalie. Kathryn gave a great demonstration of how to get a complete set of accurate measurements. Cidell and I did this for each other a couple of years ago but I think it may be time to do it again...

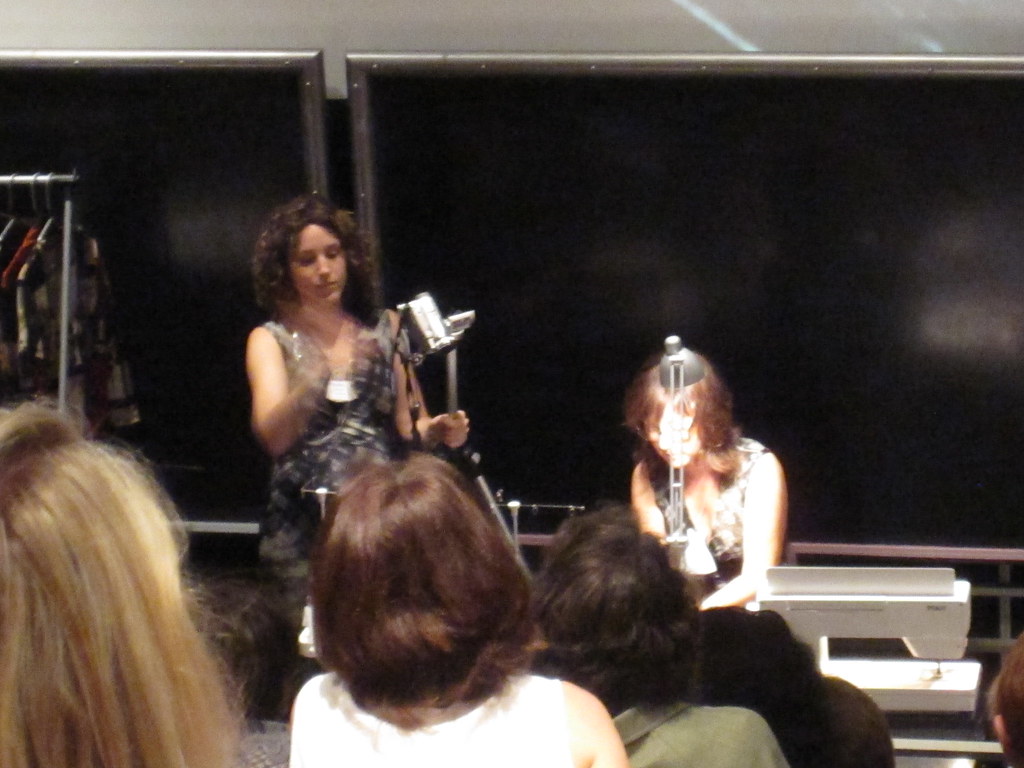
Jeanne and Emilie were fantastic! Jeanne demonstrated how to make three or four Jalie projects (I can't even remember how many--it was a blur, she worked so fast). Seeing things happening in person is soooooo helpful. And she certainly made it look easy! I really appreciate all the thought they put into their designs; lately I am developing a pet peeve about the useless notches used by the Big 4. They put in meaningless notches and then all the actual match points are circles and squares and dots. Why not ditch the meaningless notches and replace the circles, squares, and dots with useful notches???? They were a hoot, with Jeanne speaking in French and Emilie translating for her. I bought the criss-cross top, my first Jalie pattern, mostly because adorably pregnant Emilie looked so adorable in it.

Fashion Show Collage

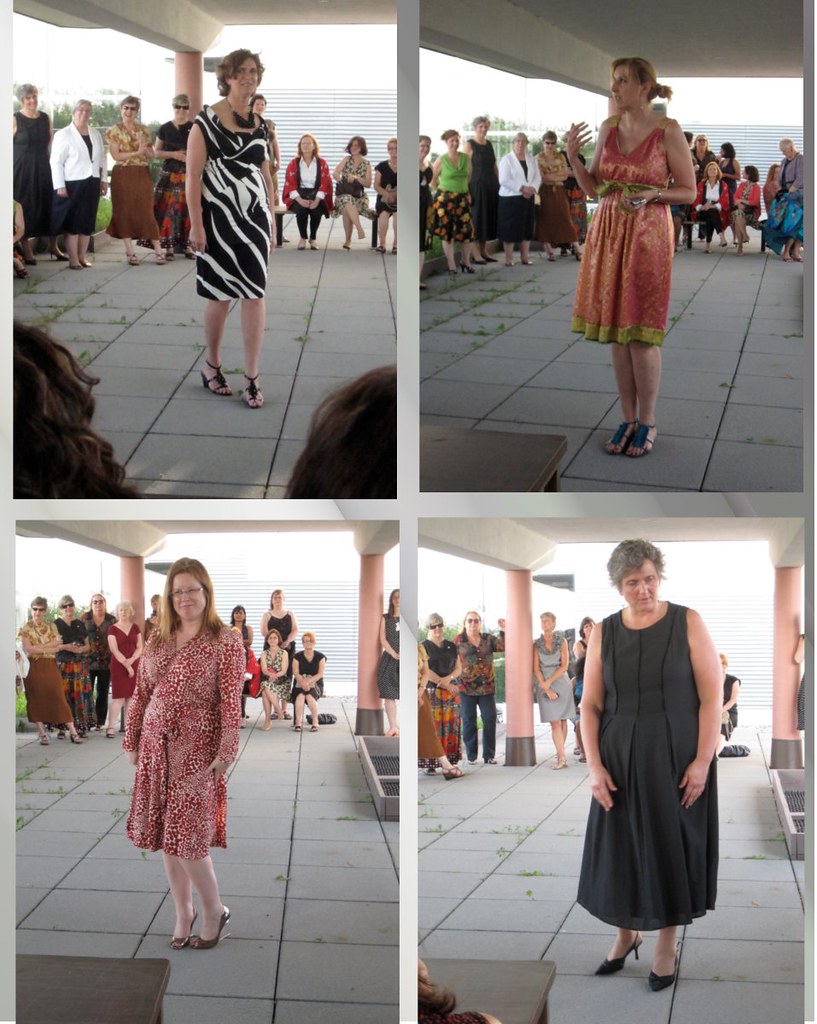
Then we all transformed ourselves for the cocktail party! Everyone looked fantastic and we did a little fashion show. It was better than a regular fashion show because everyone talked a little bit about their project, so you got the story as well as the garment. The food was beautiful (and the lemon curd dessert was to die for) and we all had a fantastic time. But we had to head to bed early because the next day was...shopping day!

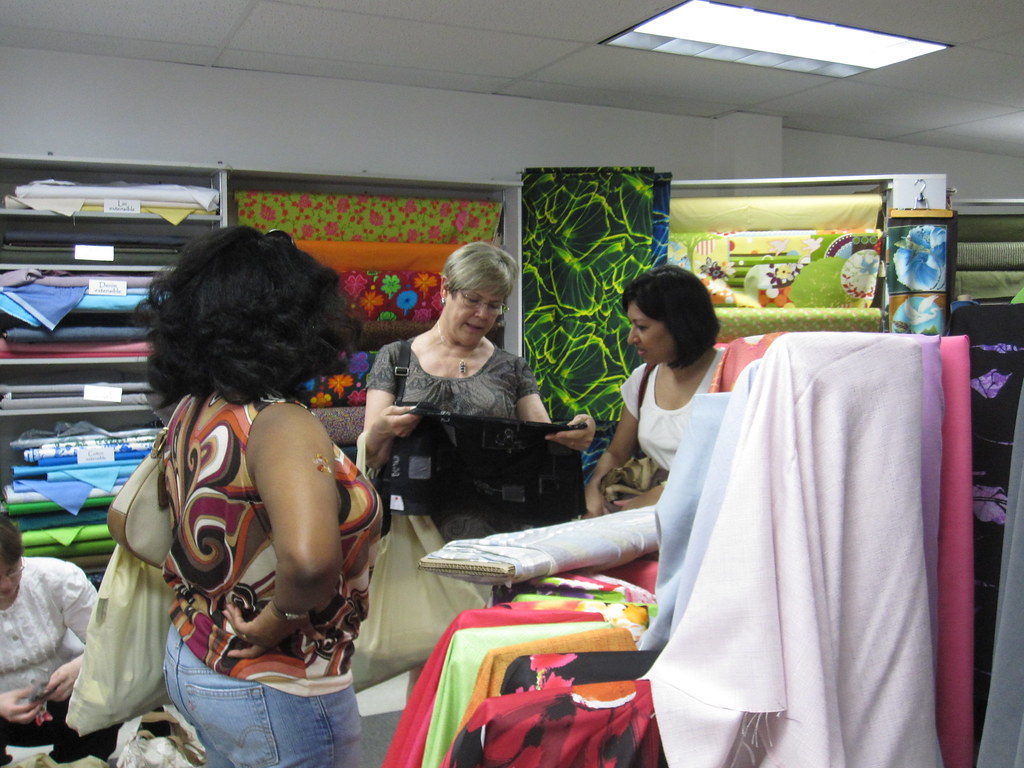
Madeleine Soie et Laine We had a choice of starting at St. Hubert, the Fabric Row of Montreal, or first heading to Suzie Spandex and a few other warehouse-type stores further out of the city. I went first to Suzie Spandex, and then took the metro to St. Hubert to meet the rest of the group at Madeleine Soie et Laine and from there to wander St. Hubert.

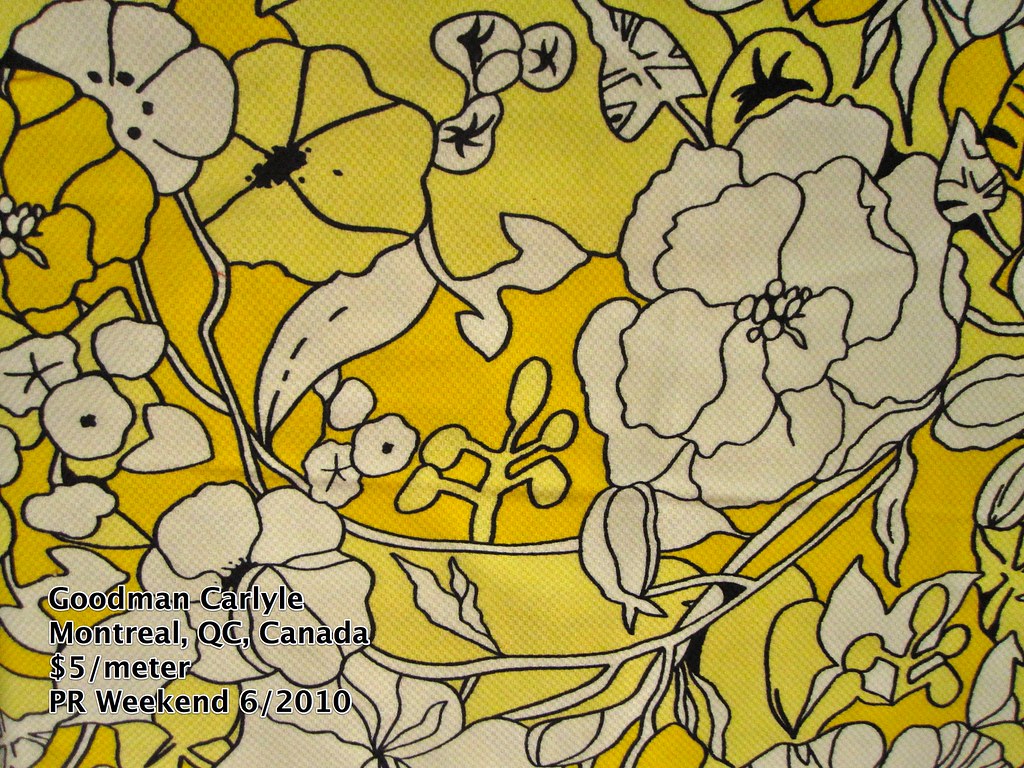
Goodman, Montreal, 6-2010Since I had just bought gallons of fabric at PR Weekend Philly and online I was luckily not in much of a fabric shopping mood. Seriously, I really need to learn how to cultivate this feeling because I felt good about not buying too much. In fact, I bought only one piece! And while I really love the fabric, I bought it mostly just because I wanted a souvenir. This yellow pique has a bit of stretch and will be adorable as a shift. I ended up with nearly four yards. I am trying not to kid myself about the fact that I do NOT make jackets, ever. Coats, yes; jackets, no. But wouldn't it be cute with a matching jacket?

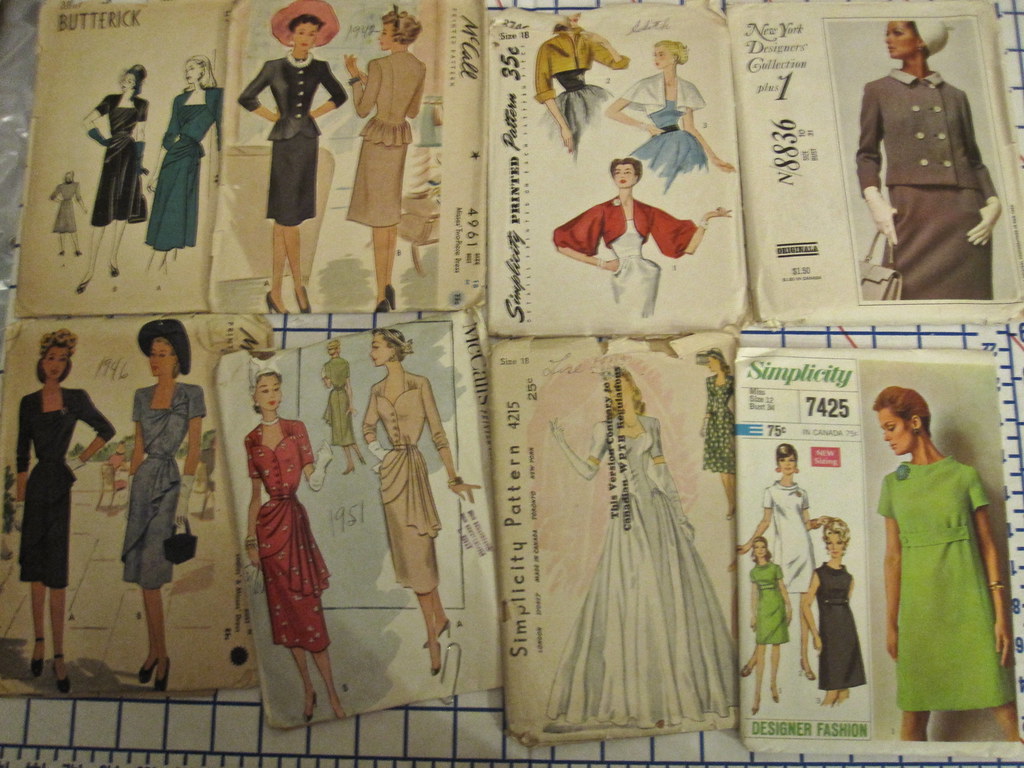
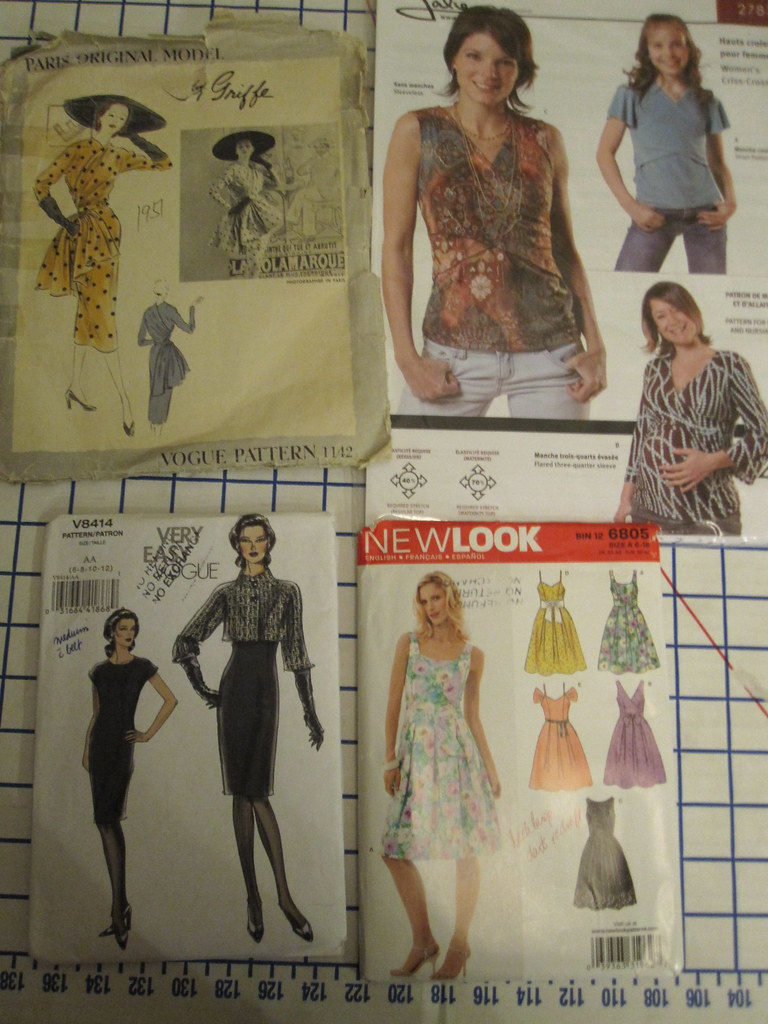
We had another party back at the Universite, this time to show off our acquisitions and swap patterns and fabric. Reneeb4930 had posted on the message board that she volunteers at a thrift shop and they had a bunch of vintage patterns come through and would we be interested in looking at them? Yes please! Well, she brought a huge bag of amazing patterns from the 1940s-60s. They were all gorgeous! She picked out several for me and I was just in heaven.

Pattern Swap Pattern Swap You can click on the photos to make them larger and see the amazingness! I adore the 40s and early 50s, so it was a no brainer that I'd love those. I usually stay away from the Shapeless Sixties, but I was really drawn to the 60s shift, even though I can't really wear that shape because of my protruding belly and large hips. But I am hoping the empire waist belt will magically deal with those little problems. I hadn't realized we could also bring patterns to swap so unfortunately I didn't bring any. But after the patterns had been looked through for a while there were still plenty left so I picked up two contemporary patterns as well. The Vogue is for the little jacket that I will never make, but is cute, no?

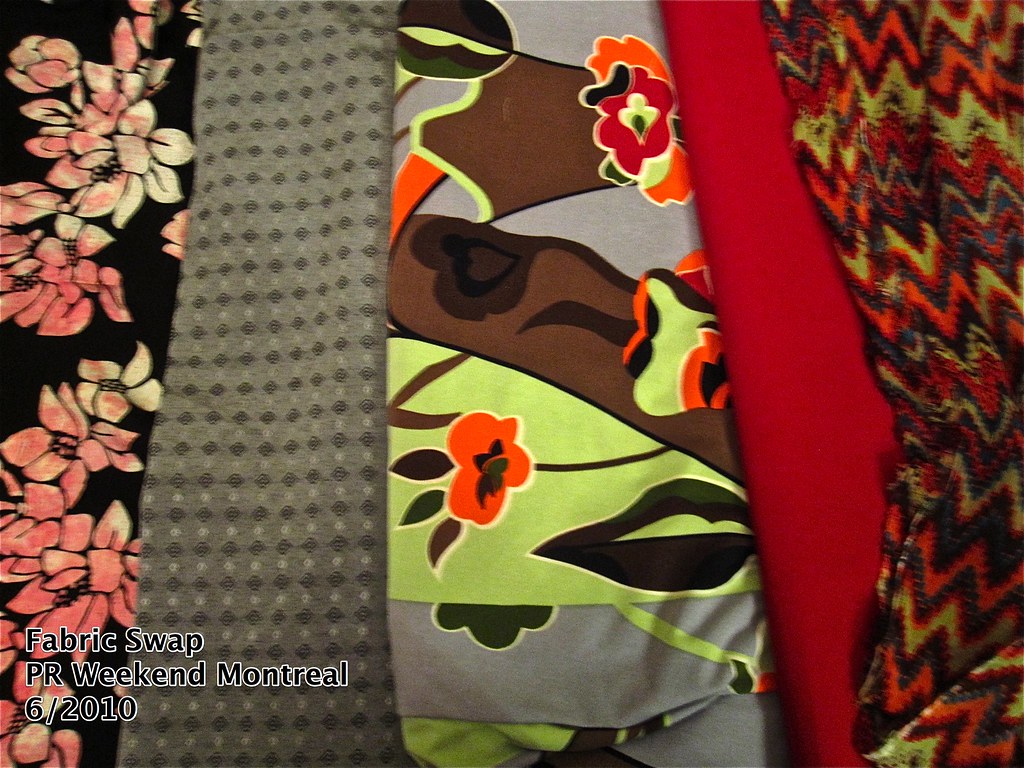
Fabric Swap, PR Weekend Montreal We also did a fabric swap. This is the best thing ever, as far as I'm concerned. We were to bring nice fabrics from our stash that we would never, for whatever reason, actually sew. I brought some pieces that I loved but somehow could never think of anything to make them into. It was so much better than sending them off into the unknown of the thrift store (I would not have been able to let go of them that way) and they were quickly claimed by sewists who will love them. And I ended up with a fantastic haul! In fact, I felt a little buyer's remorse over the yellow floral pique because with the swap fabrics and patterns I have plenty to remember Montreal by! I think the first one I make up will be the batik using two of the vintage patterns.

It seems I have not been able to travel without terrible drama lately--cancelled flights, delayed flights, endless waiting in airports, suitcases in the ether for days and days--but my flight home left on time, landed on time, *and* my suitcase arrived with me. I was (still am!) completely exhausted and so happy!

All PR Weekend related photos (and a selection of my travel photos) are here. All the travel photos are here and you can read about my sightseeing adventures here.

Wednesday, June 23, 2010

Pre PR Weekend: Sightseeing Montreal, June 2010

You can read about the sights, activities, and culture from my trip to Montreal on my travel blog here and the accommodations and restaurants here.

Click on the collage below to see all my travel-oriented photos.


PR Weekend Recap coming next!

Tuesday, June 15, 2010

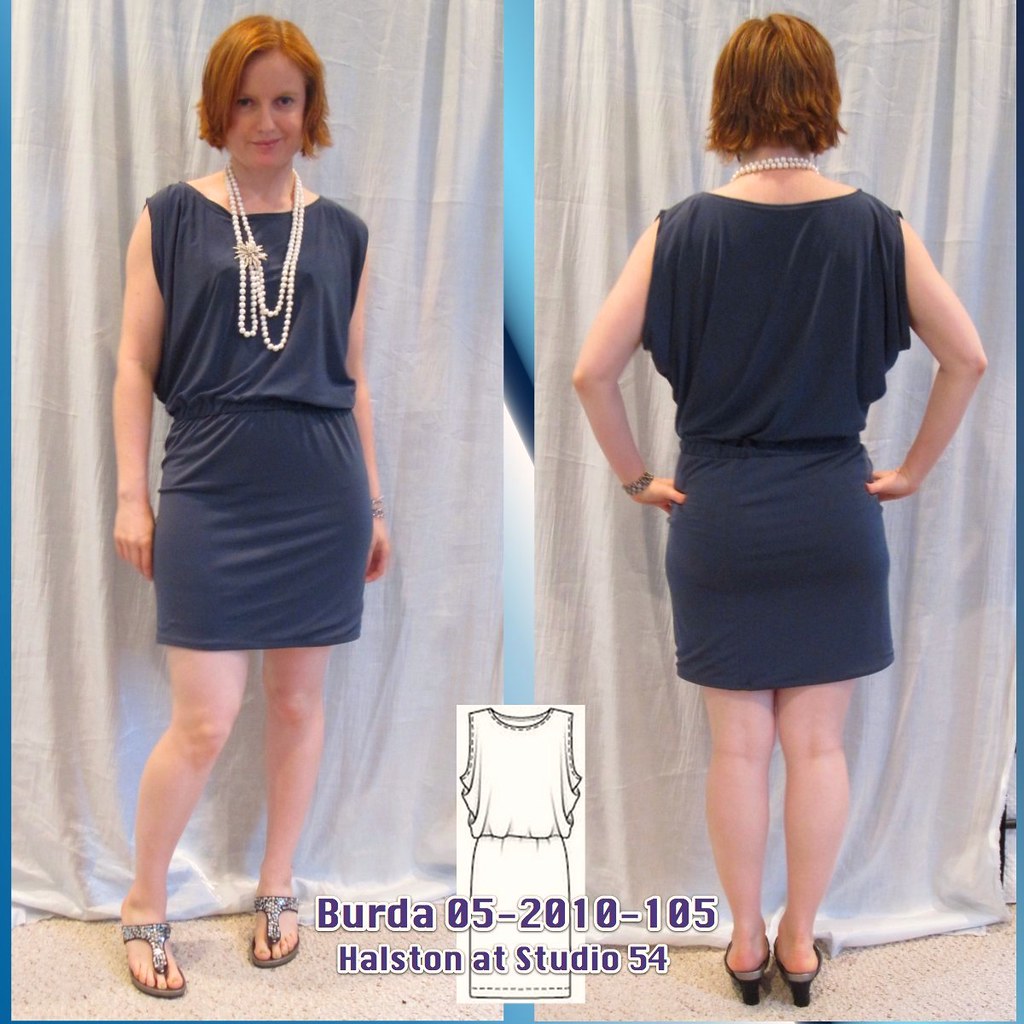
Burda 05-2010-105, Halston at Studio 54

I am in Montreal for PR Weekend this week! I will leave the real-time blogging to Cidell. While arriving here was quite the ordeal, once we were all finally here we commenced with the having fun

===========================

Burda 05-2010-105 Thumbnail

I hadn't sewn anything from nearly an entire year's subscription of Burda and I was looking for an instant gratification "make today and wear tonight" project so I decided to give Burda 05-2010-105 a shot as a summer date night dress (last year's was my McCall negligee dress). At the time I made it, there was only one review in PR, Knitter's Delight's, which I liked.

I bought the fabric at G Street in October of last year from the $2.97/yd table for a fabric hogging design from Drape Drape. However, I haven't gotten around to the project yet. I had an internal struggle but then decided it is better to sew fabric than to save it. Right? I have several knit prints on the shelf, but I thought it would be a little more chic and sophisticated to make this in a solid. This might be the closest I'll ever get to a Little Black Dress! (Actually, I have an idea for the LBD contest on PR in the Fall, so who knows.)

This was my first time using the new twice-as-dense roadmap patterns Burda recently introduced. My biggest concern is that I have to grade most things to a 34 (the smallest size is usually 36, and sometimes 38) so the more spread out pieces were great for me, as I could always see my graded tracing line. I had to grade this down and it was definitely a little tougher to see my graded lines, but I think I can handle it. Of course, this just had two large, uncomplicated pieces. Ask me again when I trace something with lots of itty bitty weird shaped pieces.

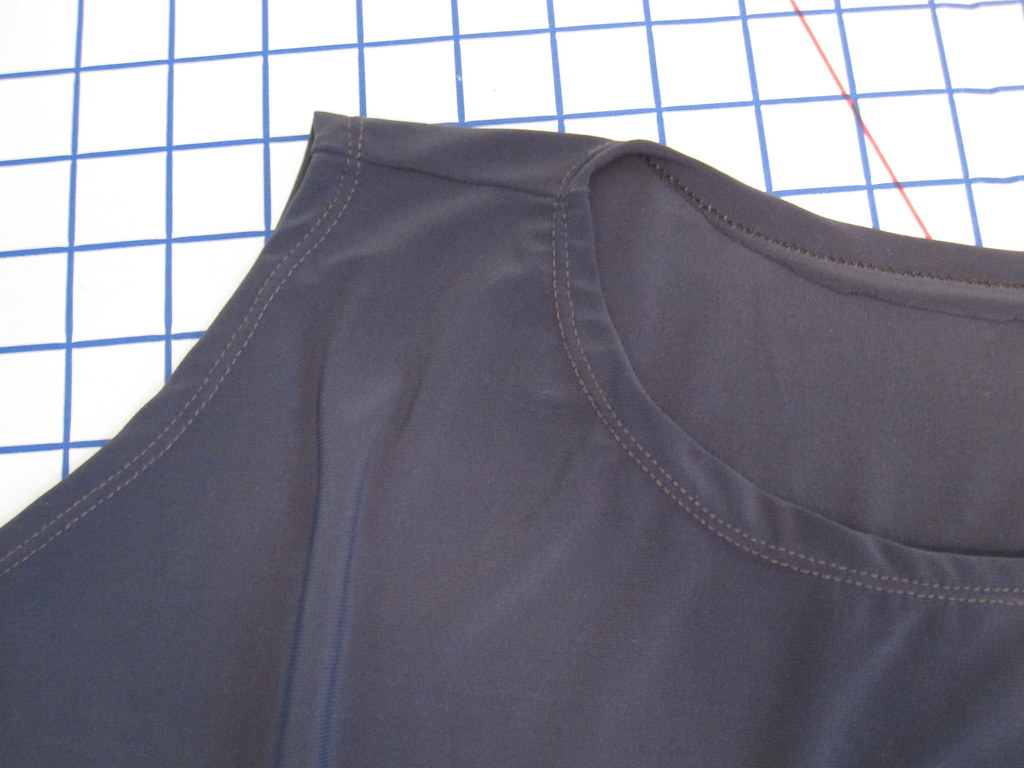
Twin Needle Finish at Neck and Armscye Burda wants you to use a facing on the neckline, but I hate facings. They have you use a twin needle to finish the armscye, which is a step in the right direction. I used the twin needle for both. My neckline is a little asymmetrical, but my attitude with this was "disposable fashion." This is Forever 21 level sewing, although under better labor conditions with only slightly less pay. As an aside, a friend of mine had a fancy dress party for Oscars one year--we were to come as starlets. She was wearing a plaid dress she had gotten from F21. There had been absolutely no effort to match the plaids, and I almost asked her if she had made it and purposely done a horrible job on it. It was remarkably bad.

Retrofit with Skirt Lining It would have taken about 2 1/2 hours had I not decided after it was all done that I had to retrofit it with a lining for the skirt. I was afraid of serious show through should I ever wear this in the daylight, and plus I wanted a little bit of lump and bump smoothing. I did a really sloppy job of twin-needling the lining in place above the elastic casing (made of the seam allowance). I figured the bodice would drape over it, hiding the ugly.

Speaking of the elastic casing, the pattern calls for 1/4" elastic, which I don't think would provide enough strength to hold this up. It is shown in the magazine with a dropped waist, but I wanted it to sit at my actual waist. I used 3/4" elastic because that's what I had on hand, but I think 1/2" (or possibly 3/8", if firm enough) would look best.

SideThis is shown with a below the knee skirt, which does nothing for me. I envisioned it with a short skirt, so the bodice would be longer than the skirt (or at least seem to be longer because of the volume). I cut the skirt in a tube on the fold, 18 1/2 inches wide of double fabric (realized later that I didn't add any seam allowances to Burda's given width, but it didn't make a difference) and 18 inches long--Burda directs you to cut the skirt 24 1/2 inches long. I wish I had given myself another inch or so. It is not in any way obscenely short and I wanted this to be sexy for evening, but man, I am totally out of the habit of wearing short skirts. This would have been long to me in my 20s. Now it feels scandalous.

I totally love this dress. It is very effortless to wear and the look is current or even cutting edge. Well, as cutting edge as a retro '70s design can be! I went whole hog with the nude lipstick and everything for this, although I don't know that my period authenticity was noted! I love that it hides the belly, although I do keep meaning to work on belly acceptance. I recently saw this photo of Diane Kruger on Go Fug Yourself (a super fun blog). I have been totally uninterested in Diane Kruger in the past. She seems the epitome of the Generic Blonde Actress. She attends the opening of an envelope and does not appear to be an actress of any note at all, yet designers throw dresses at her. She seems very boring to me. But based on that photo--in which she is wearing a fitted white dress without bothering to hide the fact that she has an actual belly--I am intrigued. Google doesn't indicate that she is pregnant, or even rumored to be. She just has a belly, like most people. And she doesn't appear ashamed of it. I need lessons in that!

This was to be my Saturday Night Date dress this summer, but alas my date did not seem to love it. He is not a "typical" guy in most ways; given his general non-conventionality I've been kind of surprised to learn (based on his reactions to clothes I've worn) that his taste in women's clothes is *very* typical: short and tight. This dress is short and tight in some places, but I think he would like it tighter in all places. Well, it will be fab for having cocktails with girlfriends. I need to plan such an event!

All photos are here and the pattern review is here.
Thursday, June 10, 2010

Stashoholism Confessional: Internet Edition and Excited for Montreal!

OK, so admittedly I just bought yards and yards and YARDS of fabric at PR Weekend Philadelphia, but one of the few things of which I had a specific need was more cotton batiste. I use this to line/underline everything in the summer (winter needs something slippery that won't stick to tights) and I am almost out.

Vogue Fabrics 5-2010


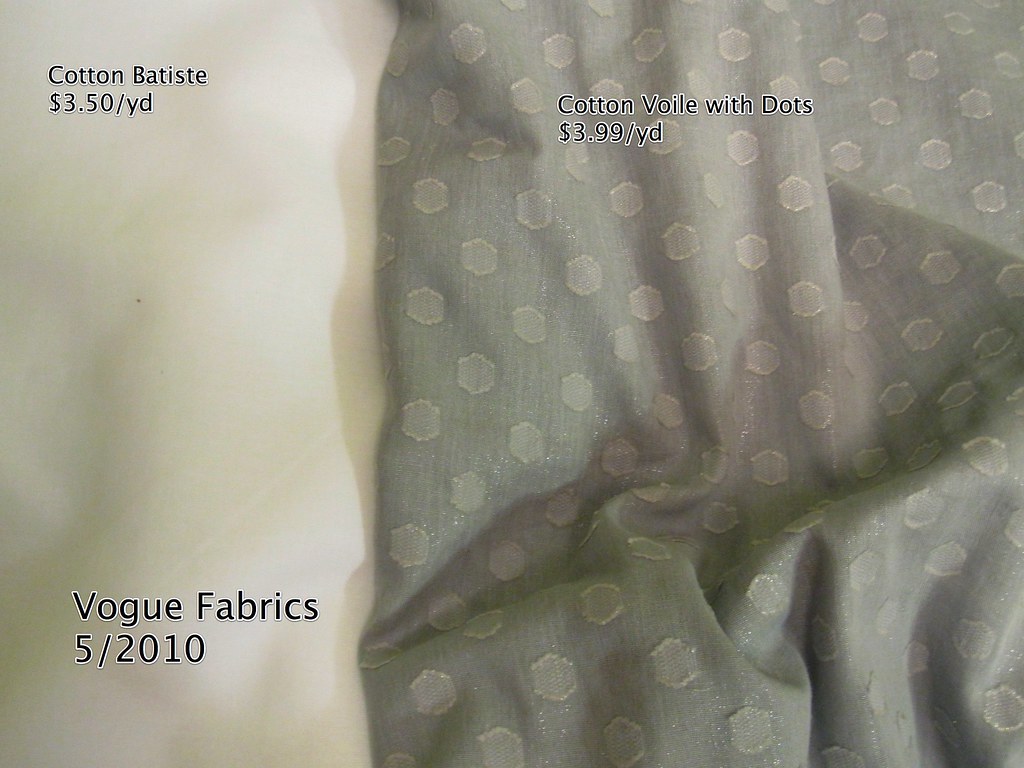
The best price I found was at Vogue Fabrics. $3.50/yd is less than I pay at Chic Fabrics in NYC ($5/yd). It is a little stiffer and coarser than the batiste I've been using, but I haven't pre-washed it yet so hopefully it will soften up. I ordered 10 yards so I'm still contemplating the best way to pre-wash. Just tossing the whole length in the wash machine results in a wrinkled mess, but pre-treating it by project ends up with wasted length. Dilemma.

04-2010-105 Since I was making the order anyway I just had to check out the rest of what they had on offer. I loved the gray voile with polka dots. They are textured somehow, but not on the wrong side of the fabric so I'm not really sure how to describe them. They're not really applique. The fabric has a subtle shimmer to it that I just love. I don't wear white blouses because (1) there is too much danger of looking like a waiter (and I absolutely NEVER wear a white blouse with a black bottom because of the waiter factor) and (2) the real reason is pit stains. So a gray is a nice stand-in. Vogue Fabric's website photo showed it as a very pale gray but it is in fact a lightish/mediumish gray, which suits me better. It will be the double flounce 04-2010-105 blouse from Burda's April issue--the link is to the French version of the site, who knows how long it will exist. At $3.99/yd, this lovely fabric was a bargain! I wish I'd gotten enough to make a longish flowy skirt. We are thinking of Turkey for holiday this year so I will want some longer but very cool dresses and skirts to wear there so as to fit in more with local mores.

Fabric.com 5/2010

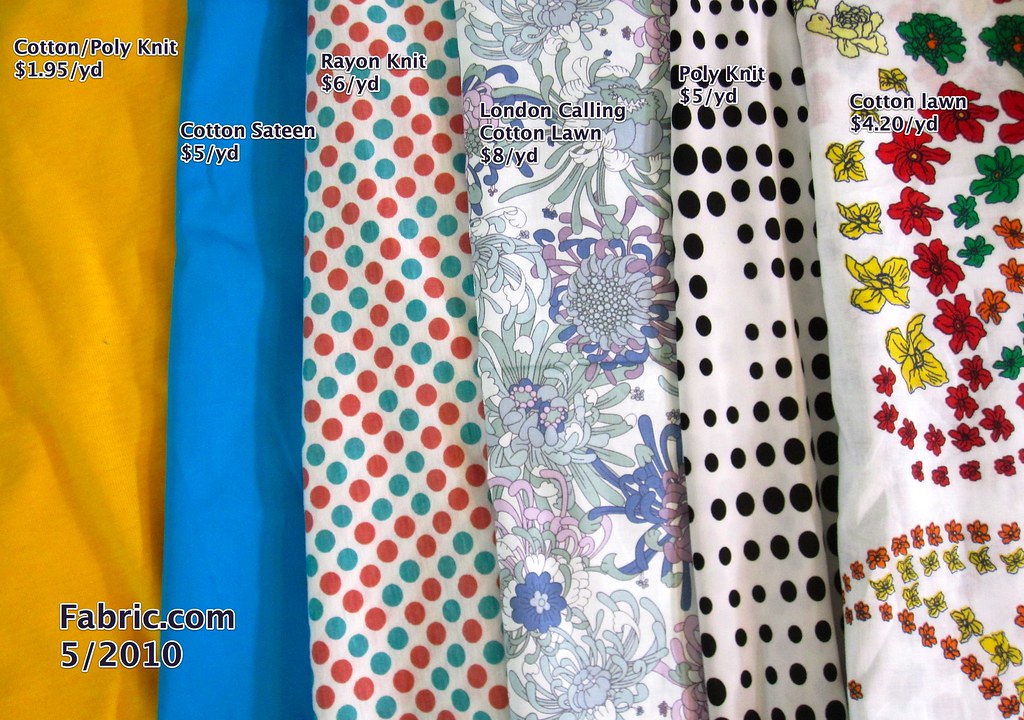
And yet, I still had an itch that was not scratched. An itch for cotton prints. An itch for orange. And so I visited fabric.com, which I really, really try not to do. I mistake "free shipping" for "free fabric" and go a little bit nuts (and even if there were free fabric, do I really need more?). The cotton lawn print is what drew me in. With red and orange it will match two of the skirts in my endless combination. However, I guess I was not really familiar with fabric.com's photography practices. What I thought would be a Liberty scale delicate paisley print turns out to be ginormous salad-plate sized paisleys. I had intended the fabric to be the Burda 05-2009-105 peplum blouse, as seen on AllisonC (LOVE! It would be easier if Allison would just give me hers.). But I am not feeling it with the large scale print. I could actually just return the fabric, but it is not in my nature to give up fabric. So now I'm thinking a quick and easy McCall 5884, with or without short sleeves.

I saw *two* women on the same day in that fab shade of mustard and was like, "Why don't I have a mustard dress????" At $1.95/yd, this fabric was the place to start. I am excited about making it into the Vogue Cynthia Steffe 1151. I ordered 4 yards and I wish I'd ordered more, because to get a firm double-knit texture I'm going to double the fabric and I think I'd like both a tee and a skirt of this fabric in addition to the dress. Maybe I can underline with knit lining and save some fashion fabric. I love the color of this, but beware that as a poly-cotton knit with no lycra it doesn't have much stretch; it's a light to medium weight.

The teal will be a skirt, the two polka dot knits tops (the orange and teal polka dots don't exactly match the orange or teal skirts I have planned, but I think it will still coordinate). I just loved the purple cotton "London Calling" lawn and don't have a set idea for it yet. BTW, fabric.com calls the lawn 100% cotton, but it definitely has a little bit of lycra in it. Which I consider a good thing, but would be a surprise to a quilter. Also, I wouldn't really call it a lawn either, as it is quite substantial and opaque.

=========================

I leave for Montreal on Monday! I'll be spending the week there before PR Weekend and I am really looking forward to some vacation. I've never been to Canada! Unfortunately, I have been traveling 3 of the past 4 weekends and have sewn nothing new for the trip. I'll have to wear something I've already worn to the cocktail party. The only thing I hope to finish before leaving is a computer bag for my adorable turquoise Samsung N150, but even that is up in the air because it will require a lot of hand sewing. After my nightmare of a trip last weekend (flight from DFW to DC cancelled; after 7 hours in the airport I managed to catch a flight to Philly and took the Amtrak home, arriving well after midnight and 15 hours after leaving my hotel in Dallas, didn't get my suitcase until last night, four days later) I am a little wary but hopefully the travel will be a little easier this trip!

So perhaps I should hold off on fabric buying for a while until I actually have sewn something! I think most of our shopping in Montreal will be higher end. Luckily I am cheap and expensive fabric isn't too tempting.

Tuesday, June 8, 2010

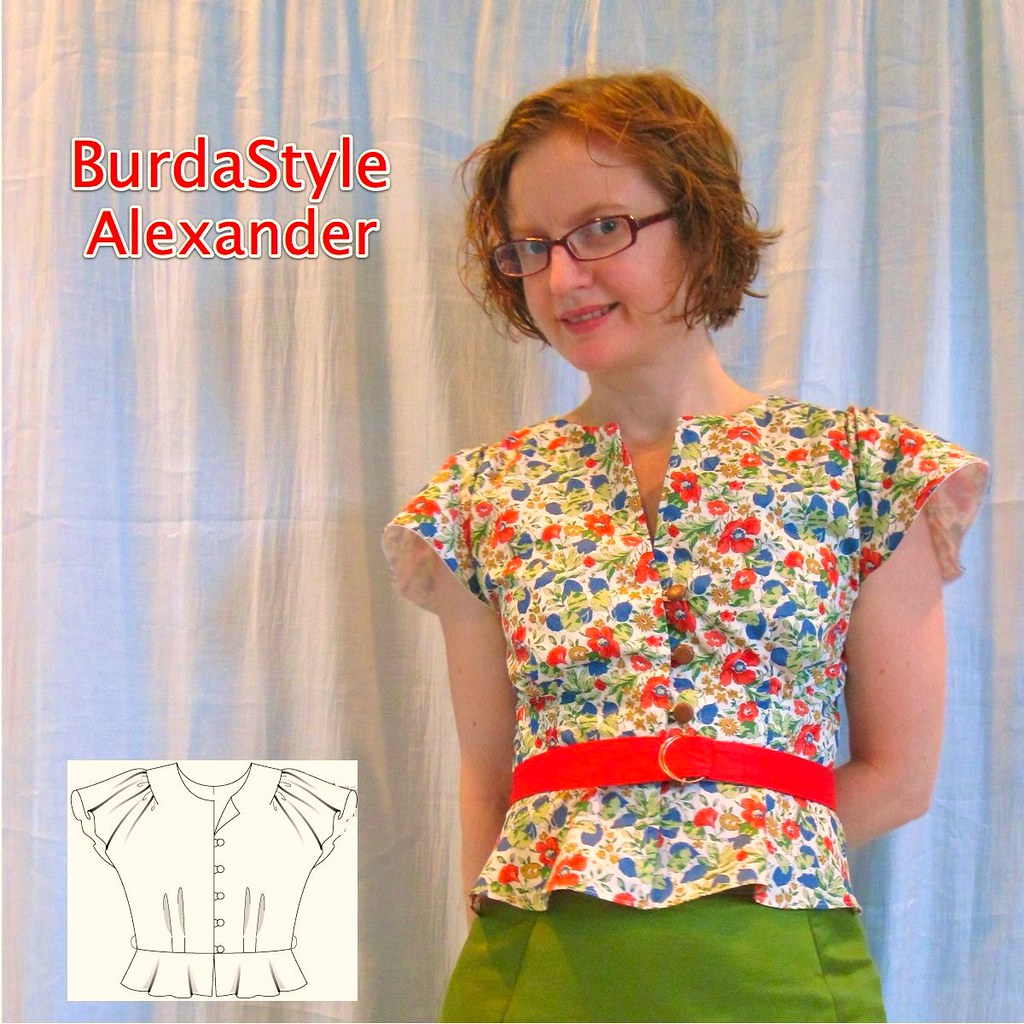
BurdaStyle Alexander Blouse

BurdaStyle Alexander Blouse #6062

Melissa first brought the BurdaStyle Alexander Blouse to my attention. I don't go to BurdaStyle very often and I rely on other people to filter the content for me. Of course, now that Burda proper no longer exists as a website, assuming they ever actually transfer the archives over to BurdaStyle I suppose I'll visit more frequently. It is SO annoying that Burda did that. Ugh.

One of the great things about BurdaStyle is that the patterns come in a large range of sizes--34 to 44 for this one. The other great thing is that anyone in the world can instantly get the pattern for about the same price. Burda is now selling magazine patterns there; they are more expensive (they all appear to be $5.40) and come in the more limited magazine range of sizes. This price per pattern seems quite high, as I pay about $6.67 per issue--only slightly more than a single pattern with no personal expenditure for ink and paper.

Join Front and Back Pattern Pieces As suggested by Melissa, I added a wedge of tissue to the sleeve where the front and back join to ensure that both were on straight of grain. I also added 5/8 inch in width to the front opening edge (or so I thought). The pattern is designed so that the front (and back, if you use the button back--I didn't, just put in a seam) edges abut each other and button with a loop and shank button. The pattern doesn't call for an underlap, but I would certainly have added one if I hadn't extended the front edge. My additional width allows the front edges to overlap so no skin shows through the front button openings, which would not be office appropriate.

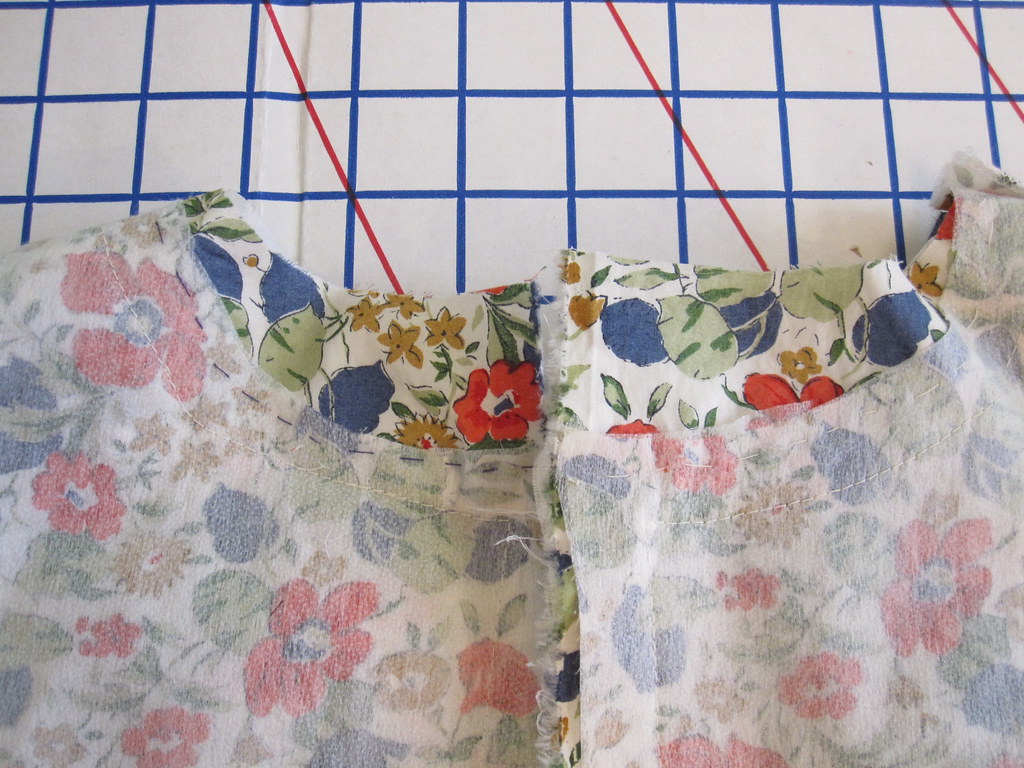
Mixed Up Front and Back.  Oops. When I pinned the facing on, the front facing was mysteriously about an inch and a half too short. The cursing coming from the sewing room drew interest from my boyfriend, who had brought his computer over and was working in the other room. He came in to see what was going on and I explained that something had gone wrong with my project. He glanced over at my wall of fabric and said, very deadpan, "Oh no, and you are almost out of material." Ha ha, very funny.

I walked the pattern pieces and they matched perfectly. I was stumped. It wasn't until I was going to sleep that night that I had my A Ha moment. I had placed the front/back piece on the fabric upside down (with the writing face down) and added my 5/8 inch additional "front" button space to the back, and in sewing had treated the front as the back and vice versa. The front and back are quite similar but not identical; the front has a lower neckline and thus a shorter facing length.

To remedy, I matched the lower facing edge to the lower front edge--leaving the excess overhanging at the neck--and hand-stitched and eased the facing into place, then machine stitched and trimmed away the excess at the neck. At that point, I also shaved off about half an inch from each vertical upper edge so the neckline would open up in a pleasing way. It worked pretty well. The back neck is a little low, but I don't think it's an obvious mistake.

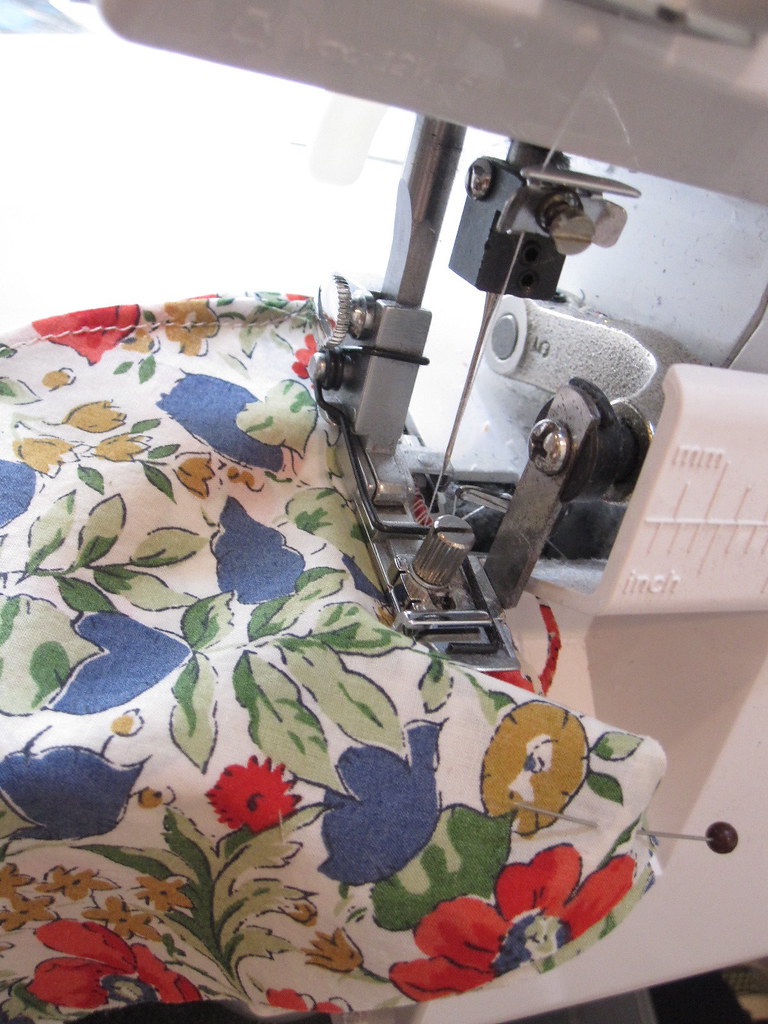
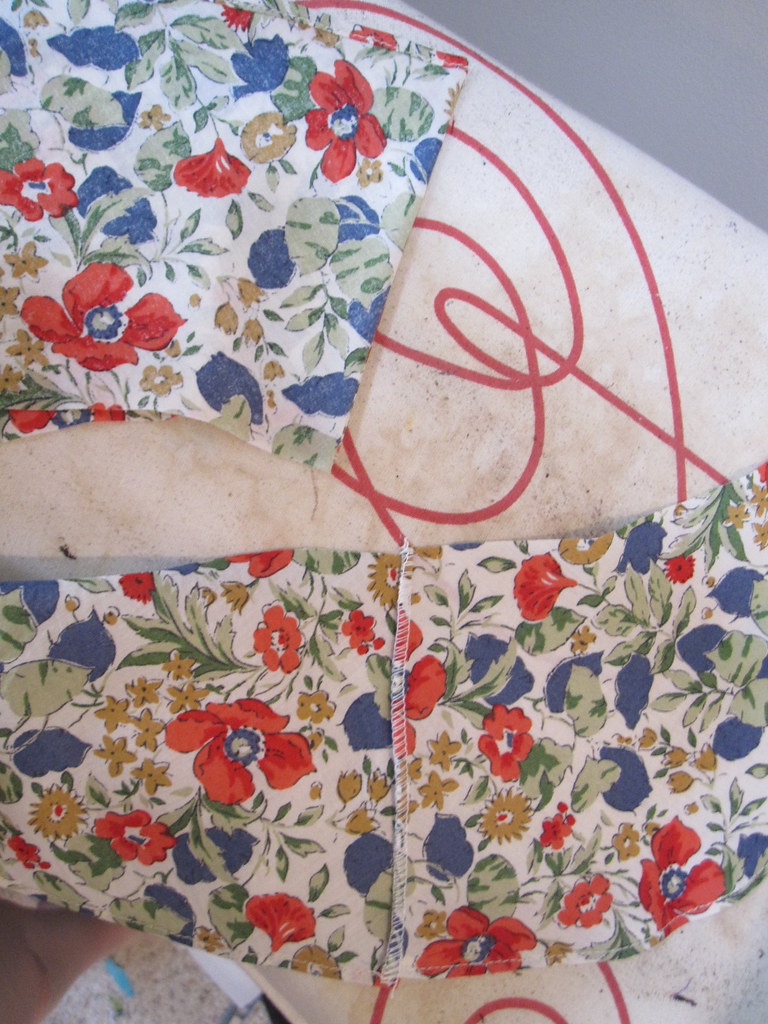
French Seam:  Use Serger for First Pass French Seam:  Press to Enclose WS Together Seam I have been on an inside finish kick lately. For the peplum, I finished the lower edges with a rolled hem. My trick for using the rolled hem foot is to zigzag the edges first to give the foot something to grab onto. I finished each lower peplum edge separately, then sewed them together with a serger French seam. First, sew wrong sides together with the serger, as shown at left. Press the serged seam to one side, then fold over and press the seam flat, right sides together. Then take the second pass with the sewing machine, enclosing your serged seam. Your lower hem will look better at the seams if you do it after making the French seam, but a rolled hem foot is too fussy to accept the bulk of a French seam so I accept a little ugliness there.

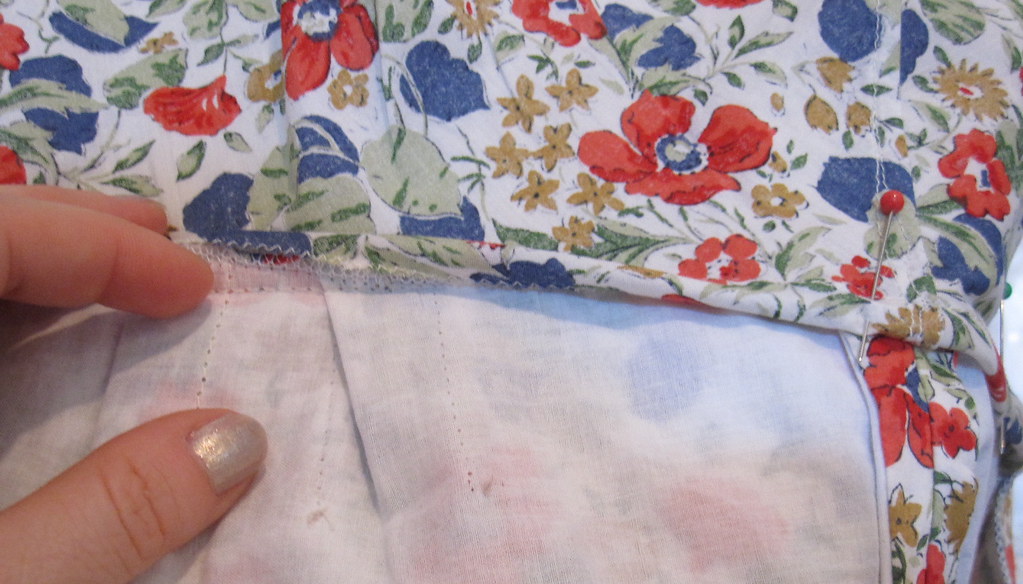
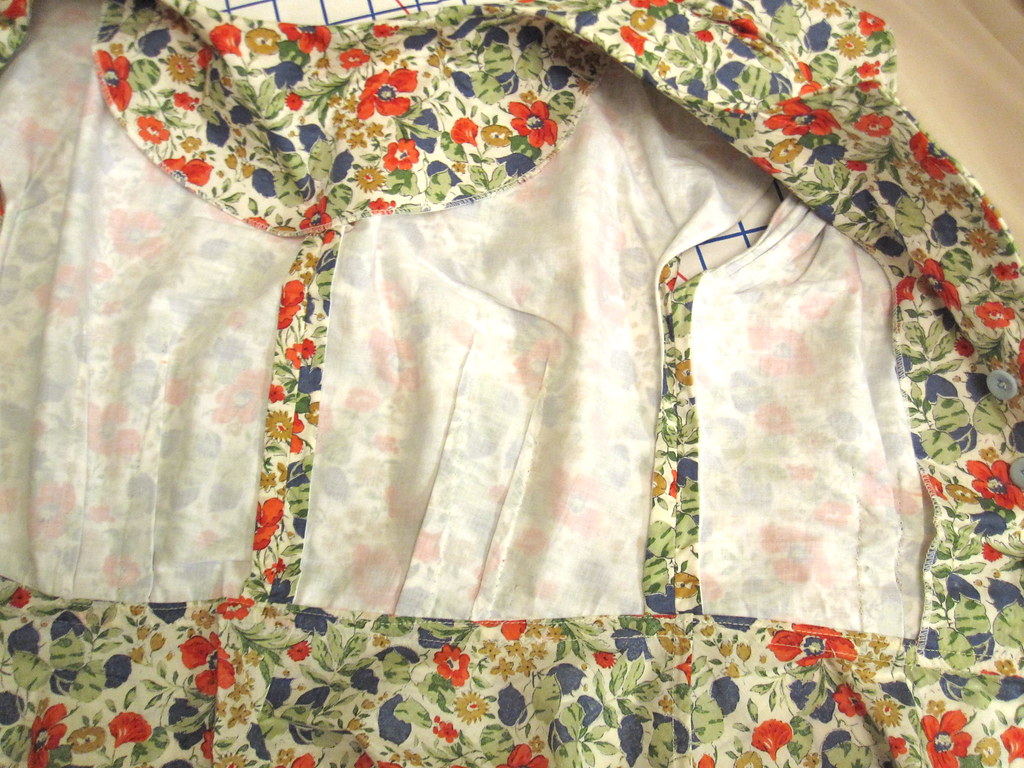
Waist Inside Finish Inside Finish Rather than do a Hong Kong Finish underlining with a wider underlining than fashion fabric to roll over the seam allowance throughout the garment, I underlined with batiste, cutting the underlining to the same size as the fashion fabric. I stitched fashion fabric and underlining right sides together for all vertical seams except center front, as that was to be faced. I had intended to hem the sleeve after finishing it with underlining, but my lovely crisp cotton lawn (purchased from Kashi) sticks out a bit rather than flowing at the sleeve edge and I didn't want to make it any stiffer. At the waist seam, I trimmed away the seam allowance of the bodice with the serger and then rolled the upper peplum seam allowance over it for a flat fell finish.

Front I normally save the list of changes for the pattern review, but since I changed this significantly I'll list them here:
-Add wedge of tissue in taping front and back pattern pieces together to preserve grain
-Add 5/8" to center front opening for over/underlap at buttons
-Shave 1/2" off the upper vertical edge of center front so the neckline falls open a bit (to see what happens when you don't, see this photo from my Vogue 8196 blouse)
-Four front buttons
-Center back seam rather than buttons
-Change back released pleats to darts (I just can't get into a puffy back)
-Underline, French seams

Would change if made again:
-Lengthen bodice a smidge
-Reduce pleat width of bodice back as there is weirdness above the darts (keep in mind that I had the front as the back but on measurement the drafted front is not significantly wider than the drafted back despite the whole bust situation)

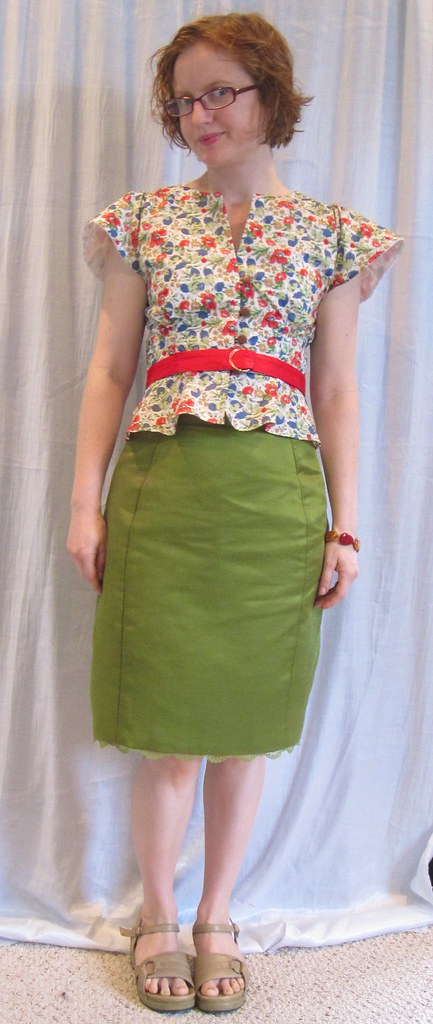
Despite the challenges posed by this project, I totally love the final result. It has a lot of interesting design and it's flattering and fun to wear (it needs the belt, in my opinion). This is part of my "endless combinations." You can see it goes with my green skirt and it was my segue into making a red skirt (or skirts, as it turned out, when the first one didn't work out so well).

All photos are here and the pattern review is here.