Monday, November 23, 2009

The Last Knit Print Standing

I was in a frenzy of sewing over the weekend. A frenzy, I tell you!

Projects 11.20-22.2009

All except the far left houndstooth project (from hell) were cut and sewn entirely over the weekend. By Sunday night I felt like I needed to stop and perhaps, you know, live some life...but I couldn't stop. Then I had the thing where I couldn't go to sleep because I was thinking about sewing too hard. Oy.

Anyway, the upshot of the frenzy is that I am way low on knit prints. I only have two Fall/Winter prints left in stash, the black/white/gray from Philly and the pink scales I recently purchased at G Street (the green/black/white from Philly could go either way, season-wise). I suppose I should turn my sights to wovens, but I really needed a Quick Knits Pick Me Up this weekend after finishing the not-entirely-successful houndstooth dress from hell.

Black Halo _Kathleen_ Dress - Sleeves - Nordstrom

I decided to browse through Nordstrom and Bloomingdale's looking for ideas for those last two knit prints. I think the winner for the pink scales is this Kathleen Dress from Black Halo. I love the "now" silhouette. The skirt is very clever, and having made the Drape Drape dress I thinking I have an idea how to do it, although that bubble hem is going to be a real fabric hog because the skirt will have to be doubled to get that look and I'm not sure I have enough fabric to do that. I have a vintage Stretch and Sew raglan sleeve peasant blouse pattern from my mom that I have, oddly, only made out of wovens, but I assume it will work for stretch fabrics. It would be pretty easy to adapt, I think.


Maggy London Ruched Dress - Sleeves - Nordstrom


I love all the drapey sculptural bits going on with this Maggy London dress. I would never take the time to figure it out, but the Maggy London Butterick pattern collection is pretty comprehensive with lots of great style in it, so I'm hoping she'll release this one as a pattern! It would be fab for the black/white/gray print.


ABS by Allen Schwartz Sweetheart Jersey Dress - Sleeves - Nordstrom


This is an interesting use of the fauxlero. I recently decided to purge my Vogue 2980 Sandra Betzina fauxlero top from my closet because I just hated the light blue color and felt it was a little too tight across the belly. I also thought the fauxlero looked kind of dated and aging. But on this dress it is suddenly new and exciting again. Hmm. The draft on V2980 is quite good so it's a shame to write off the pattern entirely. It would take a lot of frankenpatterning to get to the ABS dress from the Betzina pattern, but I have all the elements in other patterns, and it would only be the upper bodice that would take some fussing--the midriff and skirt are just rectangles. I can handle rectangles. This is a definite possibility for the black/white/gray.


Jay Godfrey _Bella_ Cowl Neck Dress - Sleeves - Nordstrom


I'm not wild about the boring, shapeless body of this dress, but how clever to create a carapace-shape by leaving the lower seam of a raglan sleeve unsewn! I'm sure there's a little more to the sleeve shape to get it to drape like that, but I'm not exactly sure what. It can't just be extra width, I don't think. You might be able to imitate that drape just by running a gentle bit of gathering along the upper sleeve seam. This isn't very practical for winter, but I thought it was an interesting bit of design. Then again, poly knit isn't warm at all, so outerwear has to do all the work anyway.


Diane von Furstenberg _Grand_ Velvet Wrap Dress - Sleeves - Nordstrom


I go hot and cold on velvet, especially stretch velvet. When I was in high school stretch crushed velvet was the HEIGHT of elegance. However, in the intervening decade(s), it has lost its luster and it can look kind of cheap to me. This is lovely, though. The fiber content includes here is rayon/nylon/silk so I don't think it's a stretch velvet and you can see that it has a nice weight and drape. I love the kimono shape of the sleeve and the, plain stark diagonal line of the wrap. This would make a fabulous party dress.


Adrianna Papell Lace Sheath Dress - Sleeves - Nordstrom

And finally, this is neither for knits nor for winter, but how much do we LOVE this lace dress? I really enjoy the lace dress I made earlier this year (I went back in and fixed that terrible zipper--I should show that sometime), and I probably don't need another one and I can *guarantee* you that I would not end up with perfectly straight rows of lace if I attempted this method, but man, I love the dress. The black lace on white, the rows, the cuteness. Love it.

You can see my Fall/Winter 2009 designer inspiration photos here.

Thursday, November 19, 2009

Really Up Close and Personal Snoop Shopping and Stashoholism Confessional

11-14-09

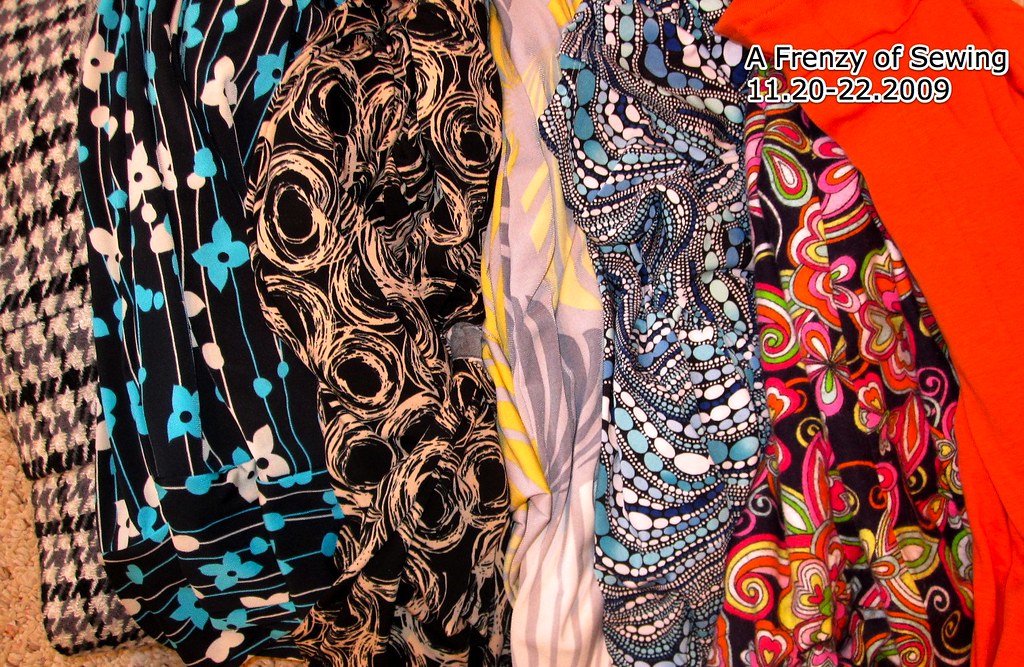
I know I am an addict and powerless over my addiction, and yet this knowledge does not empower me to stop! I have been feeling a little overwhelmed by my stash lately, so what do I do but buy more!?!?! It's totally that thing where you have don't have time to sew, so to stay connected to the hobby that you love you buy stuff you *would* use if you had time to use it.

I already HATE all my Fall/Winter clothes and I haven't even worn some of them yet this year so I need to do less shopping and more sewing. This coming weekend should be low key (last weekend was nuts and I felt like I wasn't home for longer than 2 hours the entire time) so hopefully I will sew! I have a woven dress in process and at least 3 knit dresses planned. I managed two knit dresses and a woven when I had my sewing orgy a couple weeks ago. If I can come up with two weeks of new work clothes maybe I will be less grossed out in the mornings.

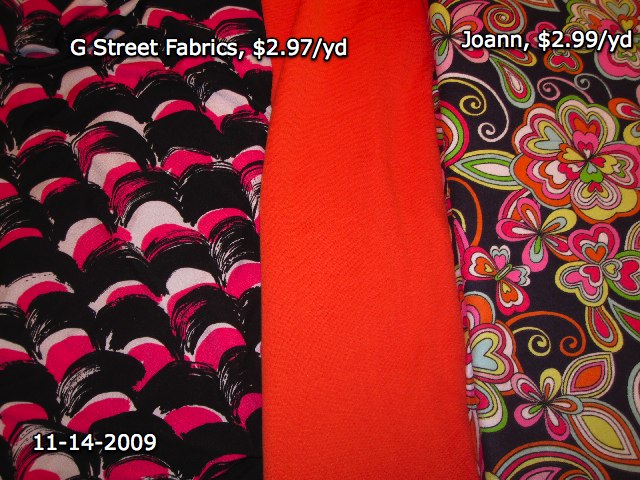
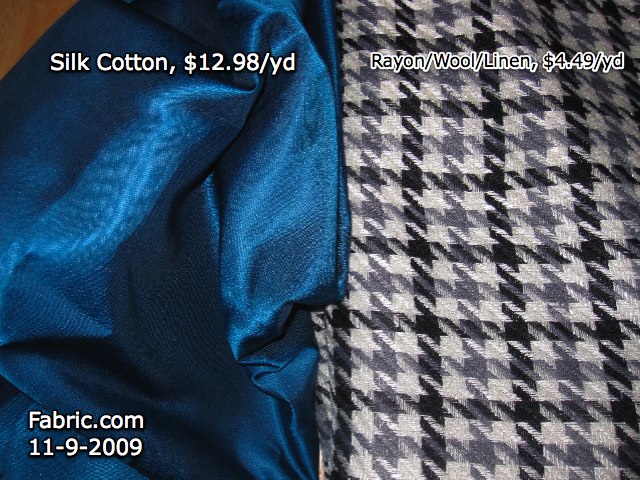
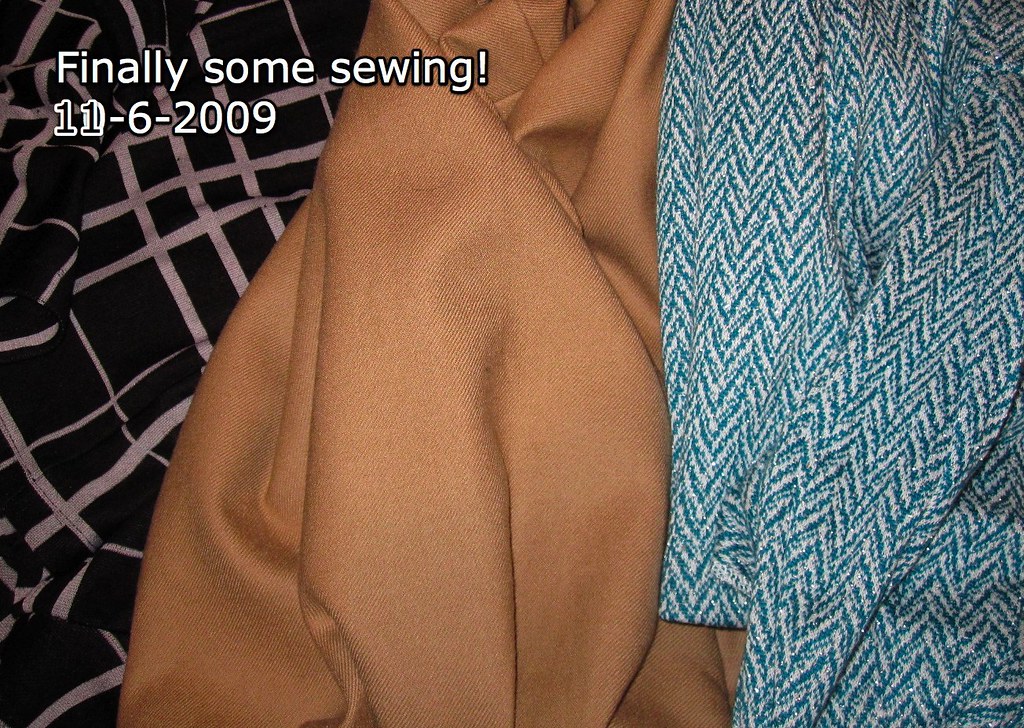
Anyway, two of the above fabrics were planned purchases. I need a new pair of PJs and the flannel on the right from Joann seemed cute for the pants (and the price was right!), and the orange jersey from G Street's $2.97/yd table matched to make a t-shirt top. I was hoping to find the lime green from the flannel print for the top, but you take what you can get. The knit print...well, you know me and knit prints.

==========================

Front
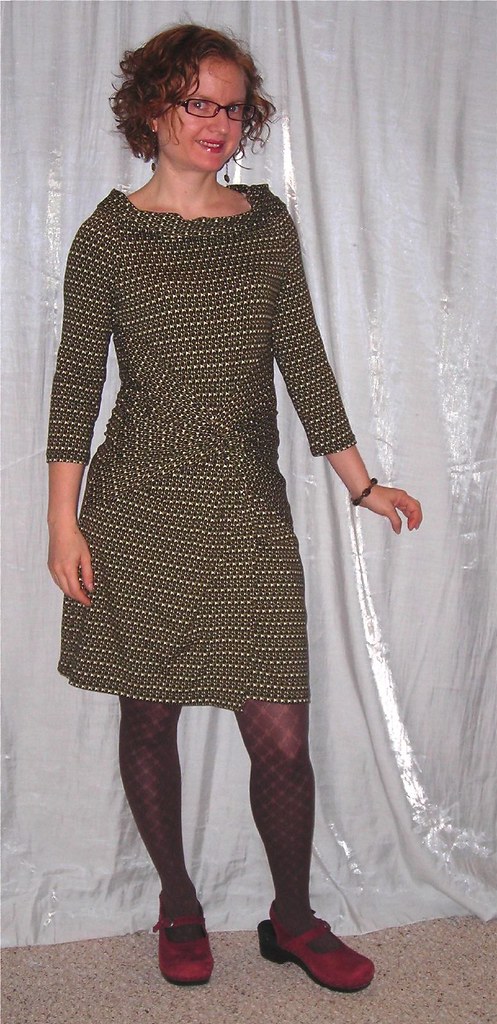
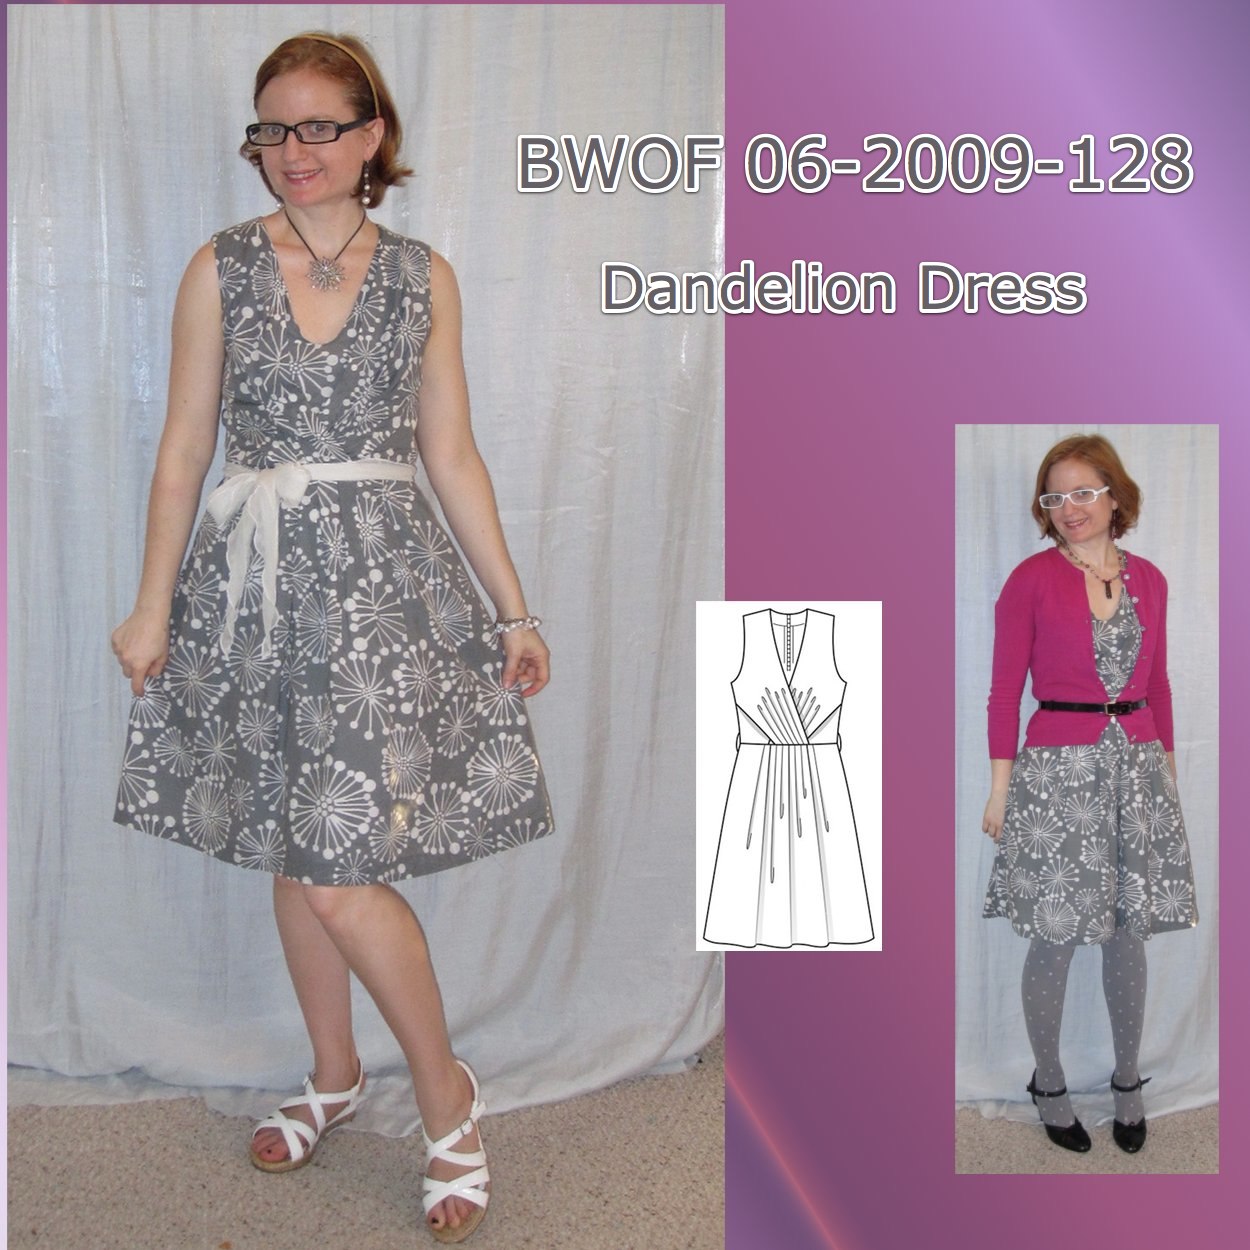
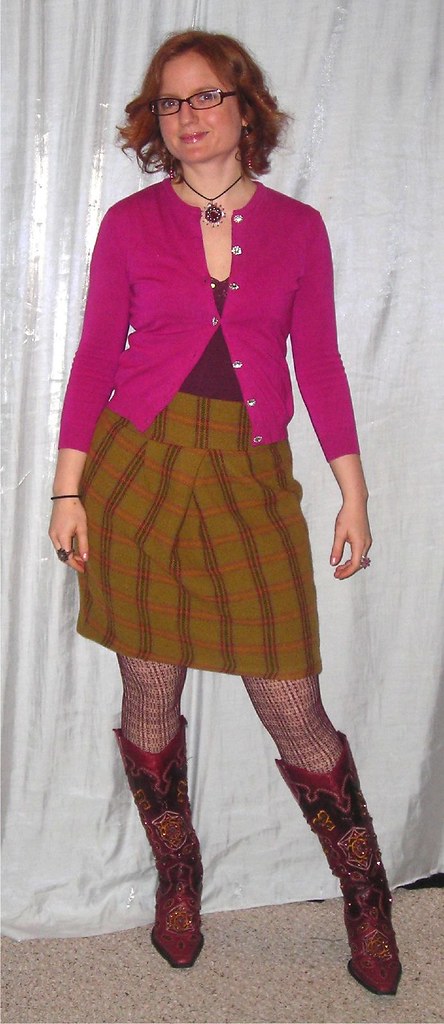
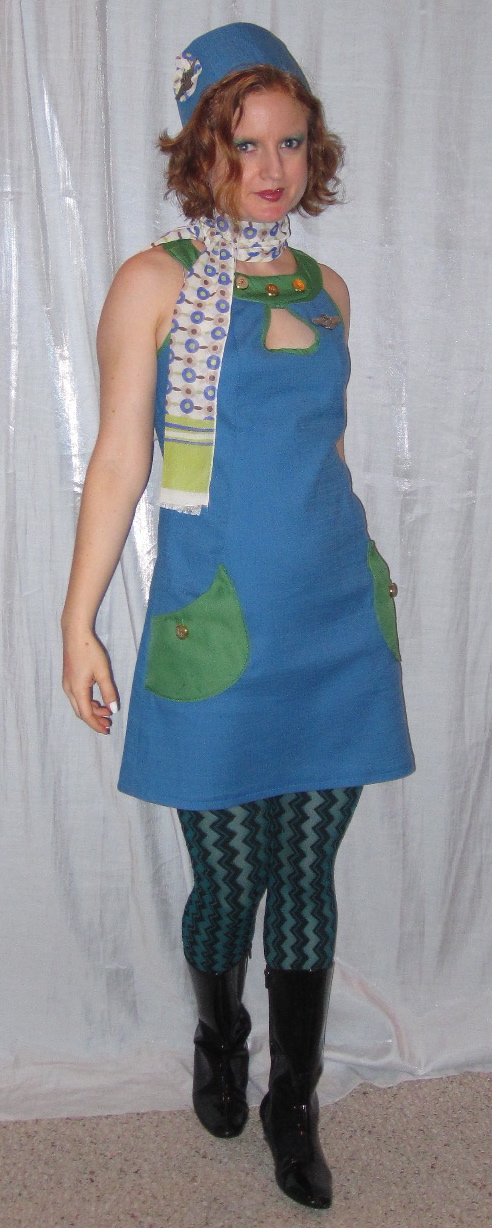
One of the Fall/Winter things that I don't hate yet is my Tippi Hedren dress. Sadly, though, it is not long for this world. The fabric was from the $2.97/yd table and I didn't notice until I'd made the dress that it was fairly heavily damaged; there are rows of tiny holes all over it and within the next few wears one or more of those spots is going to outright tear. Boo.

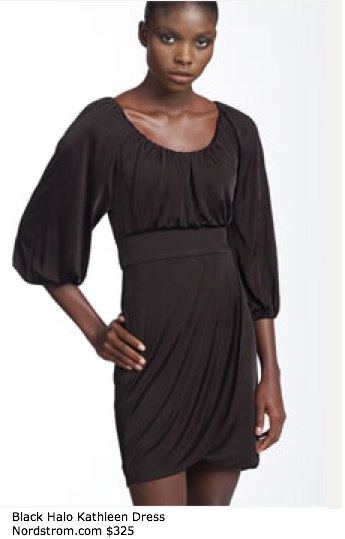
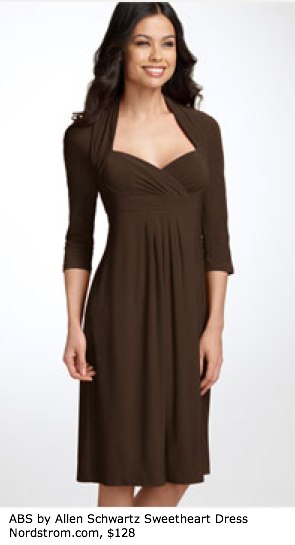
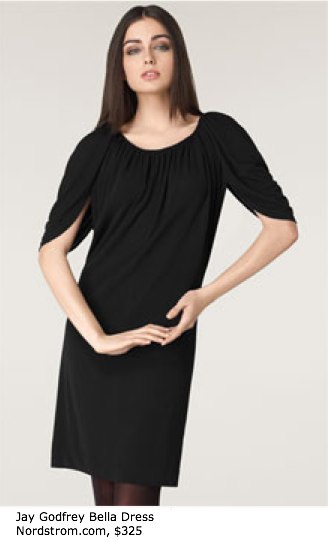
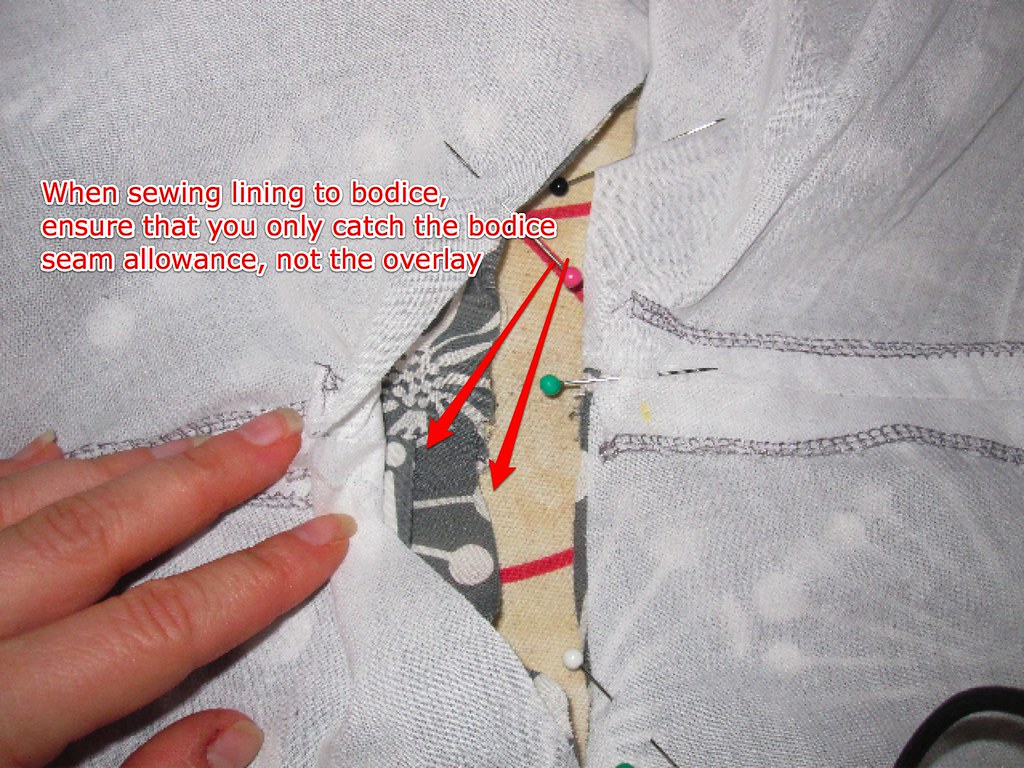
I can't decide what to remake it in, though. It really needs a heavier knit to support that collar (though a heavy knit would be very heavy indeed at the knot/wrap skirt portion of the front) and all my knits are lightweight ITYs. I'm thinking *maybe* of the abstract green print I got in Philly, but I think it's only because it's green! The pattern would probably benefit more from a less busy print. I would think about 
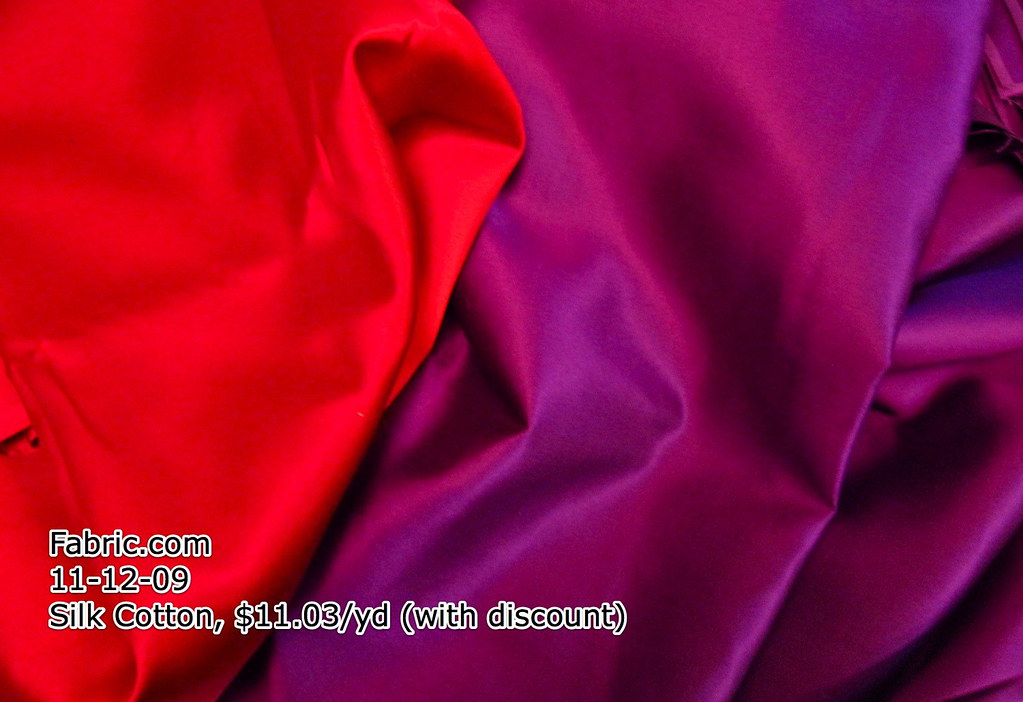
this red print, but (1) I also learned the first time around that a linear print is not the best for this style, and the print, though huge, has a regular repeat, and (2) I have a thing about not wearing colors out of season and the white in this makes it a Spring/Summer print for me. Ditto this hot pink print and this aqua and white polka dots, both of which would be really cute in this dress. Maybe I'll make it with short sleeves when I can think about warm weather clothes again. The pink scales above are on the diagonal, but I think still too regular for this pattern. Other than the green abstract print, the only thing I have in stash that might work for this pattern and of which I have enough, is the black/white/gray print from Philly...but it's more busy than I'd like so I might as well go with the green. *sigh* I really don't need to get worked up about it--I do have three knit dresses in mind before I reach the end of my Winter Knits Inspiration and I've gotta find a pattern for those hot pink scales. I love hot pink.

==========================

There's a website called "Daily Lit" that sends you small chunks (around 8 paragraphs) of a short book each day. I'm getting one called "Shoes, Bags, and Tiaras," which is sort of a catalog of some of the shoes, bags, and tiaras in the Victoria and Albert Museum's collection. Each installment is headed with a lovely photo and brief information follows. I am loving it. It's free to subscribe! Just click on the linked title above; on the right hand side of the screen there is a blue box that says "Subscribe."

I have not noticed an uptick of spam and have received only one non-book email from DailyLit--through which I discovered that Diane von Furstenburg is sponsoring Madame de Staƫl as another free read, so I subscribed to that too.

==========================

My friends know I enjoy fashion so they often clue me in on new websites. I don't always love that they've given up my email address, but I know they do it with the best intentions. There are a ton of "sample sale"-esque type websites where there is a "crazy" deal (only $700!!! Usually $1000!!! You will save so much money if you put hundreds of non-essential dollars on your credit card bill!!!!) on something each day, but I haven't clicked on any of the invitations because I'm not looking to buy anything. However, a friend sent me an invite the other day to "Rent the Runway," the clothing version of Bag, Borrow, or Steal. I don't know exactly how Bag, Borrow, or Steal works and I don't want to join to find out, but it looks like you pay a monthly membership fee and then a rental fee for the bag ($15-100/week) and keep the bag indefinitely.

On Rent The Runway, there is no monthly fee (as of now), and you can rent designer duds for $50-100 for 4 days, plus $5 insurance. Postage both directions and dry cleaning are included. For dresses that cost a couple hundred dollars, I'm not sure it's worth it but there are several $1000+ gowns ($200 rental fee on those, natch) on the site. It's an interesting concept, especially if you somehow score an invite to a once in a lifetime event and want some major wow. Of course, designer clothes come in a limited size range so it won't work for everyone. You do get two sizes sent to you, which I think is a nifty feature. I'm guessing that will quickly cost extra.

This isn't something I'll ever do, but it raises intriguing snoop shopping possibilities. If there is a designer piece that you just *have* to do an in-depth study of, you could rent it for a few days and figure out how it's put together. Expensive, but if it's not something you can visit in a local store it could be the only way to get hold of it. The website also has good photos, including detail shots. As of now the inventory is quite small, but once they get more capital from rentals (I'm assuming it's a fairly new website) I'm sure they'll expand the offerings.

Unfortunately, you have to join to website to see anything, and right now it's invitation only (so silly). If you're interested, let me know and I'll send you an invite.

==========================

Ann Taylor

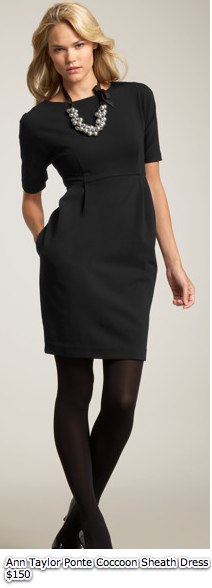
Here are some pieces from my recent inspiration file (none from Rent the Runway). This Ann Taylor dress is adorable. I love the shape of it. It's simple, but the pleats make for a very flattering fit--at least while the tulip silhouette is in style. It took me a while to warm up to tulip skirts, but since Burda started pushing them about 2 years ago I've had a lot longer than the rest of the American populace to get used to them and now I'm totally on board. I do think, however, that this is a trend we'll consider ugly when they go out of style--we'll say, "Why did we add volume around our bellies and hips? Ugh." For now, I am all about room for the belly!

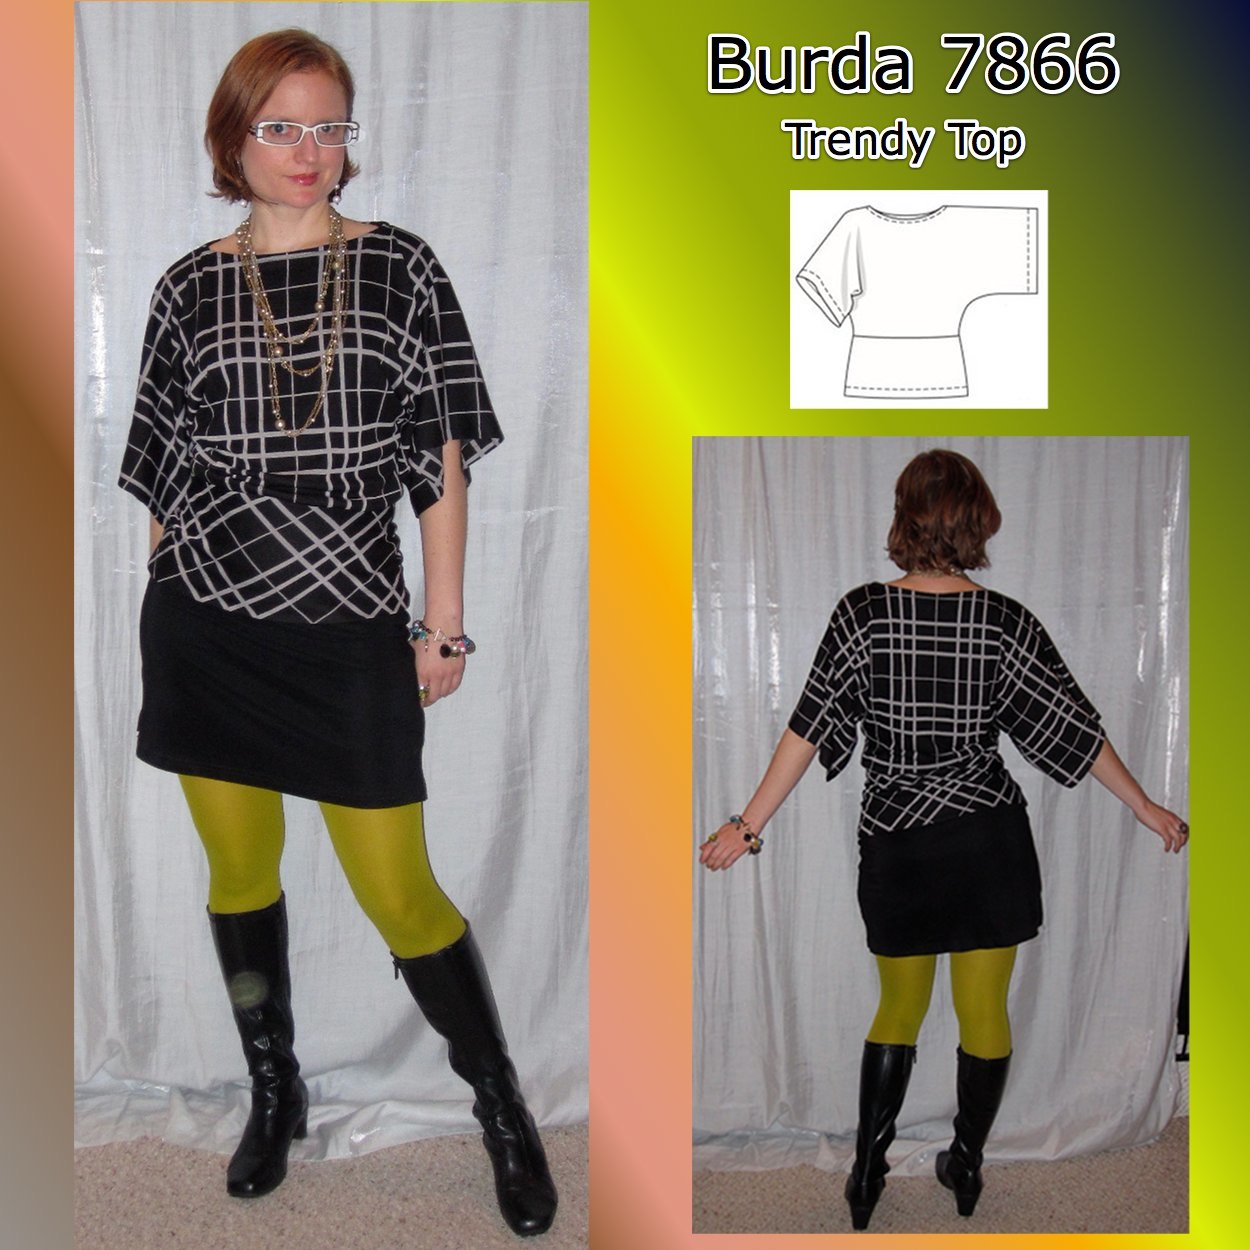
Anyway, the interesting thing about this dress is that it's so simple. The sleeves are cut on, so it has only four pieces (bodice front and back and skirt front and back). Easy. It's in a ponte knit; my only exposure to this fabric is the awful, awful, scratchy polyester nightmare available at Joann. I'm thinking this might be a little nicer? More photos of this one here.


Marc Jacobs

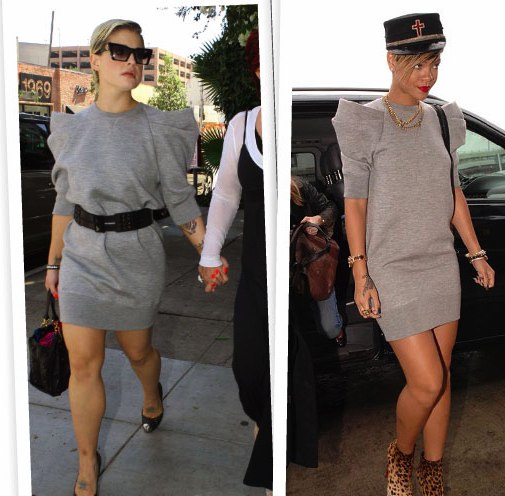
I am loving the huge origami sleeves Marc Jacobs put out on the runway. They are interesting and sculptural, and even though they're exaggerated I think they're fairly wearable. Both of these women are celebrities, of course, but I can see a regular person wearing them if the rest of the outfit is fairly fitted. I'm thinking you could get a toned down effect by lengthening the short sleeve of Simplicity 2733, which AllisonC just made


Liz Lemon ShirtdressAnd finally, I have been watching some 30 Rock episodes online and how much do we love Liz Lemon's shirtdress here? Her character generally dresses very frumpy, so I'm guessing Tina Fey decided she just couldn't take it anymore and gave herself one cute outfit in the episode. I love everything about it--the subdued plaid, the princess seams, the pleats at the waist, the puffed sleeve, the self belt, the rounded collar. So. Cute. It's not really for Fall, but I had to share. This was the best screencap I could get, unfortunately. Why do they never show people full length and unobscured so that we can pause and snap their outfits???? Television executives do not understand my needs. Of course, I can hardly blame them for ignoring me as I don't own a functioning television, so I'm not exactly the target audience.

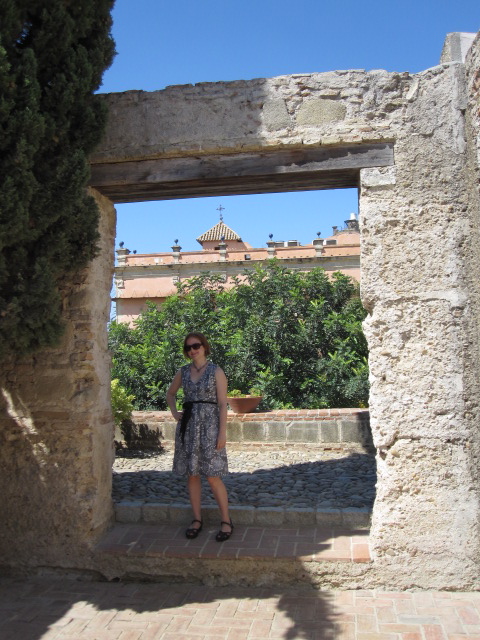
You can see my Fall/Winter 2009 Style File here.

Tuesday, November 17, 2009

BWOF 06-2009-128, Dandelion Dress

BWOF 06-2009-128 Thumbnail

This dress, 06-2009-128, was one of the many patterns in the awesome June issue of Burda World of Fashion that I wanted to make as soon as I got the magazine.

When I bought this fabric in Hong Kong I thought it was snowflakes and that I would need to make a wintery dress out of it. I don't know why I thought snowflakes when each "flake" has many more than six points. I finally decided that it looked more like dandelion seeds or fireworks than snowflakes, and that the batiste-weight cotton was more suited to a Spring/Summer dress than a Fall/Winter dress so in my frenzied run-up to Spain I decided to move this up the project list.

The downside of the batiste weight is that it was no fun to sew. The needle kept breaking threads in the weave the way that silk chiffon does, even when I used a sharp or a ballpoint. This was particularly a problem on the overlay, where a lot of the sewing is on the bias because of the shape of the piece, so the thread snags would run along the longest possible line on the piece. It also had to be entirely lined, but that doesn't bother me too much. I'm glad I'm writing about this one so long after the fact (sewn in September) because now I've mostly forgotten my frustration and am just enjoying the dress.

The pleated overlay sits on top of the front bodice and is sewn as one with the bodice at the shoulders and waistline. In the editorial photo on BWOF, the overlay neckline and bodice neckline are the same so the bodice doesn't show at all underneath the overlay at the neckline. However, when you click on the dress form photo the bodice neckline shows. I'm not sure which way it's supposed to be, but I sewed it as drafted and my bodice neckline shows.

Align Seam Allowance Anyway, you finish the neckline and diagonal lower edges of the overlay before attaching it to the bodice. The instructions are concise (BWOF says "Allowance of bodice front extends at neck edge"); I figured out this meant I needed to attached the finished neckline edge of the overlay right along the stitching line of the bodice, so that the bodice seam allowance is exposed beyond the overlay. The lower diagonal edge of the overlay begins below the armscye at the side seam, so you need to baste the raw armscye edges of the bodice and overlay together. I wouldn't normally go to the trouble of basting, but I had trouble keeping the pieces together here.

Do Not Catch Overlay Rather than use BWOF's facings, I lined the bodice with batiste, and finished it in the usual way for sleeveless dresses (leave side seams and center back unsewn; assemble fashion and lining fabrics by sewing shoulder seams; place right sides together and stitch along neckline and armscye; turn right side out through strap tunnels; sew side seams). In stitching the lining to the neckline, be careful not to catch that finished neckline edge of the overlay in the seam allowance.

The pattern is designed so that the pleats are folded and sewn into the lower edge of the overlay, but it was billowing and gaping over my bust so I stitched them up almost all the way to the bust, which I tried to capture in this closeup. The batiste really worked me over here and the lines are wonky as hell, which really bothered me when I first made it (I was rushing to get everything done for Spain and didn't have time to go in, undo, and deal with it). Now that I have distance I really don't care!

The overlay could have used an SBA here (shortening along the neckline as I normally would for a wrap style), and it gapes a little in wearing, which annoys me. But because it's just an overlay it doesn't show anything, so I'll live with it.

Trena at the Alcazar, Jerez This dress is a real winner. The lightweight cotton travels beautifully--very comfortable to wear in hot weather and easily washed in the sink and air-dried overnight. I don't know that I necessarily would have gone straight for batiste, but this could have a lot of bulk in anything with a much heavier weight, so I kind of lucked out there.

Since I didn't make this until September I was sad that I'd get so little wear out of this dress this year. But then I realized I could totally wear it through Fall with tights and a cardigan! I could also wear it as a jumper. So many possibilities and now I'm excited for wearing it a little bit longer.

All photos are here and the pattern review is here.

Friday, November 13, 2009

Linings v. Underlining; Coco Before Chanel; Stashoholism Confessional

Fabric.com 11-9-09

So it had been quite a long time since I did any fabric buying online, since June, I think. The problem with buying fabric online is that it is not quite as satisfying as buying fabric in person and I buy twice as much!

I was really taken by Simplicity 2473; I love it with the collar for a bit of a coatdress feel with much less work. However, I didn't have anything in stash for it. I decided since I'd finally had the chance to sew up some stash fabric last weekend I would treat myself, since this will be a great work dress throughout Fall/Winter. Before I started looking I saw some gorgeous silk/cotton on Fabric.com in exactly my color on The Selfish Seamstress and *had* to have it. I have worked with silk/cotton once before and found it a really wonderful fabric to sew; as soft as silk but much less unruly.

Luckily, Fabric.com had the perfect hounsdtooth wool blend as well, and at a crazy price. I was hoping for 100% wool; this is 70% rayon, 20% wool, 10% linen, which is an interesting blend. I don't generally have much use for rayon because all the rayons I've tried wear incredibly poorly, but I'm hoping the wool and linen (both of which wear well) will offer some durability.

After I placed my order I had a bit of buyer's remorse in choosing the turquoise. Yes, it is my favorite color, but maybe I should branch out?

Fabric.com, 11-2009

When the fabric arrived it was so luscious, so gorgeous, that I decided I absolutely had to have more. Given the price of $12.98/yd (or $11.03 with the 15% discount code they had put into my first order), which is waaaayyyyyy more than I usually pay for any fabric, you know it's good. The red color is a gorgeous lipstick blue-red, exactly the color red I love. The purple is more of a red-purple than a blue-purple, which is not quite to my taste. I bought it with the idea of making a dress for a friend's wedding but I don't know how much of that color I can wear (this is the Violet; I probably should have ordered the Royal). I'm thinking of somehow toning it down with gray accents.

Unfortunately (for you), I bought up the last of the houndstooth, but there are still plenty of yards of many colors of the silk cotton available.

=====================

I pre-washed the houndstooth in cold and air dried. It didn't shrink too much along the length, but holy cow did it lose a lot of width! It went from 44" wide to 38.5" wide, and really fluffed up. The fluffing up I don't mind--it will add to the coatdress feel.

But now I am in a quandary. I was planning to line this dress and have the lining cut out. But then I thought, Hmmm, I am thinking that because this shrank so much along the width in the wash it is liable to have some stretching. Should I use that lining as an underlining instead?

What is better to prevent a fabric from bagging out, lining or underlining? Right now I am leaning toward underlining, as that will reinforce the seams as well. Wisdom appreciated.

=====================

Wednesday I had the day off for Veteran's Day, so a friend and I hit up a matinee of Coco Before Chanel, a French film starring (who else?) Audrey Tatou as a young Coco Chanel.

I knew this wouldn't be primarily a fashion film, but I am always curious about people's lives. I have to say, I didn't love this movie. Coco's character is frustrating and not especially charming, and it's difficult to see why everyone around her is charmed (I think it's a French thing). There are some sewing/fashion bits, but instead of being exciting they feel forced. She really wasn't that interested in creating fashion until later in her life, and it doesn't work to pretend that there is some foreshadowing. However, it was interesting to learn about her life, which was not a very happy one. My favorite part was the very ending sequence, in which she has become Chanel.

I would say there's no reason to see this in the theater, but put it in your Netflix queue if you're interested.

This was shown at our local "arty" theater (E Street Cinema) and they showed a preview for The Young Victoria, which looks like it will be a Costume Drama in the strongest sense of the word. It's not my favorite fashion era, but I will take luscious costumes from any era! And I have loved Emily Blunt since The Devil Wears Prada. I will definitely try to catch this one in the theater.

Thursday, November 12, 2009

Look Cute Every Day: A Wardrobe Philosophy

There is an interesting thread on Pattern Review about how to edit your closet, and it got me thinking as to what my criteria are. Not that I am not, *ahem*, overdue for a major closet weeding. I pull random things on a regular basis and put them in the giveaway pile, but I haven't done a systematic cull in a while.

A couple of years ago I made the decision to Look Cute Every Day. I don't mean this in a "be decorative" or "attract men" or "be presentable because if you don't make yourself pretty you are a blight upon humankind" kind of way (please see this fabulous post by Erin at Dress a Day for a more coherent explanation of what I mean)--it has entirely to do with how *I* feel, and I am happier when I Look Cute.

Elephant enclosureI'm not 100% there, but I am much closer than when I started (now I feel cute probably 90-95% of the time, versus about 70% before). My solution--and this isn't for everyone--was to ditch "practical" clothes that were totally functional but I felt blah in--plain t-shirt tops, plain work pants, plain anything. I would rather wear a dress than pants any day...and now I do. I'm not talking about a straw man of frumpiness here--I mean even in well-fitting trousers and a good quality solid colored top I just don't feel Cute, so I don't wear them. Your mileage will vary.

Cleaning out my closet involves answering a single question: "Do I Look Cute (i.e., feel cute) in this?" Not, "Is this useful? Is this a staple I 'should' have? Is this in good shape? Does this fit well?" All of those questions get you part of the way there...but they don't guarantee you love the piece in question and that you Look Cute when you put on. It's silly to keep clothes out of an obligation--they don't have feelings and there is no Tally Sheet in the Sky that puts a black mark next to your name for getting rid of serviceable clothes you don't like--but I used to do it all the time. I'd keep a perfectly good item of clothing that I didn't like wearing just because it was perfectly good. Perfectly good is not good enough!

Trena and FoxI am not a mom, and I know that changes things (a lot), but when I hang out with my many nephews and niece I still look cute--adorable polyester knit dresses wash up just as well as boring polyester pants. When I met my twin nephews for the first time Fox spit up directly into my cleavage and then overflowed his diaper into my lap. I also crawled through a foul, disgusting playland with the older kids. The next day I played baseball with my other nephews in another cute dress. As long as you're not afraid to get cute clothes dirty, you can wear them every day. Cute Clothes are generally not more expensive (or more difficult to make) than "serviceable" clothes. It seems more of a tragedy if they get ruined, but it's actually not. Don't fall into the trap of Too Good To Use (which is a whole other rant).

Another aspect was finding a way to describe my style, which is "Retro Fantasy." When I'm contemplating what to sew, I can ask myself "is it retro? is it fantasy?" If neither question can be answered with a yes, I probably won't love it so I look for a project I will love.

There are issues.

Because cute clothes are more often distinctive I have a *lot* of them so I don't feel like I'm wearing the same things over and over. Acquisitiveness is not a virtue, even when you acquire all those clothes by sewing. Minimalist and low impact I ain't, and this disturbs me sometimes with all the environmental and consumerist implications.

Mysterious Alley, V1086There is also a concern about shallowness, and focusing too much on looks. This is a personal balance issue. You have to get dressed every morning, and you might as well Look Cute. Once I get dressed I don't think about it much for the rest of the day, although I might occasionally look down at what I'm wearing for a little burst of "I look cute!" confidence. The rest of the day my focus is on my career, my friends, working out, reading good books, etc.

You also can't Look Cute if you hate yourself (because Cute isn't objective--it's a subjective assessment of yourself by yourself). I wish I had some advice to offer here but I don't. The best I can say is that when I am depressed (the chemical kind, not the situational kind) I hate myself and nothing will make me feel Cute. I've tried medication but unfortunately didn't find one that worked, but exercise has been proven to be as effective as a mild anti-depressant so I exercise.

And adequate omega-3 fatty acid intake has also recently been shown to treat depression. I am allergic to walnuts and don't eat fish because I'm a vegetarian, and these are the major sources, so until recently I have NEVER had adequate omega-3 intake over the course of my entire lifetime. After reading Dr. Walter Willet's Eat, Drink, and Be Healthy I started taking flaxseed oil capsules (fish oil would probably be better, but there's the vegetarian thing for me) and sprinkling ground flaxseed on my morning oatmeal (also a good source of fiber!) a few years ago and it has made a huge difference in my mood. There have been confounding factors in that my life in general has improved, but I do think that giving my brain an essential nutrient of which it had long been deprived has made a difference (and a neighbor has had the same experience). I am not a pills and potions kind of person, but clinical research and my personal experience say that this is a pill that is worth it. Even better if you can eat the foods from which you can get it straight from the source.

1-16-09When I address my depression and don't hate myself it's a lot easier to feel Cute.

And of course we all have our body issues (everyone is well aware of my obsession with my belly). But I have seen evidence that any size, shape, and age can Be Cute.

But there is a bit of a chicken-and-egg thing here. You don't have to wait until you love every aspect of yourself to Look Cute Every Day. You can look cute without *feeling* cute...but eventually the feeling cute part will tag along.

Look Cute Every Day might not work for everyone, but for me it is a useful wardrobe philosophy, and contributes a great deal to my happiness.

Tuesday, November 10, 2009

Burda 7866, Kimono Sleeve Knit Top

Burda 7866 Thumbnail

I bought this fabric back in April of 2008, so I think it counts as fairly deep stash at a year and a half old. I bought it with the idea of making a skirt, but was totally not enthused by the idea and obviously didn't get around to it. Over time, I got the idea in my head that the fabric had an icky texture and I mentally wrote it off.

Then I had a sudden flash of inspiration to use it for this pattern with a bias cut lower band. I went hunting for it and thought I'd given it away in my Great Purge, but then I found it way back at the back of the shelf. And it turns out that it actually has a lovely hand, more beefy than an ITY knit but a very soft cottony texture (although I think it's actually poly). So then I was really excited to make the top!

When reviews for this top started showing up on Pattern Review I totally loved it (although my interest in the style was first piqued by Deb Thompson's review of New Look 6648 back at the end of 2006!), but didn't see the point in buying it because it would be soooo easy to draft. Of course, I knew I would never actually draft it. But then when I won the Refashion contest for my sweater hat the prize was a free pattern so I decided to pick it up, even though it would be soooo easy to draft and I was "wasting" my prize. And really, it would be easy to draft but you know what's easier? Using a pattern!

I was also inspired by the maternity wear of one of my co-workers (we had six pregnancies at once in my small division of around 36 people, so there was a lot of maternity fashion going on). She had a gray top similar to this style, but with more room for the belly of course. I thought it was very chic, and liked that it reversed the usual maternity style of more fitted on top and looser below. I complimented her on it one day and she said that her husband hated it and called it "The Sack." Men have no taste, LOL. Every time I saw her wearing "The Sack" it made me giggle to think of her husband asking, "Ugh, are you going to wear The Sack again today?"


FrontThis project, Burda 7866, was my first time sewing from a Burda envelope pattern, oddly. I found the directions more clear than in the magazine, and they were accompanied by helpful illustrations. The seam allowances are included, and are a standard American 5/8" (I wonder if they print different patterns in Europe with a different seam allowance?).

My dislike is that important information is printed on the pattern tissue--the cutting layout and the directory of symbols. I don't actually normally use either of those items, as I am familiar with symbols and jigger the cutting layout to fit my fabric, but in this case the upper bodice pattern piece is a little weird (it's hard to tell what are the sleeves and what is the lower edge) and I needed the cutting layout. I cut it off the tissue paper, but I hate that it is a fiddly little piece waiting to float off at the first deep sigh.

The neckline is bound in an interesting way to preserve the boat shape. Inexplicably, one of the neck binding pieces is about 1/8 inch longer than the other. They are treated fungibly in the instructions, so it's very unclear what the purpose of that small difference in length might be. I also found the bindings skimpy for the 5/8" seam the pattern is drafted for. They are only 1 1/8" (or 9/8 of an inch) wide, and if you sew them to the neck with a 5/8 seam that leaves you only half an inch to turn to the inside and stitch down. The illustrations seem to show a more substantial turned under binding, but nowhere does it say to use a narrower stitch at the neck. If I made this again I would definitely widen those bindings, and also cut both from the slightly longer piece (piece #5).

I shortened the lower pieces at the lengthen/shorten line to suit my frame. And having just made a BWOF that turned out way too large somehow, I decided to cut a 36 at the hip instead of my usual 38. However, the lower band still turned out way too large. My fabric isn't *that* substantial (not like a double knit) so to get the lower band to stay in place rather than just melting under the weight of the upper bodice (I think it looks best if it blouses over a little) it needs to be quite fitted with negative ease. I ended up taking a total of four inches of width off the lower band. Now it's snug but definitely not tight, and the band stays in place. Perhaps this is a design choice rather than a drafting error--the model's pose on the envelope (shown at right) makes it hard to tell how they envisioned this fitting.

SideI had only a yard of fabric and the pattern calls for 1.5 yards, but I didn't really have any trouble cutting it out. I liked that I had only small scraps leftover--easy to throw away! In the end, I'm not sure that cutting the lower band on the bias was the right choice, because I feel like it shows the bulge of my tummy more than a straight plaid line would. I happened to place one of the lower band pieces (there are two lower band pattern pieces but they are identical) so that the pattern is centered, and this one is the worst, so I wear it at the back. I love that this top is the same front and back, there's something hilarious about it.

With this project, I felt I was back to the good ol' days. I started it around 4:30 Friday afternoon before I was set to meet up with friends to go to a trendy wine bar around 8:30 or 9. It was a race against the clock, but the clock didn't stand a chance because it's so easy. I was done by 7, even with having to take apart the seam between upper and lower bodice, tighten the lower bodice, and sew it back together.

I totally LOVE this top now that I've finally gotten around to making it. It is very "now," trendy, and chic. And by "chic" I mean it will be a "what was I thinking?" piece in about three years. Heh. However, I am of the opinion that if you wear a garment knowing that it is a little silly and will eventually be horrifyingly dated, you probably won't look back on it with shame, but with a little bit of chuckling nostalgia at how much fun we had looking silly.

All photos are here and the pattern review is here.

Friday, November 6, 2009

A Very Happy Day

I have a terrible memory. Not the kind of terrible memory that loses keys (because they always go in the same place the second I walk through the door), but the more embarrassing kind. My emotional memory is very weak. Vocabulary words from high school? I got those right here. "Remember that one time...." from high school? Um, did I even *go* to that high school? Because I don't remember a thing. It is more problematic than the regular kind of bad memory, I think, because it involves meaningful experiences with other people, who might be a little miffed that I can't remember it at all.

There is an upside to this, though, because things are new to me much more quickly than to other people. I have not been able to sew much lately because of travel, visitors, and general life stuff. The last time I spent a full day sewing was before my trip to Spain in early September.

By this week I was so frustrated that the same project had been on my sewing machine for a month that I decided to try to work on it each evening for 30 minutes. I'd force myself into the sewing room around 9:15 (after getting home from the gym and having dinner), accomplish some small task, and head to bed. I don't usually sew during the week because I'm just tired after a full day of work and working out and want to spend time relaxing. It wasn't much fun, although I did see progress on the dress.

Because I have no emotional memory I thought that my purpose in sewing was to get clothes (I stopped buying clothes other than jeans and workout clothes about 3 years ago). So I motivated myself by thinking about wearing the dress when I finished it.

I had the day off work today and earmarked it as A Sewing Day--I was going to take the whole day for myself and just sew. And, although it sounds silly to say this is an epiphany, considering I write a blog about sewing:

I LOVE TO SEW!!!!!

It was like rediscovering an essential component of myself to sit at the machine all day today. I love the creativity, the problem solving, the intellectual challenge (I have a strictly 2D brain and 3D sewing projects blow my mind), and of course the clothes/fashion/styling/outfits, but the other parts are just as integral to my enjoyment.

Man. I had a great day.

And then, on top of a day spent having FUN, I ended up with three finished projects: the lingering month-long project and two quick knits (love those quick knits). I am so in love with all three projects. There's something from old stash, something from new stash, something blue...nothing borrowed, though. There's a classic piece and a trendy piece and a piece that will fit into most years' trends. There's one thing for work, one for day-to-night, and one that's strictly for fun. There's a tailored piece and a voluminous piece. Dresses and a separate. All will work for three seasons depending on how they're styled, and I might even be able to squeeze the fourth season out of two of them.

I even have a teeny bit of hand-sewing to do (I never have hand-sewing when I need something to occupy me, and I'm sure I'll have an opportunity to do it shortly).

And since posts without pics are no good, here's a sneak peek. I hid all the details but at least you can see the fabrics whose serger clips are the newest ones littering my sewing room floor.

Projects 11-6-09

Thursday, November 5, 2009

Retro Air Hostess Pillbox Hat Tutorial

Hair CheckWhen planning this costume, I knew a pillbox hat would be an essential element. While making the uniform and realizing that there is a fine line between Air Hostess and Diner Waitress, I knew the hat had to make up the difference so I wanted to do a fabulous job. I wanted to make the hat out of the blue fabric, because the green poly was just so awful (as previously discussed). I had enough scraps to cut the band; I had to piece the crown, but I just barely got everything cut out!

Down With Love - HatFor the dimensions of the hat I turned to (what else?) Down With Love. Based on the movie costume, I planned for it to be four inches tall. However, once I got it in process I realized that was a bit too tall so I cut it down to 3.5 inches, and I think the height is good. Someone taller than me with a bigger head (I have a child-sized head at 21.5 inches) might do well with four inches.

You may recall that I went through a millinery mania last year but, as with so many of my manias, I lost enthusiasm after buying my relatively inexpensive but still pricey hat block and supplies without actually producing anything (other than my sewn hot pink newsboy cap from a pattern, which made use of exactly none of those supplies). However, now that the weather has turned cool again my interest is renewed and for this hat I went back into my hat-making resources to see what I could learn. I learned quite a bit!


MATERIALS

Outer fabric
Lining fabric
interfacing
Frame material (I used plastic needlepoint canvas, available in large sheets for cheap at fabric and craft stores)
duct tape or yarn
needle and thread (i used my sewing machine on this project, but it is totally possible to do it all by hand and it is not endlessly laborious or time-consuming)

STEP 1: DRAFT YOUR PATTERN

This step was fairly easy for me as I just turned my pillbox hat block upside down and traced around the crown, and then made measurements of the brim side for the brim pieces. I think the brim pieces should have had curved top and bottom edges, because the grain is a little weird at the side seams, but flat pieces worked just fine for my purpose.

If you don't have a hat block to trace, you can just make a circle for the crown (mine is a bit oval), though it will involve a bit of math. To get the dimensions of the circle, measure around your head. This will be your circumference. To draw your circle, figure out your radius (remember the formula is 2Š»r (that's 2 x pi x radius, where pi=3.14).

So, for my child-sized 21.5 inch head:
2Š»r=21.5
Š»r=10.75
r=3.42, or approximately 3 1/2 inches (or if you want to get more precise, 3 7/16, or you can use cm)

You can either rig up a compass-type arrangement to draw your circle, or you can double the radius to get the diameter, in this case 6.84 inches, around 6 7/8 inches, draw a + in which the two arms are 6.84 inches and cross in the center, and draw your circle around that.

You'll need to add a seam allowance around the circle.

Then draft up your side band (a rectangle 4 inches tall and the width of your head + 1/4 or 1/2 inch ease + seam allowances at top, bottom, and side seam).

STEP 2: CUT OUT YOUR COMPONENTS

Cut CrownTo cut out my frame, I put the pattern underneath the canvas and traced around the pattern (omitting the seam allowances on the tip altogether, and the omitting the upper and lower seam allowances of the band) in highlighter, then cut it out. To assemble the frame, I used duct tape. This was fine for the side "seams" and the top, but I also ran duct tape around the bottom edge to ensure the canvas wouldn't be sharp. I really, really regretted this when I was sewing the hat to the frame so don't follow my lead there.

I interfaced both my outer and my lining fabric to make sure everything would be sturdy and crisp looking. I used medium weight fusible interfacing.


STEP 3: ASSEMBLE THE FRAME

Make Needlepoint Canvas FrameThen it's time to make a frame. I actually started by making a buckram frame, but I have a sneaking suspicion that the buckram that Joann sells is not--gasp--hat-making grade. There was no way the frame would have provided any kind of structure when my fashion fabric had about 10 times more body. So I set that aside and went for my costuming/make it work favorite material--plastic needlepoint canvas. Tape the top and the crown together on the inside and the outside with duct tape. Easy.

STEP 4: SEW OUTER FABRIC

Sew Together Outer Fabric The next step is to assemble the outer fabric. It helps to have (1) stretchy fabric and (2) largish seam allowances because you're going to assemble it on top of the frame. This means that the outer fabric will be slightly larger than the frame and slightly larger still than the lining. I didn't account for this in my pattern (I cut all components--outer, frame, and lining--the same size), I just dealt with it at the construction stage.

Once my frame was constructed, I hand stitched the outer fabric in place around it. I went back and reinforced the stitching by machine, but the hand-sewing would have been enough to keep it in one piece.

STEP 5: ATTACH OUTER FABRIC TO FRAME
Sew Outer Fabric to FrameThis is not necessarily an essential step, but I felt the hat would look better if I stretched the fabric over the frame and sewed it to the frame. Normally, I would just sew the outer fabric and lining together and sandwich the frame in between, but I wanted this to have a tight fit. I used a curved needle and took advantage of the properties of needlepoint canvas (i.e., that it's intended to be sewn upon and has little square openings for the purpose). Sewing through the duct tape was horrible. I should have just stopped and ripped off the duct tape but I did not because I am dumb. But once the fabric was sewn in place the hat was already looking pretty great.

STEP 6: ASSEMBLE LINING

Pin Together Lining

Next step is to make the lining. I assembled it on my hat block because I have one, but if you don't you can just sew it with slightly larger seam allowances than drafted (this is assuming you have used perfect seam allowances on the frame and slightly smaller seam allowances on the outer fabric). Because the outer edge will be hand-stitched to the outer fabric, there is no need to leave any seam openings for turning.


STEP 7: HAND-STITCH LINING TO OUTER FABRIC OVER FRAME

Hand Sew Lining Once your lining is assembled, place it into the hat, turn under the lower edge and pin in place, and hand-stitch to the outer fabric. It really doesn't take that long and gives a nice finish on the inside. I sewed little loops of ribbon on the inside that barely stuck down below the edge of the hat to put bobby pins through to make sure it wouldn't fall off.

STEP 8: EMBELLISH

Cockade The hat needed a little something once it was finished. In Down With Love the decoration is a hat pin, but since (1) it is ludicrous to pretend that I have enough hair to make use of a hat pin, and (2) I do not have a hat pin, I went with a cockade. I cut a circle out of my sheer print (using a bowl with a diameter of around 6 inches, I think), serged the edges, gathered it up in a yoyo, and pinned it in place with wings.

And voila! LOVE the hat. It totally made the costume.

All photos of this project are here, and you can read more about the concept and the uniform if you're interested.

Tuesday, November 3, 2009

Retro Air Hostess Uniform: Simplicity 2927

On the Go When planning this costume for last year I had been unable to decide between and Simplicity 2927 and Simplicity 3559, a 1960s reissue, but I ultimately decided that S2927 offered more opportunity for using two colors and went with that one.

I had only one day to sew the dress because of my travel schedule, but it's an easy pattern to make. I picked up the blue fabric, a sort of faux-linen with a lot of stretch, from G Street Fabrics' $2.97/yd table; there was only a little over a yard and a quarter, but since I was making a short dress I figured it would work. The green is a poly crepe from Joann's Casa Collection, $4.80/yd with coupon.

I kind of hate to rip on Joann, because it is handy to have a brick and mortar store I can pop into for notions and I don't want them to go out of business, but can we take a moment to talk about how awful this Casa Collection poly crepe is? If my "special occasion" dress was made out of this sh!t I would cry. I mean, it goes without saying that the hand is horrible; just touching it makes you cringe. It is thin and flimsy *and* it ravels. The crepe-y texture is mystifyingly gross (like, what higher class fiber could this possibly be imitating?). And it's not even cheap! I really hope all the sewists out there who don't have physical access to anyplace other than Joann have discovered that you can order better fabrics at a lower cost online.

PSA UniformAnyway, I had planned to make the side princess panels out of the contrast green, but the thought of having this fabric up against my skin other than at the neck was unbearable so I cut the side panels out of blue; I had to cut them off grain to fit everything onto my limited fabric but it doesn't appear to be pulling the dress out of shape. I really wish the pockets had been drafted onto the side princess panel, it would have been much more sophisticated than just a patch pocket. But I did not have time to redraft so I stuck with the patch pocket motif. I really liked the way EvLouise's version on Pattern Review turned out with the contrast collar and pockets, so I went with that. Of course, after I went back to look at the reference photos I saw that color-blocking was a popular thing!

To bring in the green more I finished the armscye and keyhole opening edges with bias tape made of the green. I am not sure there is really any point to polyester bias tape as it doesn't steam into shape, obviously, but it actually worked better than I expected. I used my bias tape maker and got faint iron impressions onto the bias strips, which allowed me to line things up. As usual, the Simplicity armscye was too tight on me as drafted, so I trimmed off about an inch at the bottom, scooping out more at the lower front than the back, tapering to nothing at the shoulder (other than, in this case, trimming off the seam allowances for the bias tape finish).

The keyhole opening is to be accomplished, according to the pattern, by cutting a small rectangular facing, placing it right side to right side, stitching around the small keyhole opening as drafted, clipping, and flipping. Yuck. That is asking for the worst kind of flapping floppy facings. I wanted a more exaggerated opening so I cut a teardrop shape keyhole and finished with the bias tape.

BackI took a huge swayback tuck out of the back pattern piece, as per usual. Even with the tuck I had to majorly contour the center back seam to get a decent fit. This ended up shortening the back hemline significantly--I cut about two inches off center front to hem and zero off center back--but luckily this is meant to be worn short!

I had deliberately chosen a green regular zipper (rather than my normal choice of invisible), and was considering making it an exposed zip but decided that would be going too far. Then I thought of doing a lapped zipper, but (1) this is a technique I have only done once before, and (2) I feared with the highly contoured back seam the lap would gape open. So I just did a regular zipper installation. I used to be so good at regular zippers, but I have been on invisibles so long that I have totally lost my touch!

SaluteAs the dress took shape, I began to get concerned. It turns out there is a fine line between "Retro Air Hostess" and "Diner Waitress." Diner Waitress just does not offer the glam I'm looking for. I knew the hat and scarf would make a difference, but I wanted to jazz up the uniform to make it look a little more "martini" and a little less "milkshake."

I wanted the pockets to be functional so I wouldn't have to carry a purse (did not have time or inclination to make or find an old school flight bag), so I added buttonholes and used gold buttons to close them. The collar is not intended to have functional buttons, so I just sewed three buttons there for decoration. I felt that this added the necessary punch to the uniform.

I loved this pattern for the uniform, but I don't really see it as regular clothes for me. It's very similar to Simplicity 6276, a 1974 pattern I made last year and I haven't ended up loving that dress (I think it will get purged in the next Goodwill run). This has a narrower profile, while S6274 is more A line (which I am down on right now), but the band collar is just not my scene.

All photos are here and the Pattern Review is here.

Monday, November 2, 2009

Halloween 2009: Retro Air Hostess

Cidell and I had the idea to do Retro Air Hostesses last year, but I ended up being in Germany for work and had to miss Halloween. I had already purchased the fabulous poly chiffon print for the scarf last year and didn't have any other burning ideas, and in fact, didn't necessarily plan to dress up at all, as discussed previously, until my brother and sister-in-law decided to come visit for Halloween. So the Retro Air Hostess was back on and here it is:

S2927Thumbnail

I'll discuss the costume in a three part series. This is the introduction, then I'll cover the uniform and then the hat.

First, there was research. OK, that's not really true. I did some research last year but this year I didn't have time before I started my uniform. After I'd finished the dress, I poked around a little.

Down With Love - Full Length

I was much influenced by the highly underrated movie "Down with Love." (Seriously, if you have Netflix, just go ahead and order this movie. You can thank me later.) Jeri Ryan plays a stewardess character and the hair, hat, uniform, and overall manner are just fabulous. I couldn't find any decent places in the movie to do a screencap, though imdb has a better shot here (partly obscured by a suitcase). The late 60s vibe was what I was going for (though my uniform is more like early 70s, I admit), so I had to re-watch the movie of course to get it down.


Irazu Air Uniform PSA Uniform
There is a great series of images on flight attendant uniforms here (the link is to part 1; the post contains links to parts 2-4). The collection here is mostly the same but has a few additional images. The most comprehensive collection is here; the uniforms are on mannequins, which is fabulous for detail but not so great for getting the right "feel" for the time period. The Irazu Air and PSA uniforms were the most like what I was going for.


Front


After seeing these uniforms I kind of wished I had done a contrast color in the princess panel, but oh well. I think I captured a bit of the spirit in mine. At any rate, I feel very kicky and ready to travel the world.


All the photos are here! Alas, I didn't have my trusty photographer so they're boring indoor shots, but I did have fun doing them.