And on Sunday I'm leaving for Spain!!!!! I am so excited. I need a vacation for sure. Work has seriously eroded my sewing time so I won't have an entirely new wardrobe, but I will have one or two new pieces.
If anyone has any fabric store recommendations in Barcelona, please let me know! I'll be there for a week. Then I'm off to Madrid, Cadiz, and Sevilla where it will be too whirlwind to get any fabric shopping in, I think (but I suppose it wouldn't hurt to be informed...)
=============================
When I got the silk/nylon crinkly shiny green fabric I'd found at Paron in NYC home, I had two thoughts. (1) Must.sew.now. And (2) I think this is home dec? Not that #2 bothered me, just made me think I should go to home dec more often.
I immediately made up a skirt and a dress. I went back through my BWOFs (I know it's Burda now, but you'll always be BWOF to me, baby) and stumbled on 11-2008-111. It looks like nothing in the photograph, just a jumble of shiny, print satin and a faux fur capelet, but the line drawing shows that it's got a very on-trend pleated neckline and a fairly simple silhouette, perfect for the fabric to be the star.
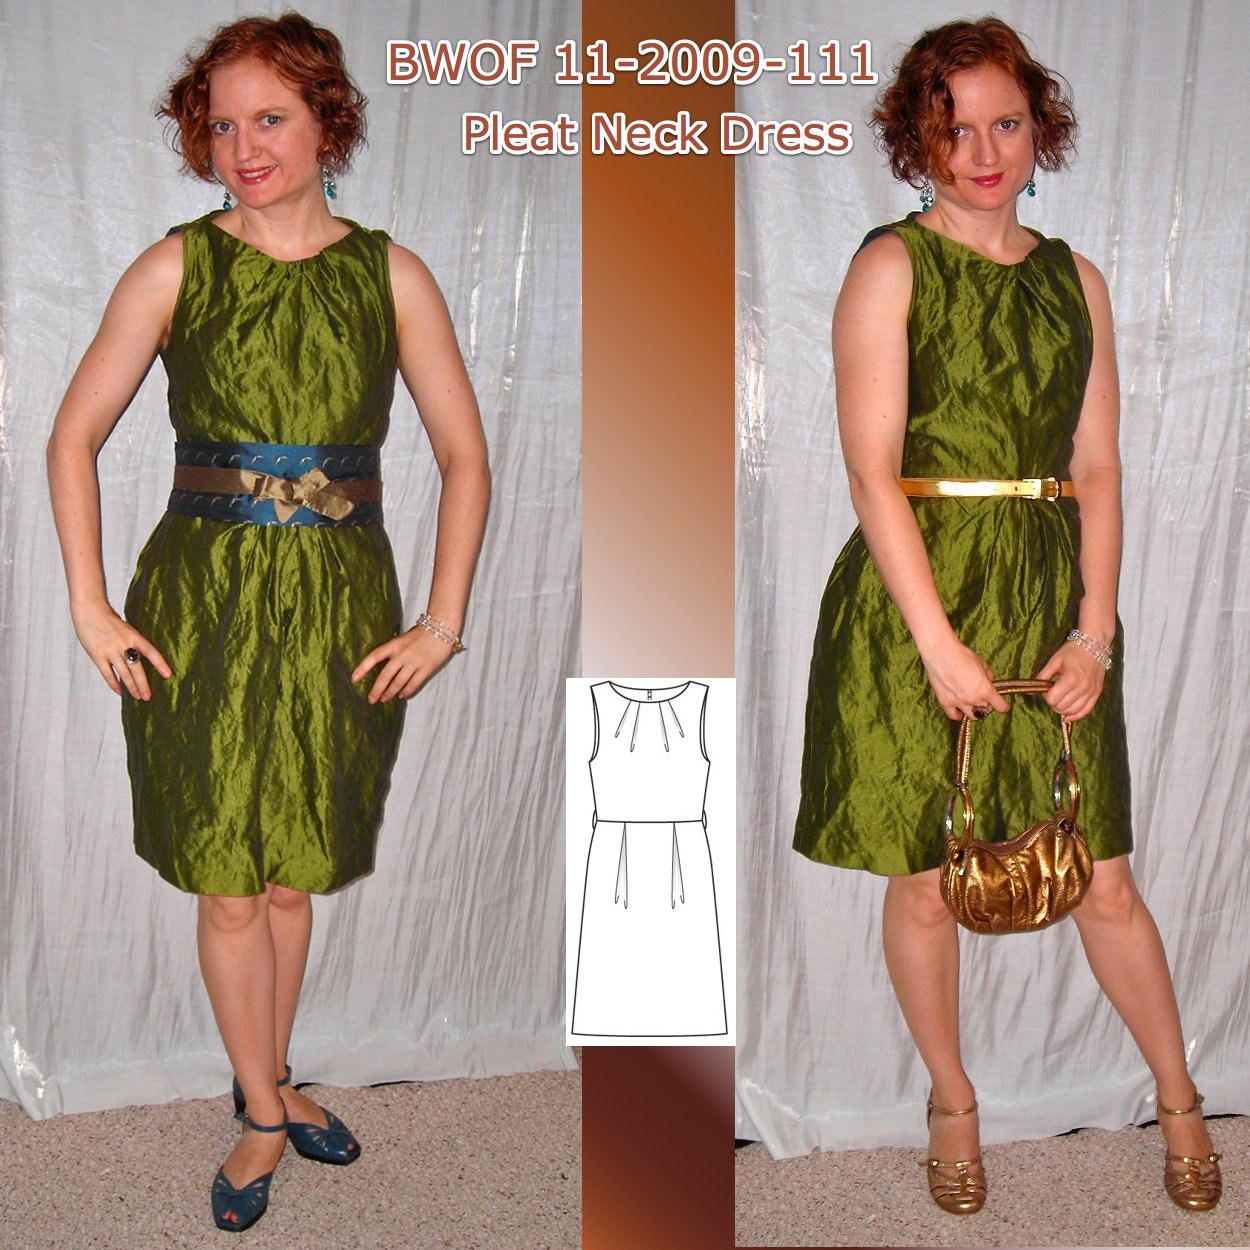
I am thrilled with the result. It has enough interest, but isn't weighted down with bells and whistles.
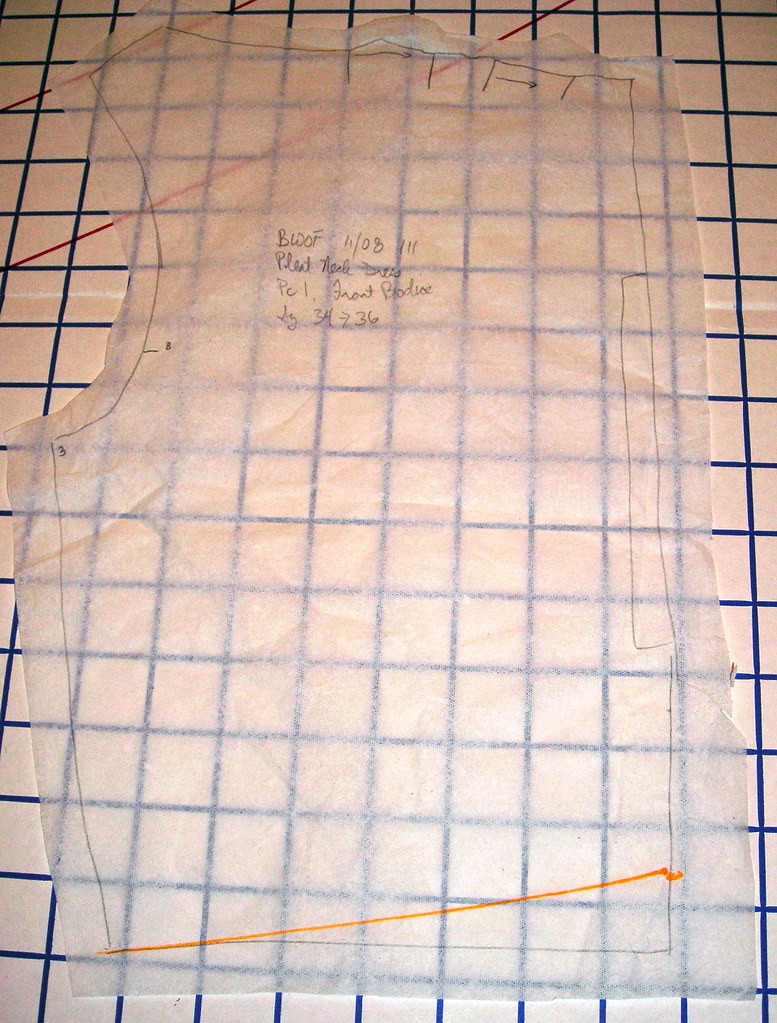 The shaping in the front bodice comes only from the pleats at the neckline, so I was stumped when tracing and cutting as to how to do an SBA. I decided I'd figure it out in sewing and the answer became obvious when it was basted together and the waistline was sagging. You can see my orange marking to indicate how to shorten the bodice.
The original design calls for the skirt to have inverted pleats spaced evenly from center front. However, I thought it would be more in the style of the dress to move them to center front. It has a bit of the same maternity problem as Butterick 5321 and absolutely must be worn with a belt or I look like I have no waist, but I think for the fabric the style works. If I make it again in a more conventional fabric I will probably place the pleats as drafted.
 After that, everything was smooth sailing. To get nice looking construction and ensure the fabric wouldn't end up shredding at the seams (silk nylon seams like a tough blend, but silk always seems prone to shredding) I put in French seams. I discovered--well, I'm sure everyone was already doing this--a cheater method that makes them so much easier. I unthreaded the left needle (yeah, I should have taken it out but whatevs) and used the serger to sew the first seam. My problem with French seams has always been that no matter how close to the edge I sew the first seam I always get some kind of seam allowance crap poking out of the second seam. Not so with the serger seam! The serger trims off all the crap and makes it nice and tidy to turn in and sew the second seam. I may do French seams more often now.
 It turns out this silk-nylon blend is very scratchy, which is what makes me think it's home dec rather than fashion fabric. So I wanted a comfortable lining that was substantial enough to stand up to the scratchy fashion fabric without getting worn holes in it. I searched through stash and came up with a cotton I'd gotten at Hobby Lobby a couple of holiday seasons ago while visiting my family in Texas. It is a crosswoven turquoise and dark blue that was gorgeous on the bolt but after I washed it the sheen was lost and it was too thin and flimsy to be suitable for much. But it was perfect for a lining.
In order to give the front neck pleats some body, I stitched the shoulder seams of the bodice fashion fabric and lining, sewed them right sides together at the armscyes (topstitching afterward), turned them right side out and then treated as one at the neck. The pleats at the neck are much more distinct than those at the waist, where the fashion fabric is separate from the lining. I finished the neckline with bias tape (sacrificing this skirt, which was just too wrinkle-prone to wear).
As I said, this absolutely must have a belt, and luckily I had already made a gorgeous obi and the colors look fabulous together.
As I forgot to tell Cidell before she made hers, I shrank the pattern along every dimension:
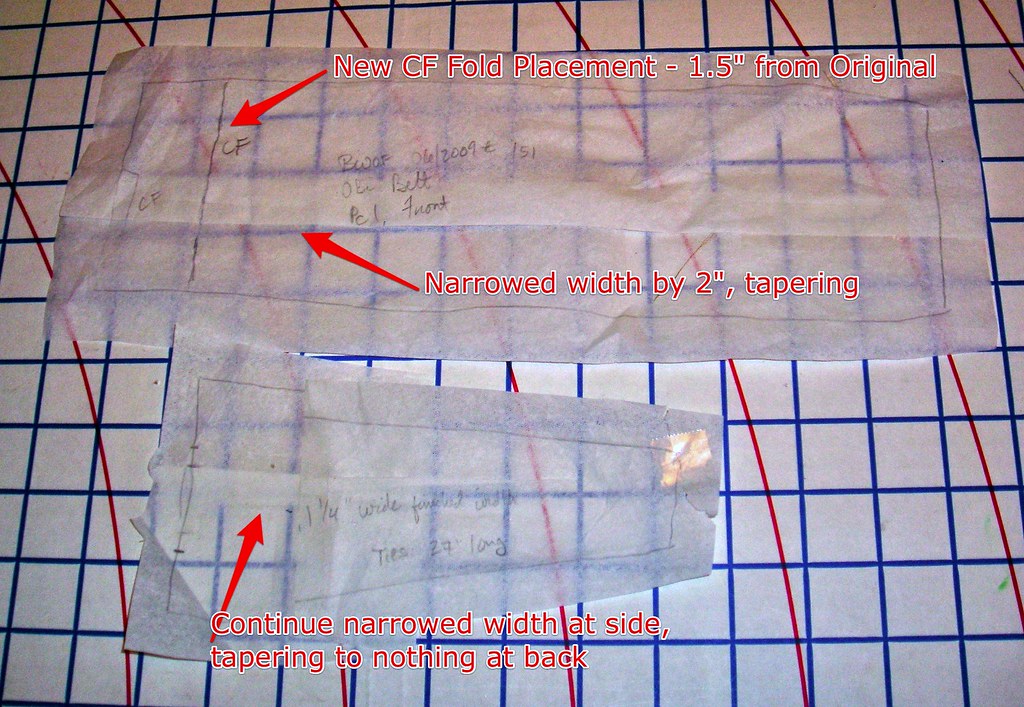
The pattern comes in 36/38 and 40/42, so I knew I'd needed to size it a little as I am generally a 36 at the waist. Here are the changes I made:
-Moved CF 1.5 inches (and because this is cut on the fold that means I shortened the front piece a total of 3 inches)
-Narrowed the front piece along the vertical axis by two inches at CF, tapering to nothing by center back (on the side/back piece)
-Ties 27" long
This was designed to be made of leather and unlined, but I was using my tie silk from the Fabric Mart bundle and it needed to be lined. I chose a bronze silk dupioni from stash (it has previously made appearances in Butterick 4985 and BWOF 06-2008-105 and is nearly gone). I interfaced both halves with heavy interfacing.
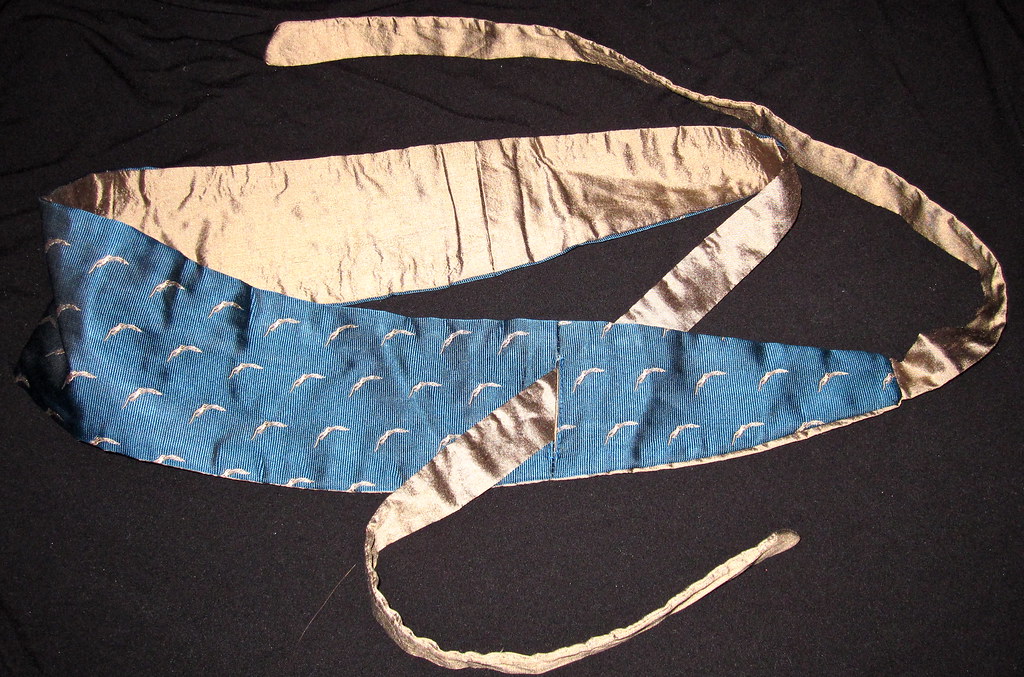 I sewed the side seams, leaving a slit in both lining and fashion fabrics on one side, sewed the ties to the ends, and then sewed all around the edges. I turned the obi right side out by pulling the ties and then the body through the slit. Then I turned in the seam allowances at the slit and topstitched it closed, as you can see in the photo.
I'm a huge fan of the way it turned out, and have a red and black version planned. I'd been wanting to make an obi-style belt for a while and knew it would be a very simple matter to draft my own, but I never got around to it. Thanks BWOF!
All photos of the dress are here and the obi photos are here and the pattern review is here.


.jpg)


